Baked Italian Grinder Sandwiches Recipe
If you’re craving a sandwich that’s bursting with classic Italian flavors but with a warm, melty twist, then this Baked Italian Grinder Sandwiches Recipe is going to become your new kitchen hero. It’s one of those recipes that feels fancy enough for company but is so easy and satisfying that you might find yourself making it on a random weeknight. What I love most is how all the layers of meats, cheeses, and veggies come together, then get baked until gooey and slightly crispy—it’s a total crowd-pleaser!
This recipe works beautifully for everything from casual family dinners to game day snacks, and it’s perfect when you want a sandwich with a little extra oomph. Plus, the buttery herb glaze brushed on the bread takes it to a whole new level of flavor and texture that’s hard to resist. You’re going to enjoy every step of making—and more importantly—eating these Baked Italian Grinder Sandwiches.
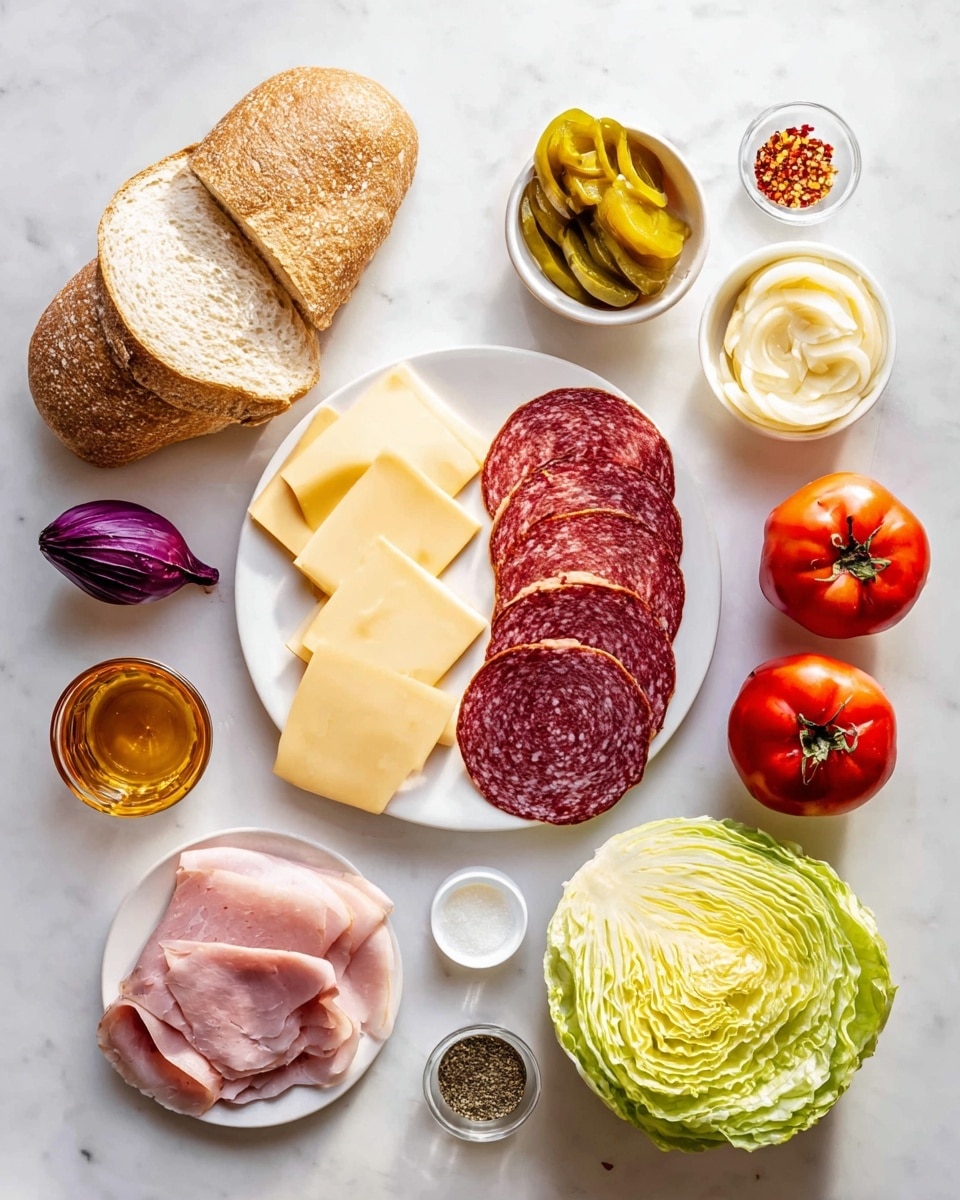
Ingredients You’ll Need
Gathering the ingredients for these baked grinders is part of the fun because each adds something special that balances the whole sandwich perfectly. Choose good quality Italian rolls and fresh deli meats if you can; it’ll make a noticeable difference.
- Italian sub rolls: Look for sturdy rolls with a soft inside and a crusty exterior—they hold up well to baking and fillings without getting soggy.
- Unsalted butter: Melting it allows you to infuse the seasonings thoroughly and control the saltiness.
- Garlic powder: Adds a mellow, savory depth to the butter mixture.
- Onion powder: Brings a subtle sweetness and complexity.
- Dried oregano: A classic Italian herb that perks up every bite.
- Dried basil: Enhances the herbal aroma and flavor.
- Red pepper flakes: Just enough heat to keep things exciting—adjust as you like.
- Salt: Balances and enhances all the flavors in the seasoning butter.
- Black pepper: Freshly ground if possible, for a little kick.
- Deli-sliced salami: Choose a good quality one with a nice balance of spice and fat for flavor and texture.
- Deli-sliced ham: Adds smokiness and tenderness to the layers.
- Deli-sliced pepperoni: For that signature zesty, spicy note.
- Deli-sliced mozzarella cheese: Melts beautifully and keeps the sandwich gooey.
- Deli-sliced provolone cheese: Offers a slightly sharp, nutty contrast to mozzarella.
- Grated Parmesan cheese: Adds a salty, umami crunch on top.
- Roasted red peppers: Sweet and smoky, they brighten up the sandwich.
- Sliced black olives: Bring that briny, savory punch we all love in Italian subs.
- Banana peppers: A tangy, slightly spicy touch that cuts through the richness.
- Fresh basil leaves: They add fresh flavor and a pop of green that’s just so inviting.
Variations
One of my favorite things about the Baked Italian Grinder Sandwiches Recipe is how easy it is to tailor it to what you love or have on hand. Don’t be afraid to get creative and make it your own!
- Vegetarian variation: Swap the deli meats with grilled veggies like eggplant, zucchini, and mushrooms; use extra cheese and maybe a good Italian veggie spread to keep it hearty.
- Spice it up: Add extra red pepper flakes or swap the banana peppers for jalapeños if you like some real heat—I tried this once, and it was a hit at a summer cookout.
- Gluten-free option: Use gluten-free sub rolls and double-check your deli meats and cheeses to keep it safe for anyone with gluten sensitivities.
- Make it smaller: Turn it into sliders using cocktail rolls for parties or kid-friendly meals—baking time will be shorter, so keep an eye on them.
How to Make Baked Italian Grinder Sandwiches Recipe
Step 1: Prep your rolls with a flavorful herbed butter
After preheating your oven to 375°F (190°C), slice each Italian sub roll lengthwise, keeping the bottom hinge intact so it opens like a book. This prevents the filling from spilling out and makes for easier eating (trust me on this!). Next, melt the unsalted butter and stir in the garlic powder, onion powder, oregano, basil, red pepper flakes, salt, and pepper until well combined. Brush this fragrant butter mixture generously over the cut sides of the rolls—don’t be shy here, the butter keeps the bread beautifully moist and adds layers of flavor once baked.
Step 2: Layer the meats, cheeses, and veggies
Start by layering the salami evenly across the bottom half of your roll, then follow with the ham and pepperoni. Each meat adds its own character, so layering them evenly ensures every bite is balanced. Next, add your sliced mozzarella, then the provolone cheese, spreading them out so every inch is covered—this helps everything melt together perfectly. Sprinkle the Parmesan cheese on top for a little savory crunch. Then scatter the roasted red peppers, black olives, banana peppers, and fresh basil leaves over the cheese layers. I like using fresh basil at the end because its bright flavor really freshens up the sandwich after baking.
Step 3: Bake until melty and golden
Place your sandwiches on a baking sheet, cut side up, making sure they have enough room and aren’t crowded (this prevents soggy edges). Bake them in the preheated oven for 10-12 minutes until the cheeses have melted and the bread is slightly crispy around the edges. Keep an eye towards the end—the sandwich should be melty and toasty but not burnt! Once done, let them cool for a minute or two before slicing to prevent the cheese from running everywhere.
How to Serve Baked Italian Grinder Sandwiches Recipe
Garnishes
I love topping my baked grinders with a quick drizzle of good quality extra virgin olive oil and a sprinkle of freshly chopped parsley or more fresh basil to brighten things up. Sometimes, a little splash of red wine vinegar or a few more banana pepper rings on top adds that perfect tangy finish after baking.
Side Dishes
To round out the meal, I often serve these sandwiches with a simple side—mixed greens dressed lightly with lemon vinaigrette work beautifully to cut through the richness. Crisp kettle-cooked potato chips or a cold pasta salad are also classic partners. For something heartier, roasted veggies or a cup of minestrone soup make this an all-in-one Italian feast.
Creative Ways to Present
For parties, I’ve served these grinders sliced into small, manageable portions on a large wooden board with small bowls of extra peppers, olives, and pickles so guests can customize their bites. Wrapping smaller sandwiches in parchment paper tied with twine gives a charming, rustic touch and makes them very portable too. Perfect for casual dinners or potlucks!
Make Ahead and Storage
Storing Leftovers
If you have leftovers (and you might!), I store them wrapped tightly in plastic wrap or foil in the fridge to keep moisture in. I find that the flavors actually meld beautifully overnight, but be sure to reheat properly to revive the crispy edges and melted cheese.
Freezing
I haven’t frozen the fully assembled baked sandwiches myself because the bread can get soggy on thawing, but you can freeze the assembled but unbaked sandwiches on the tray, wrapped tightly in plastic, and covered in foil. When ready, bake from frozen and add a few minutes to the bake time. It’s a handy trick for prepping meals in advance!
Reheating
The best way I’ve found to reheat leftover Baked Italian Grinder Sandwiches is in the oven at 350°F (175°C) for about 10 minutes, wrapped loosely in foil to keep moisture. For a crispy finish, open the foil during the last few minutes. I avoid microwaving because it tends to make the bread chewy instead of crisp.
FAQs
-
Can I use different types of bread for the Baked Italian Grinder Sandwiches Recipe?
Absolutely! While Italian sub rolls are traditional and hold up well to the fillings and baking, you can experiment with French baguettes, ciabatta, or even sturdy sandwich rolls. Just make sure the bread has a firm crust and enough texture to avoid becoming soggy during baking.
-
Is it possible to make this recipe vegetarian?
Yes! Substitute the deli meats with grilled or roasted vegetables like zucchini, eggplant, and bell peppers. Increase the amount of cheese or add a flavorful spread like pesto or olive tapenade to keep the sandwich satisfying and layered with flavor.
-
How do I keep the sandwiches from getting soggy during baking?
Using a good quality crusty bread and brushing the cut sides with the seasoned melted butter helps create a barrier that keeps the bread from soaking up too much moisture. Also, baking on a sheet without covering the sandwiches ensures the bread crisps up nicely.
-
Can I prepare the sandwiches ahead of time?
You sure can! Assemble the sandwiches up to the baking step, wrap them tightly, and keep them refrigerated for a few hours or overnight. Then bake just before serving. This makes entertaining way easier and keeps everything fresh.
-
What’s the best way to reheat leftovers?
Reheat in the oven at 350°F for about 10 minutes, loosely covered with foil to keep moisture, then uncover at the end for a little crispiness. Avoid the microwave if you want to keep the bread crusty.
Final Thoughts
This Baked Italian Grinder Sandwiches Recipe is one of those dishes that feels like a warm hug after a long day in the kitchen. I love how it brings all my favorite Italian deli flavors together with the comfort of melted cheese and crispy bread. I think once you try it, you’ll find yourself making it for cozy nights, feeding a hungry crowd, or anytime you just want a seriously tasty sandwich that’s a little bit special. So go on, give it a go—you deserve a great sandwich!
PrintBaked Italian Grinder Sandwiches Recipe

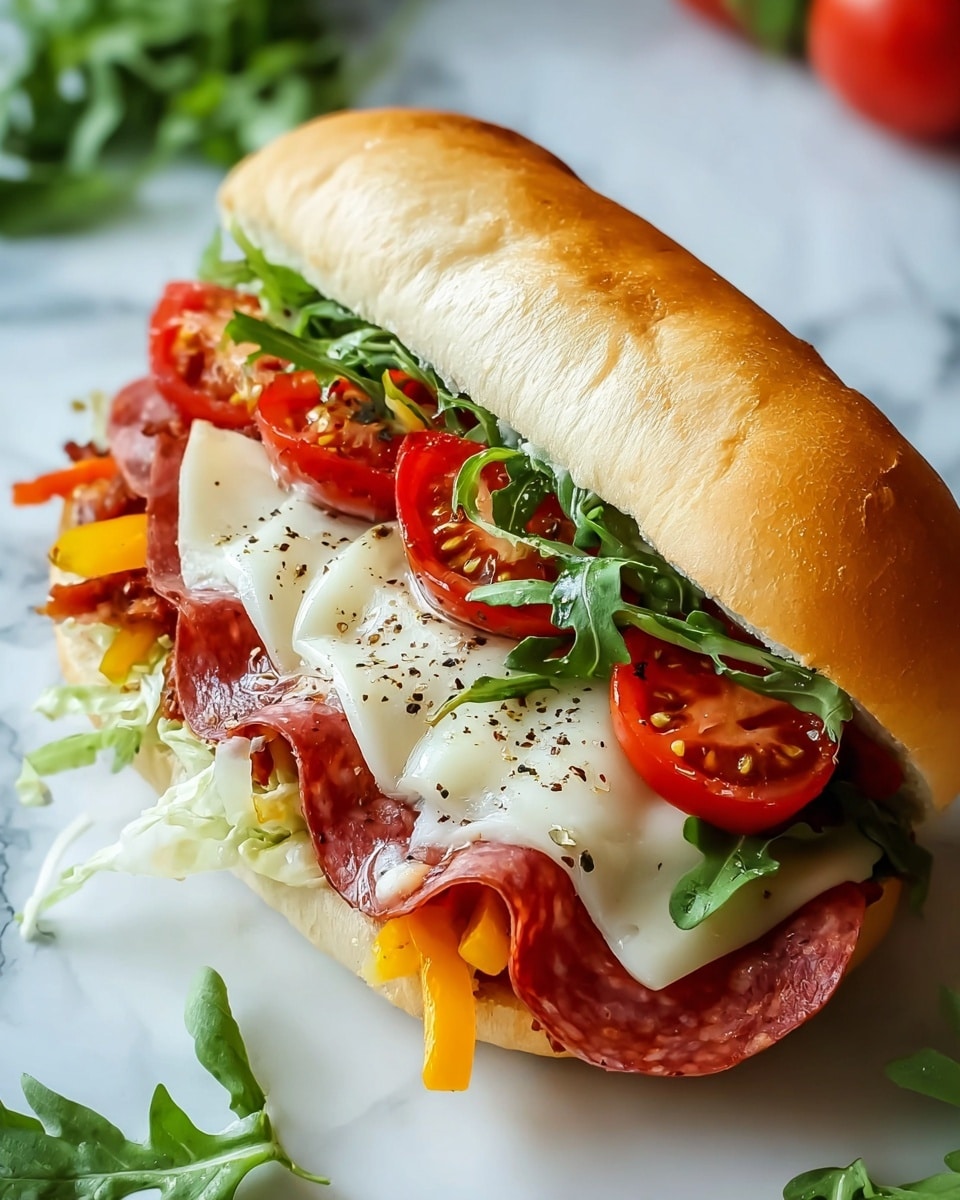
These Baked Italian Grinder Sandwiches are loaded with layers of salami, ham, pepperoni, mozzarella, provolone, and Parmesan cheese, accented by flavorful roasted red peppers, black olives, banana peppers, and fresh basil. Brushed with a seasoned butter blend and baked until the cheese melts and the bread crisps, these sandwiches make a perfect hearty meal with a delightful Italian flavor.
- Prep Time: 20 minutes
- Cook Time: 15 minutes
- Total Time: 35 minutes
- Yield: 4 sandwiches 1x
- Category: Sandwiches
- Method: Baking
- Cuisine: Italian
Ingredients
Bread and Butter Mixture
- 1 loaf Italian sub rolls
- 1/2 cup unsalted butter, melted
- 1 tablespoon garlic powder
- 1 tablespoon onion powder
- 1 tablespoon dried oregano
- 1 tablespoon dried basil
- 1 teaspoon red pepper flakes
- 1/2 teaspoon salt
- 1/4 teaspoon black pepper
Meats and Cheeses
- 1/2 pound deli-sliced salami
- 1/2 pound deli-sliced ham
- 1/2 pound deli-sliced pepperoni
- 1/2 pound deli-sliced mozzarella cheese
- 1/2 pound deli-sliced provolone cheese
- 1/4 cup grated Parmesan cheese
Vegetables and Herbs
- 1/4 cup roasted red peppers, sliced
- 1/4 cup sliced black olives
- 1/4 cup banana peppers, sliced
- 1/4 cup fresh basil leaves
Instructions
- Preheat the Oven: Preheat your oven to 375°F (190°C) to prepare for baking the sandwiches.
- Prepare the Rolls: Slice the Italian sub rolls lengthwise but keep them hinged at the bottom so they open like a book without separating.
- Arrange on Baking Sheet: Place the sliced rolls cut side up on a baking sheet, ensuring they are spaced without overcrowding.
- Make Seasoned Butter: Melt the unsalted butter in a bowl using a microwave or stovetop, then add garlic powder, onion powder, dried oregano, dried basil, red pepper flakes, salt, and black pepper to it.
- Combine Seasonings: Stir the butter and spices thoroughly until well combined and the seasonings dissolve in the butter.
- Brush Rolls: Generously brush the seasoned butter mixture over the cut sides of the sub rolls, covering both halves evenly to infuse flavor and aid browning.
- Layer Meats: Place a layer of salami evenly across the bottom half of each roll, followed by a layer of ham, then a layer of pepperoni ensuring full coverage.
- Add Cheeses: Layer deli-sliced mozzarella cheese over the pepperoni, then top with provolone cheese entirely covering the mozzarella slices.
- Sprinkle Parmesan: Evenly sprinkle grated Parmesan cheese on top of the provolone layer to add a sharp flavor and crisp texture when baked.
- Add Vegetables and Herbs: Scatter sliced roasted red peppers over the cheese layers, then add black olives, banana peppers, and finish with fresh basil leaves for a burst of freshness and color.
- Bake the Sandwiches: Place the baking sheet in the preheated oven and bake for 10-12 minutes until the cheese melts completely and the bread becomes slightly crispy.
- Cool Slightly: Remove the sandwiches from the oven and allow them to cool for a minute before serving.
- Slice and Serve: Carefully cut the sandwiches into individual portions with a serrated knife. Serve warm and enjoy the melty, savory deliciousness.
Notes
- Keep the sub rolls hinged for easier handling and to maintain sandwich integrity during baking.
- Adjust the amount of red pepper flakes depending on your desired spice level.
- Use freshly grated Parmesan for best flavor and texture.
- Feel free to substitute or add your favorite Italian cold cuts or cheeses as preferred.
- For a crispier bread, bake an extra 1-2 minutes but watch carefully to prevent burning.
- These sandwiches are best served hot but can be wrapped and reheated gently for leftovers.
Keywords: Italian grinder sandwich, baked sandwich recipe, Italian sub, salami sandwich, provolone sandwich, melted cheese sandwich, easy Italian lunch, baked deli sandwich