Mini Pumpkin Pies with Whipped Cream Recipe
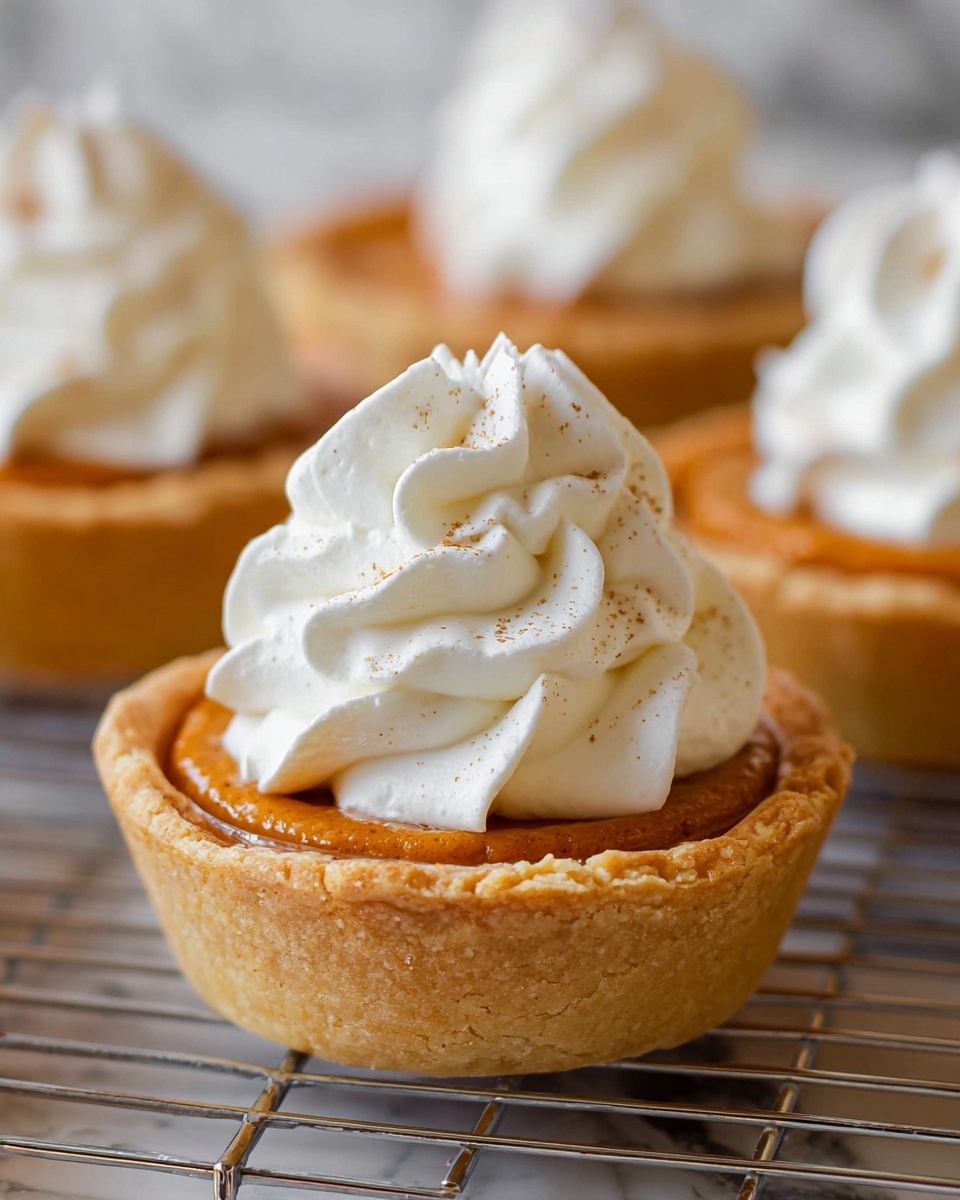
If you love the cozy flavors of fall but want something a bit more fun and portable than the classic pumpkin pie, these Mini Pumpkin Pies with Whipped Cream Recipe are absolutely perfect. I first made these when I wanted a festive dessert that was easy to serve at a family gathering — and let me tell you, they disappeared fast! Each mini pie packs that rich pumpkin filling everyone adores, wrapped in a buttery crust, and topped with a fluffy dollop of homemade whipped cream that takes it over the top.
What I really enjoy about this Mini Pumpkin Pies with Whipped Cream Recipe is how practical and charming it is. They’re small enough to be a delightful individual treat but satisfyingly rich, so everyone feels like they got a special dessert moment. Whether you’re making them for Thanksgiving or just a weekend treat, these mini pies never fail to impress without requiring you to spend hours in the kitchen. Plus, the recipe is straightforward — you’ll see how easy it is to whip up the filling and crust, even if you’re not a baking pro yet!
Ingredients You’ll Need
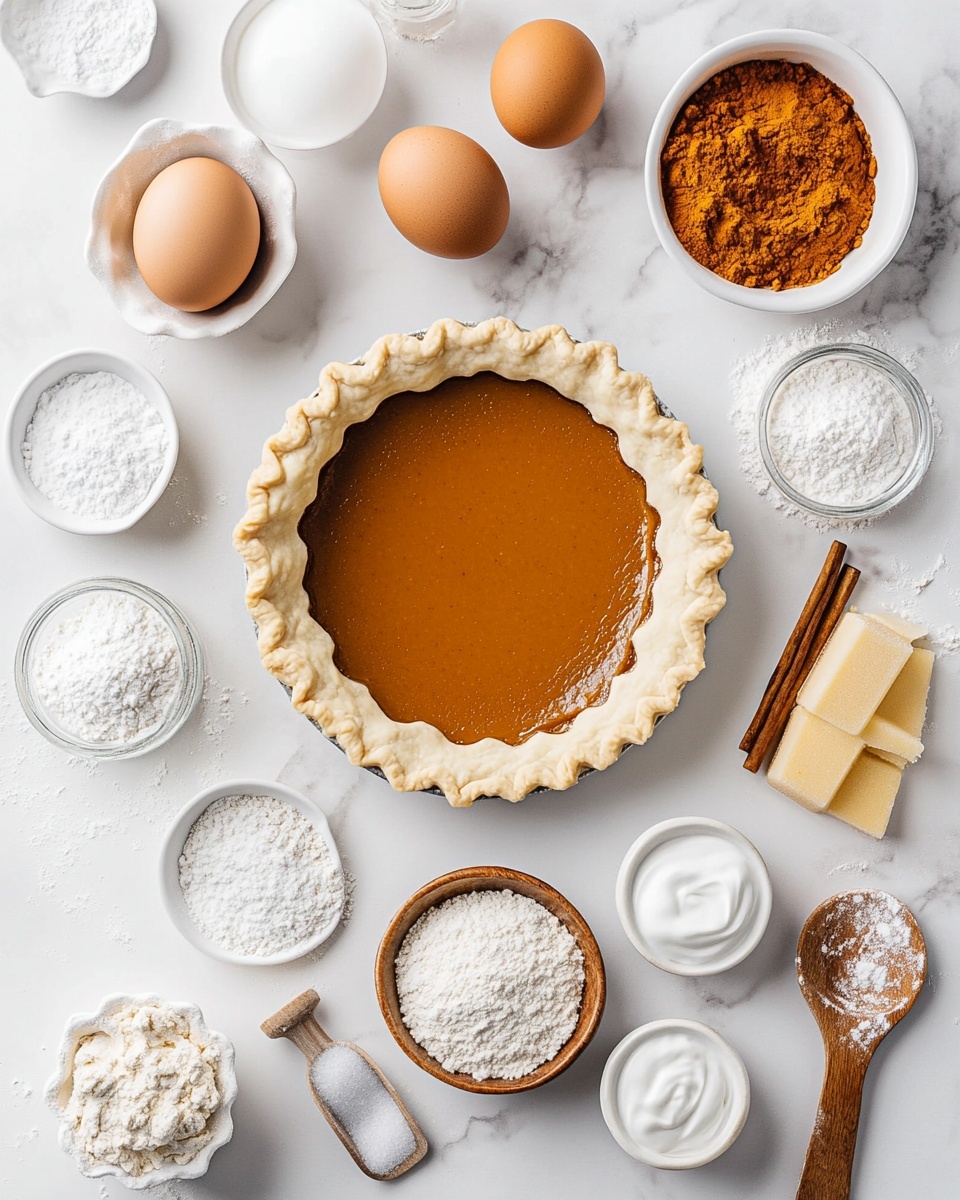
To get these Mini Pumpkin Pies just right, you’ll want to combine classic pumpkin pie spices and creamy, comforting ingredients. I always recommend using a good-quality pumpkin puree and fresh spices if you can—it makes a noticeable difference in flavor.
- Pie crust: Homemade or store-bought works, but homemade gives you that rustic, buttery flavor I love.
- Pumpkin puree: Use canned pumpkin puree — not pumpkin pie filling — for the best texture and taste.
- Egg and egg yolk: These add richness and help the filling set perfectly.
- Light brown sugar: Adds a subtle molasses depth that pairs beautifully with pumpkin.
- Granulated sugar: Balances out the sweetness without overpowering.
- Pumpkin pie spice: This blend brings the warmth of cinnamon, nutmeg, and clove — essential to get that signature pumpkin pie flavor.
- Cinnamon: I like sprinkling extra cinnamon for an aromatic boost.
- Salt: It brightens the flavors and tames any bitterness.
- Vanilla extract: Adds a lovely sweet floral note that rounds out the filling.
- Evaporated milk: This gives the filling a smooth, creamy texture without being too heavy.
- Heavy whipping cream: For the whipped cream topping — make sure it’s cold so it whips up beautifully.
- Granulated sugar (for whipped cream): Sweetens just right without clumping.
- Vanilla extract (for whipped cream): Enhances the cream’s flavor and aroma.
Variations
I love switching things up depending on the season or who I’m serving. Mini Pumpkin Pies with Whipped Cream Recipe are super adaptable, so feel free to play around with the flavors and textures to suit your taste or dietary needs.
- Gluten-free crust: I’ve tried using gluten-free pie crust mix, and it worked surprisingly well. Just press it carefully into the muffin tins so it holds without cracking.
- Vegan option: Swap out the eggs for a flax egg and use coconut milk instead of evaporated milk. The texture changes a bit but still tasty!
- Spice it up: Add a pinch of ginger or cloves to the pumpkin filling if you want a bit more zing.
- Maple whipped cream: Instead of vanilla, swirl in a tablespoon of pure maple syrup to the whipped cream for a delicious twist that’s subtle but memorable.
How to Make Mini Pumpkin Pies with Whipped Cream Recipe
Step 1: Prepare Your Pie Crust
Start by rolling out your pie crust on a floured surface until it’s about 1/8 inch thick. I like to use a cookie cutter or the lid from a wide-mouth jar to cut out 3 1/2-inch circles—this fits perfectly into a standard muffin tin. You’ll want around 12 circles total, so if you’re using homemade dough, don’t forget to gently re-roll any scraps to get that last bit of dough. This step is fun because you get to work with the dough’s texture and hear that satisfying crunch as you press it into the pan.
Step 2: Line the Muffin Tin with Dough
Lightly grease your 12-count muffin pan to prevent sticking, then press each round of dough into the cups, shaping it up the sides to hold the filling. Make sure the edges are snug but not stretched thin—that way, the crust won’t shrink away as it bakes. This part can feel a little fiddly, but take your time to get a nice even edge.
Step 3: Mix the Pumpkin Filling
In a large bowl, whisk together the pumpkin puree, egg, and egg yolk until smooth. Then add your brown sugar, granulated sugar, pumpkin pie spice, cinnamon, salt, and vanilla extract. Gradually whisk in evaporated milk to create a creamy filling that’s perfectly spiced. I always taste a tiny bit of the raw mixture (just a drop!) to make sure the spices feel balanced before filling the crusts.
Step 4: Fill and Bake
Divide the pumpkin filling evenly among the lined muffin tins. I find a spoon or small ladle helps get it into each cup without making a mess. Bake at 350°F for about 30-40 minutes—store-bought crust usually cooks closer to 30 minutes, while homemade takes nearer 40. Look for golden brown crust edges and a filling that’s just set but still a bit wobbly in the middle. Trust me, overbaking makes it dry!
Step 5: Cool and Add Whipped Cream
Let the mini pies cool in the pan for about 10 minutes, then carefully run a knife or cake release tool around the edges to loosen them. Transfer each to a wire rack to cool completely. Meanwhile, whip the heavy cream with sugar and vanilla until you hit soft to medium peaks — perfect for piping. Don’t overbeat or you’ll get butter! Pipe a pretty swirl of whipped cream atop each cooled pie, then dust with a pinch of cinnamon. This final touch makes all the difference.
How to Serve Mini Pumpkin Pies with Whipped Cream Recipe
Garnishes
I’m a sucker for simplicity, so a dusting of fresh cinnamon on the whipped cream is my go-to garnish—it adds that warm, cozy aroma that fills the room when you serve them. Sometimes, I’ll toss a few chopped toasted pecans on top for a little crunch and nutty sweetness, especially when serving guests who like a bit of texture contrast.
Side Dishes
Mini Pumpkin Pies are perfect alongside a cup of hot apple cider, chai tea, or a rich coffee. At holiday dinners, I like pairing them with fresh fruit salad or a light cheese platter to balance the sweetness. They also make an excellent dessert for potlucks where finger foods rule!
Creative Ways to Present
For Thanksgiving or festive parties, I’ve arranged these mini pies on a tiered dessert stand surrounded by autumn leaves or small pumpkins for a charming seasonal display. You can also serve them in individual mini tart tins or line them up on a wooden board with spoons and themed napkins. Trust me, presentation doesn’t have to be complicated to wow your guests.
Make Ahead and Storage
Storing Leftovers
These mini pies keep really well in the fridge for 3-4 days. I usually store them in an airtight container to keep the crust from getting soggy. If you want to maintain the creamy texture of the filling and fresh whipped cream topping, I suggest adding the whipped cream right before serving rather than storing with it.
Freezing
I’ve frozen mini pumpkin pies successfully by wrapping them tightly in plastic wrap and then in foil, placing them in a freezer-safe container. They freeze well for up to 2 months. When ready to eat, thaw overnight in the fridge and then add fresh whipped cream. Just be aware the crust won’t be quite as crisp as fresh-baked but still delicious.
Reheating
To reheat, pop the pies in a 325°F oven for about 10 minutes until warmed through — don’t microwave if you want to keep the crust from getting chewy. Let cool slightly before topping with whipped cream. This little trick helps maintain the buttery texture you want.
FAQs
-
Can I use canned pumpkin pie filling instead of pumpkin puree in this Mini Pumpkin Pies with Whipped Cream Recipe?
It’s best to use canned pumpkin puree rather than pumpkin pie filling because the filling already contains sugars and spices, which could throw off the balance in this recipe. Using pure pumpkin puree gives you control over sweetness and spices, resulting in a more authentic and balanced mini pie.
-
Do I have to make my own whipped cream for this recipe?
While store-bought whipped cream can work in a pinch, homemade whipped cream really makes a difference in fresh flavor and texture. Plus, it’s easy to make and you can customize the sweetness and vanilla level. Just make sure to whip it until it forms soft peaks and use it promptly for best results.
-
How do I prevent the crust from shrinking in these mini pies?
Make sure not to stretch the dough while lining your muffin tin, and chill the dough before rolling it out if possible. Press the crust evenly into the pan to avoid gaps. If you notice shrinking, you can try blind baking the crust for a few minutes before adding the filling.
-
Can I make these Mini Pumpkin Pies ahead of time?
Absolutely! You can bake the pies a day or two in advance and keep them refrigerated. Just add the whipped cream topping right before serving to maintain that fresh, fluffy texture. These mini pies actually taste great when chilled, so they’re perfect for prepping ahead.
-
What’s the best way to reheat leftover mini pumpkin pies?
The best method is to heat them in a 325°F oven for about 10 minutes until warmed through. Avoid microwaving, as this can make the crust soggy or chewy. Once warmed, add fresh whipped cream to enjoy them at their best.
Final Thoughts
I honestly can’t recommend this Mini Pumpkin Pies with Whipped Cream Recipe enough—it’s become a go-to in my kitchen for when I want that classic pumpkin pie flavor but with a fun, individual twist. Cooking and sharing these little pies feels like passing along a warm hug, especially on crisp fall days. I know you’re going to love how simple yet special these tiny delights are, and once you try making them, I bet they’ll become a favorite in your recipe collection too. So, grab your rolling pin and mixing bowl, and let’s get baking!
PrintMini Pumpkin Pies with Whipped Cream Recipe

Delight in these charming Mini Pumpkin Pies, perfect for fall gatherings and holiday celebrations. Each mini pie features a flaky crust filled with a smooth, spiced pumpkin custard, baked to golden perfection and topped with a dollop of homemade whipped cream. This recipe combines classic pumpkin pie flavors in a convenient handheld size that’s sure to impress.
- Prep Time: 25 minutes
- Cook Time: 35 minutes
- Total Time: 1 hour
- Yield: 12 mini pies 1x
- Category: Dessert
- Method: Baking
- Cuisine: American
- Diet: Vegetarian
Ingredients
Mini Pumpkin Pie Ingredients
- 1 homemade pie crust disk, or 2 store-bought pie crust rolls
- 15 oz pumpkin puree
- 1 large egg
- 1 large egg yolk
- 1/2 cup packed light brown sugar
- 1/4 cup granulated sugar
- 1 tsp pumpkin pie spice
- 1/2 tsp cinnamon
- 1/4 tsp salt
- 1 tsp vanilla extract
- 3/4 cup evaporated milk (6 oz)
Ingredients for Whipped Cream
- 1 cup heavy whipping cream
- 3 Tbsp granulated sugar
- 1/2 tsp vanilla extract
Instructions
- Prepare the Pie Crust: Unroll the pie crusts or roll homemade pie dough out to 1/8-inch thickness on a floured surface. Cut out 3 1/2-inch diameter circles using a cookie cutter or a jar lid. You will need 12 disks in total. If using homemade dough, re-roll scraps to get the required number of rounds.
- Line the Muffin Pan: Lightly grease a 12-count non-stick muffin pan with cooking spray. Gently press each dough round into the muffin cups, molding it to cover the sides evenly.
- Prepare the Pumpkin Filling: In a large bowl, whisk together the pumpkin puree, whole egg, egg yolk, light brown sugar, granulated sugar, pumpkin pie spice, cinnamon, salt, and vanilla extract until well combined. Gradually add evaporated milk while whisking to create a smooth custard filling.
- Fill the Pies: Divide the pumpkin filling evenly among the muffin cups lined with pie dough, filling each about three-quarters full. The filling should just suffice for all 12 cups.
- Bake the Mini Pies: Place the muffin pan in a preheated oven at 350°F (175°C). Bake for 30 to 40 minutes, depending on crust type—store-bought crusts generally bake around 30 minutes, while homemade crusts take closer to 40 minutes. Bake until the crust tops are golden brown and the filling is set.
- Cool the Mini Pies: Remove the pies from the oven and let them cool in the pan for 10 minutes. Use a knife or cake release tool around the edges of each cup to loosen the pies, then transfer them to a wire rack to cool completely to room temperature.
- Make the Whipped Cream: In a mixing bowl, beat heavy cream on medium-high speed for about 1 minute until soft peaks form. Add granulated sugar and vanilla extract and continue beating for another 2 minutes until the cream holds stiff peaks but is still pipeable. Avoid overbeating to prevent it from turning into butter.
- Serve: Once the mini pumpkin pies are completely cooled, pipe or dollop the whipped cream on top of each. Optionally, dust with a sprinkle of cinnamon for extra flavor and visual appeal. Serve and enjoy!
Notes
- You can use store-bought or homemade pie crust depending on your preference; homemade crusts may require longer baking times.
- Ensure the pies are completely cooled before adding whipped cream to prevent it from melting.
- For a dairy-free whipped topping alternative, consider using coconut cream.
- Make sure not to overbeat the whipped cream to keep it smooth and pipeable.
- These pies can be stored in the refrigerator for up to 3 days; add whipped cream just before serving.
Keywords: mini pumpkin pies, pumpkin pie, fall dessert, holiday pies, homemade mini pies, whipped cream topping, easy pumpkin dessert