Mini Cheesecakes with Vanilla Wafers Recipe
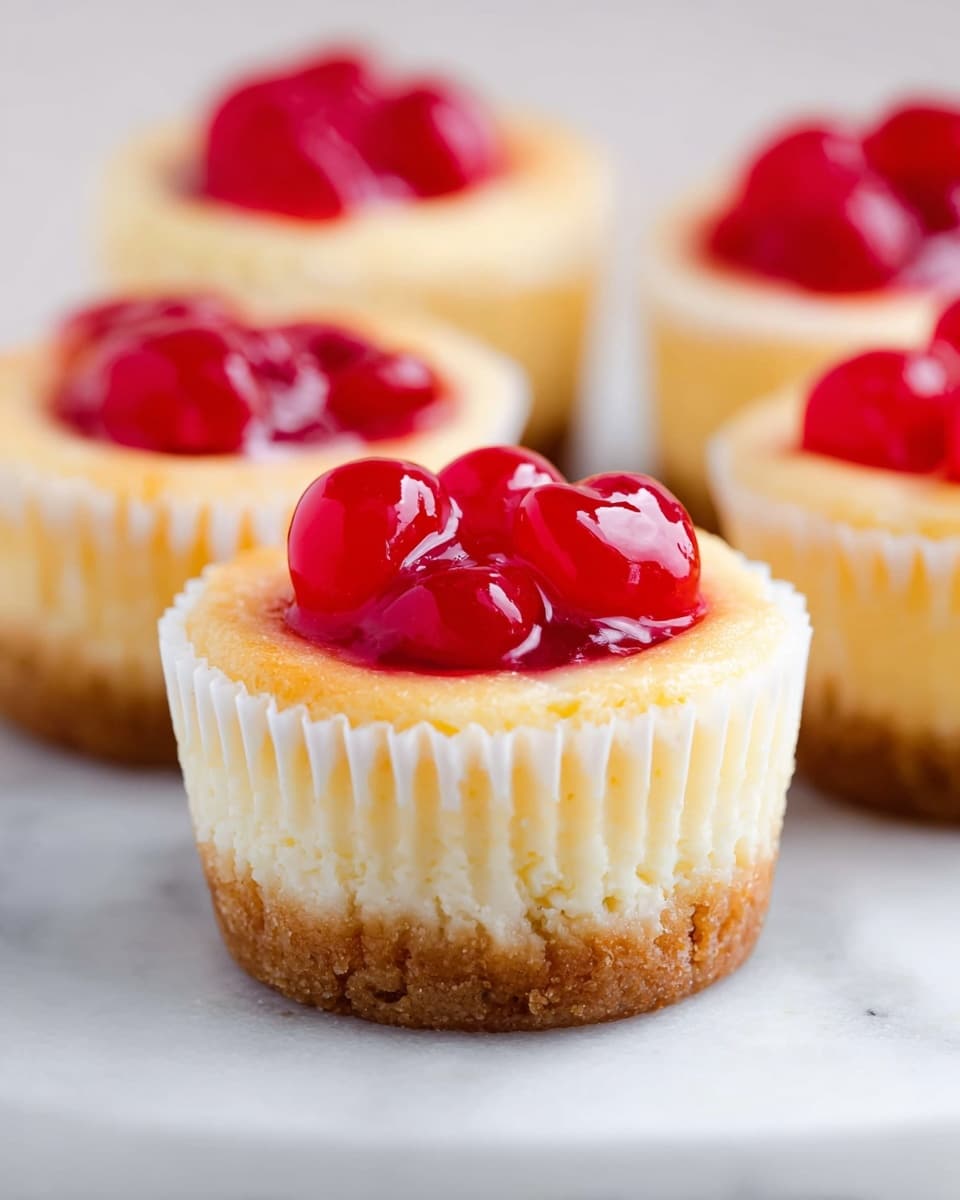
I’m so excited to share this Mini Cheesecakes with Vanilla Wafers Recipe with you! These little delights are the perfect combo of creamy cheesecake goodness and that nostalgic vanilla wafer crunch at the bottom. Seriously, they’re like bite-sized packages of happiness that work wonderfully for everything from casual get-togethers to fancy dessert spreads. I love how quickly they come together, which is perfect when you’re craving something sweet but don’t have hours to fuss.
What makes this Mini Cheesecakes with Vanilla Wafers Recipe really special is how approachable it is. No complicated crust to make, no fancy equipment needed—just a few pantry staples and some love. Whether it’s a last-minute dessert or a sweet treat for the kids’ lunchbox, these mini cheesecakes never disappoint. Plus, you get to enjoy that creamy filling paired with the buttery vanilla wafers, which I think is what makes them so addictive!
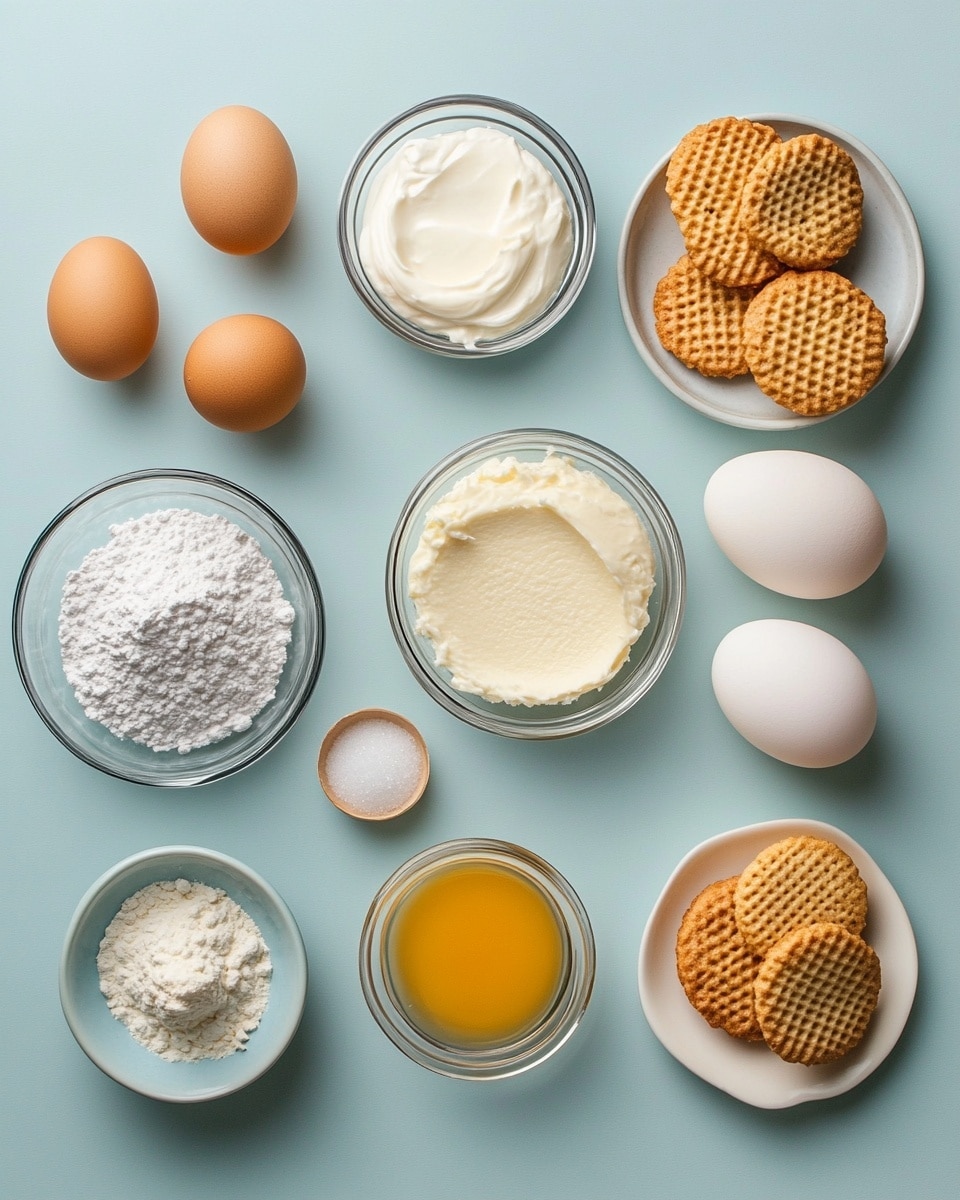
Ingredients You’ll Need
These simple ingredients come together to create a beautifully balanced mini cheesecake — creamy, sweet, and a little bit crunchy on the bottom. Whenever I shop for this recipe, I always make sure to pick fresh cream cheese and good-quality vanilla wafers to get the best texture and flavor.
- Cream Cheese: Softened cream cheese is the heart of these cheesecakes; make sure it’s room temperature for easy mixing and a smooth batter.
- Granulated Sugar: Adds just the right amount of sweetness to contrast the tangy cream cheese.
- Eggs: Eggs help bind everything together and give the cheesecake its signature creamy texture.
- Vanilla Extract: A splash of vanilla elevates the whole flavor profile — don’t skip it!
- Vanilla Wafers: These form the perfect buttery base for the mini cheesecakes and bring a lovely crunch.
- Optional Toppings: Think canned pie filling, fresh berries, whipped cream, or even a drizzle of caramel or chocolate sauce to make them extra special.
Variations
I love experimenting with this Mini Cheesecakes with Vanilla Wafers Recipe — it’s so easy to tweak based on what you have or what mood you’re in! Feel free to make it your own and try out different flavors and toppings.
- Lemon Zest and Juice: Adding fresh lemon juice and a bit of zest brightens up the cheesecake. I’ve done this for a spring picnic and it was a hit!
- Oreo Base: Swap vanilla wafers for Oreos—crush them for the crust and add whole minis for a chocolate twist I like to call “mini Oreo cheesecakes.”
- Mini Version: Use a mini cupcake pan and half a vanilla wafer at the bottom. They bake faster, so start checking after 10 minutes for perfect, tiny treats.
- Dairy-Free Options: You can substitute cream cheese for a dairy-free alternative, but keep in mind texture might differ slightly.
- Seasonal Toppings: Fresh berries in summer, warm apple pie filling in fall—seasonal toppings make these cheesecakes feel festive!
How to Make Mini Cheesecakes with Vanilla Wafers Recipe
Step 1: Whip Up That Creamy Cheesecake Filling
First things first, preheat your oven to 375°F so it’s ready to go when your batter is mixed. In a big bowl, beat your softened cream cheese with the sugar until it’s silky smooth — I like using a hand mixer for this step because it really crushes any lumps. Then, add the eggs one at a time, mixing well after each addition. Stir in the vanilla extract, and if you like a little zing, a couple teaspoons of fresh lemon juice will do wonders here.
Step 2: Layer the Vanilla Wafers and Fill ’Em Up
Grab a standard muffin pan and line it with cupcake liners for easy clean-up. Pop two vanilla wafers in the bottom of each liner – this is your crust, and it’s what gives the cheesecakes that perfect crunch. Pour the cheesecake batter over the wafers, filling each about 3/4 of the way full. Don’t fill to the very top — leaving a bit of space helps avoid overflow while baking.
Step 3: Bake Until Just Set
Bake for 15 to 18 minutes. You’re looking for the edges to be set but the centers to still have a little jiggle. This part is key—overbaking dries them out. I usually test doneness with a toothpick; if it comes out clean, you’re good. Then, let them cool completely right in the pan. If you can wait, chilling them for at least 30 minutes in the fridge helps the flavors meld and the texture firm up beautifully.
How to Serve Mini Cheesecakes with Vanilla Wafers Recipe
Garnishes
When it comes to garnishes, I keep it simple but colorful—fresh berries like strawberries or blueberries add a burst of freshness, and a dollop of whipped cream always feels indulgent. Sometimes I drizzle a little caramel or chocolate sauce right before serving to impress guests. But honestly, these mini cheesecakes are delicious on their own too, so don’t feel pressured to add anything!
Side Dishes
I like pairing these bite-sized treats with a cup of coffee or a refreshing glass of iced tea when serving as an afternoon snack. For parties, they go beautifully alongside fresh fruit platters or a light salad to balance the richness.
Creative Ways to Present
For special occasions, I’ve arranged these mini cheesecakes on tiered dessert stands—makes for a stunning display! You can also present them in individual mini mason jars layered with fruit and crushed wafer crumbs for a rustic-chic look. Wrapping each with a little ribbon adds a sweet touch for gift-giving.
Make Ahead and Storage
Storing Leftovers
I keep leftover mini cheesecakes covered tightly with plastic wrap or stored in an airtight container in the fridge. They’ll stay fresh and creamy for up to 3-4 days, which is perfect if you want to get ahead on party prep or just treat yourself over a few days.
Freezing
Freezing these mini cheesecakes works surprisingly well! I freeze them on a baking sheet first so they don’t stick together, then transfer to a freezer-safe container. When you want a sweet snack later, thaw overnight in the fridge. The texture stays great, and you’ll have dessert ready whenever cravings hit.
Reheating
Since these are best served chilled, I don’t usually recommend reheating. However, if you like your cheesecake slightly softer, you can let them warm up at room temperature for 20-30 minutes before enjoying. Avoid microwaving since that can mess with the texture.
FAQs
-
Can I make Mini Cheesecakes with Vanilla Wafers Recipe ahead of time?
Absolutely! These mini cheesecakes actually taste better after chilling for a few hours or overnight. You can prepare them a day ahead and store in the fridge until serving to save yourself stress on the day of your event.
-
Can I use a different cookie instead of vanilla wafers?
Yes! I’ve tried using Oreos, graham crackers, or even gingersnaps for a fun twist. Just pick cookies that will hold their texture when baked and complement the creamy filling.
- Should I use silicone muffin pans or cupcake liners?
Either works great! I use liners for easy clean-up and neat presentation, but silicone pans are perfect if you want to skip liners and still get cheesecakes out easily without sticking.
- How do I know when my mini cheesecakes are done baking?
Look for slightly puffed edges and centers that still jiggle a tiny bit when gently shaken. A toothpick inserted should come out clean or with just a few moist crumbs. Don’t overbake or they’ll be dry.
Final Thoughts
This Mini Cheesecakes with Vanilla Wafers Recipe is one of my go-tos when I want an easy, crowd-pleasing dessert that doesn’t feel heavy or complicated. Every time I make them, I find myself sneaking a few while they’re cooling (not ashamed!). I know you’ll enjoy the creamy, dreamy texture and the subtle crunch from those classic vanilla wafers. Give it a try next time you want to impress without stress — I promise these mini cheesecakes will become a favorite in your dessert rotation!
PrintMini Cheesecakes with Vanilla Wafers Recipe

These Mini Cheesecakes with Vanilla Wafers are a delightful and easy-to-make dessert featuring a creamy cheesecake filling atop crunchy vanilla wafer bases. Perfect for portion control and customizable with your favorite toppings like fresh berries, pie filling, or whipped cream, these mini treats bake quickly and chill for a perfect, rich bite-sized indulgence.
- Prep Time: 15 minutes
- Cook Time: 15 minutes
- Total Time: 1 hour
- Yield: 12 mini cheesecakes 1x
- Category: Dessert
- Method: Baking
- Cuisine: American
Ingredients
Cheesecake Filling
- 16 ounces cream cheese, softened
- ¾ cup granulated sugar
- 2 eggs
- 1 teaspoon vanilla extract
Base
- 24 Nilla Wafer Cookies
Optional Toppings
- Canned pie filling
- Fresh berries
- Whipped cream
- Chocolate or caramel sauce
Instructions
- Make cheesecake filling: Preheat your oven to 375°F. In a large mixing bowl, beat 16 ounces of softened cream cheese together with ¾ cup granulated sugar until smooth and creamy. Add the eggs one at a time, fully incorporating each before adding the next. Then, mix in 1 teaspoon of vanilla extract. Optionally, you may add a couple teaspoons of fresh lemon juice for a slight tart balance.
- Prepare the muffin pan with wafers: Line a standard muffin pan with 12 cupcake liners or use a silicone muffin pan without liners for easy removal. Place 2 Nilla Wafers at the bottom of each liner or cup to create the base of your mini cheesecakes.
- Fill the muffin cups: Divide the prepared cheesecake batter evenly among the 12 cups, filling each about ¼ inch below the top to allow space for rising during baking.
- Bake the cheesecakes: Place the pan in the preheated oven and bake for 15-18 minutes, or until the cheesecake center is set and a toothpick inserted near the center comes out clean. Avoid overbaking to maintain creamy texture.
- Cool and chill: Remove the cheesecakes from the oven and allow them to cool completely at room temperature. Then, chill them in the refrigerator for at least 30 minutes or until firm to finish setting.
- Add toppings and serve: Once chilled, top each mini cheesecake with your favorite toppings such as canned pie filling, fresh berries, whipped cream, or drizzles of chocolate or caramel sauce before serving.
Notes
- Alternative bases: Instead of Nilla Wafers, you can press about ¼ inch of graham cracker crust made from 2/3 cup crushed graham crackers, 2 tablespoons melted butter, and 2 tablespoons sugar into the bottom of silicone muffin cups. Alternatively, use an Oreo cookie as a base and sprinkle crushed Oreos on top.
- Lemon juice: Adding a couple teaspoons of fresh lemon juice to the batter is optional but recommended to add a hint of tartness and balance the cream cheese flavor.
- Extra mini cheesecakes: For smaller mini cheesecakes using mini cupcake pans, break the vanilla wafers in half and use one half per cup. Bake for about 10 minutes and this will yield approximately 36 mini cheesecakes.
Keywords: mini cheesecakes, vanilla wafer cheesecakes, easy cheesecake recipe, mini desserts, bite-size cheesecakes, no crust cheesecakes, quick cheesecake