Easy Baked Salmon Sushi Cups (Viral Recipe) Recipe
If you’re anything like me and love sushi but don’t always feel like rolling it yourself or making a special trip to the sushi bar, then you’re going to adore this Easy Baked Salmon Sushi Cups (Viral Recipe) Recipe. It’s such a fun, approachable twist on traditional sushi that’s perfect for weeknight dinners, casual parties, or whenever you want a sushi fix without the fuss. I first stumbled upon this viral recipe scrolling through social media, and after trying it once, it quickly became a go-to for impressing friends without breaking a sweat.
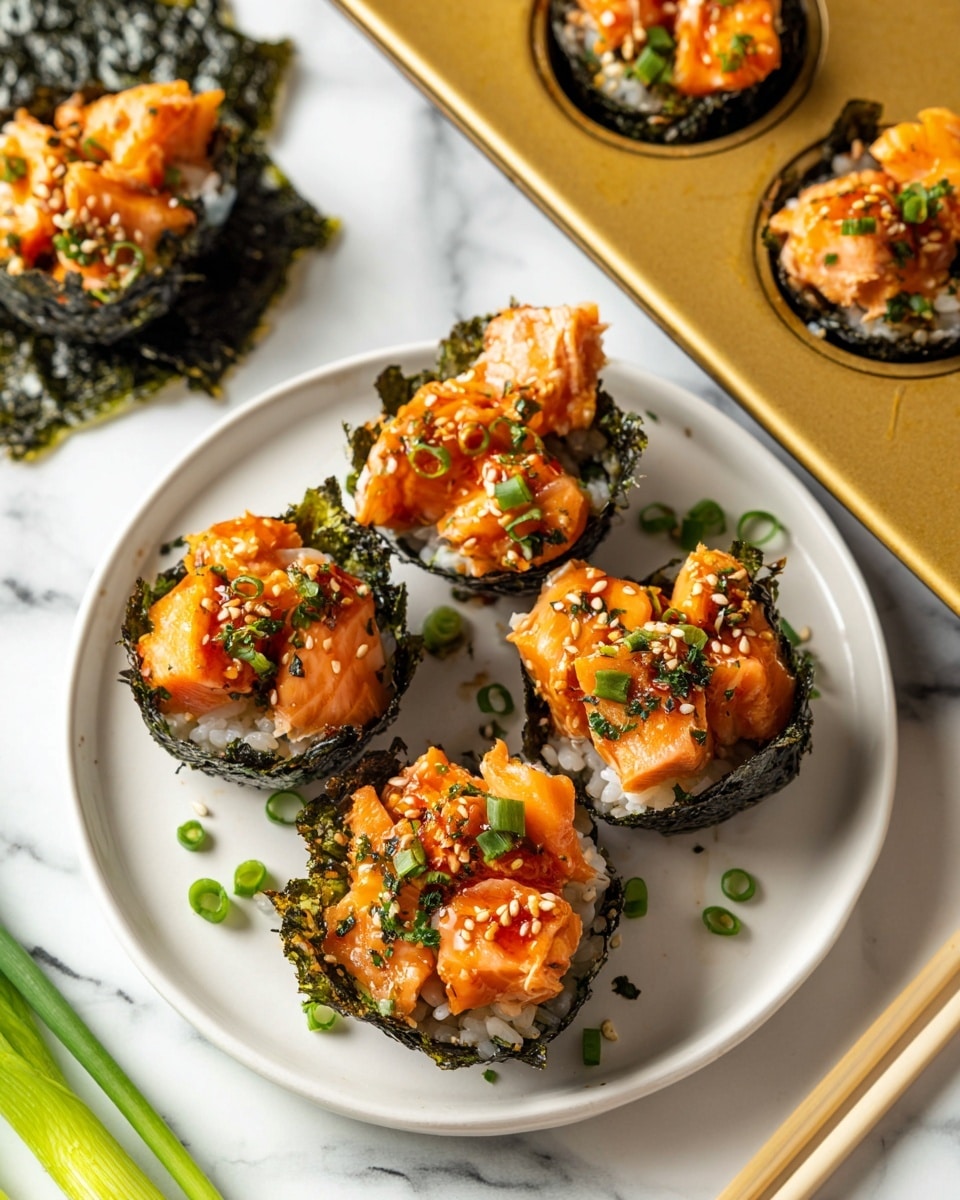
What makes this Easy Baked Salmon Sushi Cups (Viral Recipe) Recipe so special is the blend of flavors packed into bite-sized cups—salmon coated in that irresistibly creamy and spicy sauce, nestled on a perfectly seasoned sushi rice bed, all wrapped in nori. Plus, the baking step gently cooks the salmon just right, enhancing the taste and texture while keeping everything easy to assemble. You’ll appreciate how simple yet delicious it is, especially if you want sushi vibes at home with minimal effort.
Ingredients You’ll Need
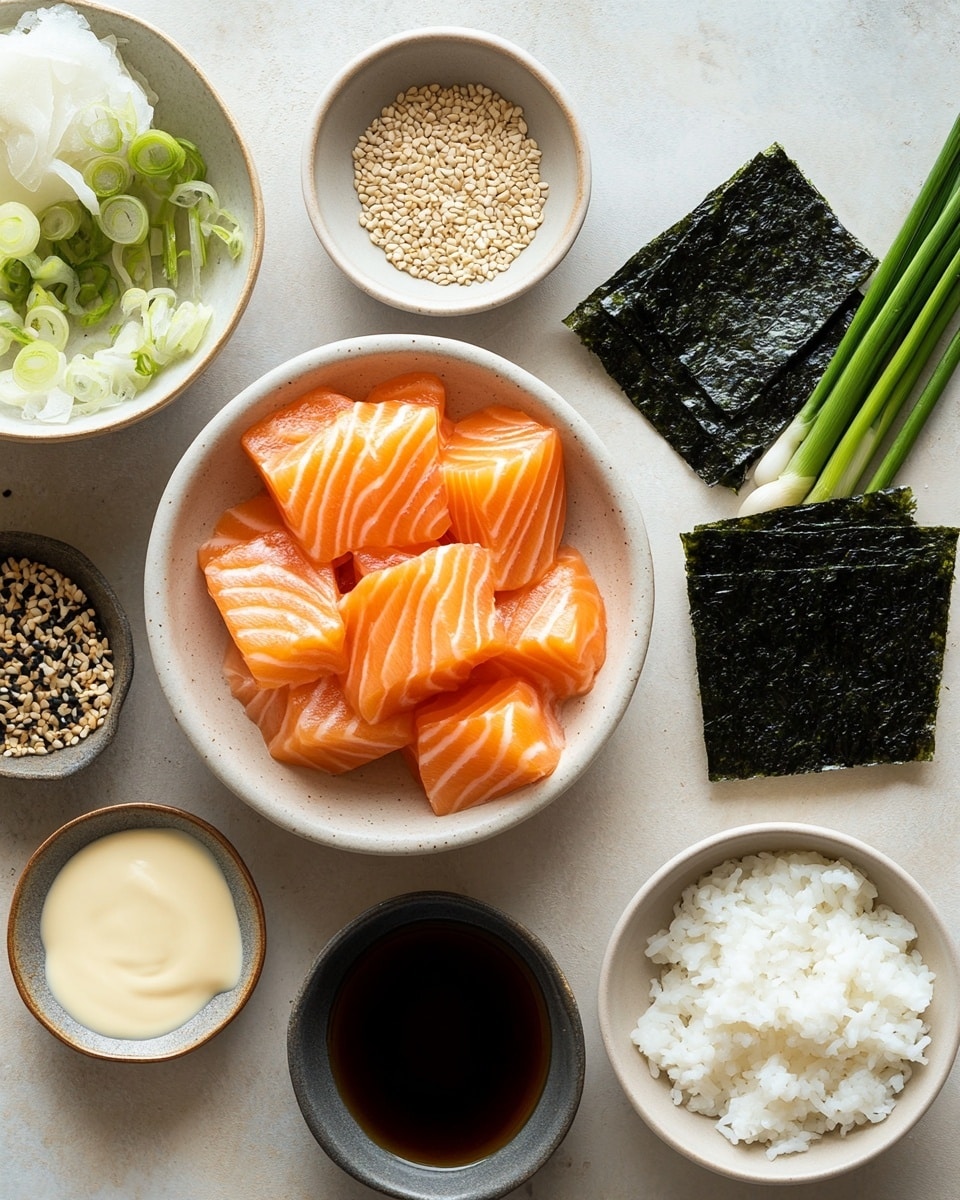
The ingredients here come together beautifully to balance creamy, spicy, tangy, and umami notes—all essential in sushi. The sushi rice sets a solid foundation, and the salmon mixture’s creamy heat really steals the show. When shopping, look for fresh, high-quality salmon, and definitely grab some Kewpie mayo if you haven’t tried it yet—it’s a game changer for sushi dishes.
- Salmon: Use fresh, sashimi-grade or well-frozen salmon cubed for the best texture and flavor.
- Light soy sauce: Adds that perfect salty umami touch without overpowering the salmon.
- Kewpie Mayo: This Japanese mayo is creamier and sweeter than regular mayo, perfect for sushi sauces.
- Sriracha: Gives the salmon mixture a spicy kick you can adjust depending on your heat preference.
- Sesame oil: A little goes a long way for that nutty richness.
- Sushi rice: Essential for that sticky, slightly vinegared base that holds everything together.
- Rice vinegar: Balances the rice with gentle acidity and slight sweetness.
- White sugar: Just enough to mellow the vinegar and create that classic sushi rice flavor.
- Nori sheets: Cut into squares, they make perfect little cups for holding the sushi rice and salmon.
- Furikake: A sprinkle on top adds crunch and extra umami for that authentic touch.
- Green onion: Fresh and bright, it finishes the dish beautifully with a mild onion bite.
- Cooking spray: To lightly grease the muffin tin for easy removal of the sushi cups.
Variations
I love to mix things up with this recipe depending on what’s in season or my mood. One of my favorite tweaks is playing with the heat level or swapping out salmon for other proteins. Don’t be shy—make it your own! This recipe is forgiving and perfect for experimenting.
- Spicy mayo swap: Sometimes I replace the sriracha and Kewpie mayo with a homemade spicy mayo using regular mayo, sriracha, and a dash of lime juice for extra zing. It’s fresh and zesty!
- Alternative proteins: Tried smoked salmon or even cooked shrimp when I didn’t have fresh salmon on hand. Both worked wonderfully and pleased the family.
- Vegetarian option: Replace salmon with marinated tofu or avocado cubes; just toss in a bit of soy sauce and sesame oil for flavor.
- Extra crunch: Add diced cucumber or thinly sliced radishes on top before baking for a refreshing crisp bite.
How to Make Easy Baked Salmon Sushi Cups (Viral Recipe) Recipe
Step 1: Cook and Season the Sushi Rice
Start with cooking your sushi rice according to the package instructions—it’s important to get that rice perfectly tender but still sticky. While the rice cooks, warm the rice vinegar and sugar in the microwave just until the sugar dissolves. Pour this sweet and tangy mixture over your hot rice and gently fold it in without smashing the grains. This step is key for that authentic sushi rice flavor, so don’t rush it. Let it cool a bit while you prep the salmon.
Step 2: Prepare the Salmon Mixture
Next, combine the cubed salmon with light soy sauce, Kewpie mayo, sriracha, and sesame oil. Mix everything gently but thoroughly so each salmon piece is nicely coated with that creamy-spicy sauce. I like to taste just a little here to tweak the heat if you want it milder or spicier. This mixture is the heart of your sushi cups, so make sure it’s flavorful!
Step 3: Assemble the Sushi Cups
Preheat your oven to 400℉ while you assemble. Lightly spray a muffin tin with cooking spray so your sushi cups don’t stick. Cut your nori sheets into squares large enough to fit into each cup. Press the nori square into each muffin well and then spoon in the sushi rice, pressing lightly to mold it. Top each with a generous spoonful of the salmon mixture. I find pressing gently helps everything hold together after baking without squishing the rice.
Step 4: Bake and Finish
Bake your assembled cups at 400℉ for about 15 minutes. Watch for the salmon to cook through and the tops to lightly brown; don’t overbake or the salmon might dry out. Once done, let the cups cool for a few minutes so they set nicely. For an extra pop, drizzle more sriracha or spicy mayo over the top, then sprinkle with furikake and sliced green onions. These final touches really brighten up the dish and add texture.
How to Serve Easy Baked Salmon Sushi Cups (Viral Recipe) Recipe
Garnishes
When I serve these sushi cups, I always top them with a generous sprinkle of furikake. It adds a lovely crunch and umami burst I can’t get enough of. Freshly sliced green onions or chives provide a nice, mild onion flavor without overpowering the dish. Sometimes, I add a small dollop of extra spicy mayo for those who love an extra kick. It’s simple but makes them feel special.
Side Dishes
These sushi cups are quite filling, but I love pairing them with a light miso soup or a crisp cucumber salad dressed with rice vinegar and sesame seeds. Steamed edamame is another easy, healthy side that goes perfectly with the flavors. If you want to keep the meal fresh and vibrant, these sides are easy options that complement without competing.
Creative Ways to Present
For special occasions, I like to serve these sushi cups on a beautiful wooden board lined with shiso leaves or bamboo leaves to add that sushi bar vibe. Adding small dipping bowls of soy sauce mixed with a splash of lemon or lime juice for dipping turns it into a more interactive experience. You can also arrange garnishes like pickled ginger slices or wasabi on the side to mimic a sushi restaurant feel right at home. It always impresses guests and makes it feel festive.
Make Ahead and Storage
Storing Leftovers
I store leftovers in an airtight container in the fridge, separated by parchment paper if stacking. The sushi cups hold up well for about 1-2 days, though they’re best eaten fresh. I find the rice can dry out a bit after a day, so I recommend reheating gently or enjoying cold for a grab-and-go snack.
Freezing
Freezing isn’t my go-to for this recipe because the texture of rice and salmon changes noticeably. However, if you want to freeze, I suggest freezing the assembled cups before baking. Wrap them tightly and bake straight from frozen, adding a few extra minutes to the bake time. It’s not perfect but can work in a pinch!
Reheating
To reheat, I gently warm each sushi cup in a 350℉ oven for about 5-7 minutes until the salmon is warm but not dried out. Avoid microwaving, as it tends to make the rice gummy and the salmon rubbery. Oven reheating keeps the texture much closer to freshly baked.
FAQs
-
Can I use different fish instead of salmon for the Easy Baked Salmon Sushi Cups (Viral Recipe) Recipe?
Absolutely! While salmon adds a rich, buttery flavor, you can substitute other fish like cooked shrimp, crab meat, or tuna. Just make sure the fish is fresh and suitable for cooking or ready to eat. The cubic shape helps with even cooking in the muffin tin.
-
Is it necessary to bake the salmon cups, or can I serve them raw?
Baking gently cooks the salmon, making it safe and tender while allowing the flavors to meld beautifully. If you prefer raw salmon and have sushi-grade fish, you could assemble the cups without baking, but keep in mind the texture and flavor will differ. The baking also crisps the nori slightly, adding a nice contrast.
-
How do I prevent the nori from getting soggy in this recipe?
Greasing the muffin tin and pressing the nori firmly against the sides helps it hold its shape and stay crisp during baking. Also, don’t overload with wet ingredients—just enough sushi rice and salmon mixture to keep the cups stable without excess moisture. Baking at a higher temperature briefly helps keep the edges from getting too soggy.
-
Can I make the sushi rice ahead of time for this recipe?
Yes! You can cook and season the sushi rice a few hours in advance and store it covered at room temperature or in the fridge. Just bring it back to room temperature before assembling for best results. Refrigerating sushi rice too long can dry it out, so avoid making it too far ahead.
-
What if I don’t have a muffin tin? Any alternatives?
If you don’t have a muffin tin, you could try using small ramekins or even mini tart pans. Just make sure they’re oven-safe and lightly greased. The idea is to have individual cups to hold the rice and salmon together for easy eating.
Final Thoughts
This Easy Baked Salmon Sushi Cups (Viral Recipe) Recipe won a special place in my kitchen because it’s the perfect blend of simplicity and bold flavor, plus it brings people together. Whether you’re making it for a casual family dinner, a weeknight indulgence, or showing off at a party, it never fails to impress with minimal effort. Give it a try—you’ll love how approachable sushi can be when it’s baked, sauced, and served as these irresistible cups.
PrintEasy Baked Salmon Sushi Cups (Viral Recipe) Recipe

These Easy Baked Salmon Sushi Cups offer a creative twist on traditional sushi by combining fresh salmon, perfectly seasoned sushi rice, and a blend of spicy mayo and sriracha, all baked into convenient, bite-sized cups. Perfect as an impressive appetizer or a fun meal, these sushi cups are quick to prepare and deliver vibrant flavors with a crispy baked finish.
- Prep Time: 15 minutes
- Cook Time: 15 minutes
- Total Time: 30 minutes
- Yield: 12 sushi cups 1x
- Category: Appetizer
- Method: Baking
- Cuisine: Japanese
Ingredients
Sushi Rice
- 1 ½ cup uncooked sushi rice
- 1 tbsp rice vinegar
- 2 tsp white sugar
Salmon Mixture
- 1 lb salmon, cubed
- 1 tbsp light soy sauce
- 1 tbsp Kewpie Mayo
- 1 tbsp Sriracha
- 1 tsp sesame oil
Other
- 3 large nori sheets
- furikake, for garnish
- 1 green onion, chopped, for garnish
- cooking spray
Instructions
- Cook Sushi Rice: Prepare the sushi rice according to the package instructions until fully cooked and tender.
- Season Rice: In a microwave-safe bowl, combine rice vinegar and sugar, then microwave for about 30 seconds until the sugar dissolves. Pour this mixture over the cooked rice and gently fold to combine, allowing the flavors to absorb while you prepare the salmon.
- Preheat Oven: Set your oven to 400℉ (204℃) and allow it to fully preheat.
- Mix Salmon: In a bowl, combine the cubed salmon with light soy sauce, Kewpie mayo, Sriracha, and sesame oil. Stir well to coat the salmon evenly with the sauce.
- Prepare Nori: Cut each nori sheet into 4 rectangles or squares, sized appropriately to fit inside a standard muffin tin cup.
- Assemble Sushi Cups: Lightly spray the muffin tin with cooking spray. Place one nori square into each muffin cup, then add a spoonful of the seasoned sushi rice into the center of each nori piece, pressing down gently to form a base. Top the rice with a layer of the salmon mixture.
- Bake: Place the muffin tin in the preheated oven and bake for 15 minutes, or until the salmon is cooked through and the tops are slightly golden.
- Garnish and Serve: Remove the sushi cups from the oven and allow them to cool briefly. Drizzle additional sriracha or spicy mayo on top, then garnish with furikake and chopped green onions. Serve immediately and enjoy!
Notes
- Use fresh, sushi-grade salmon for the best flavor and safety.
- You can adjust the amount of sriracha for more or less spice according to preference.
- If Kewpie mayo is unavailable, regular Japanese-style mayo or a mixture of mayonnaise and a small amount of rice vinegar can be used as a substitute.
- Ensure nori sheets are stored in an airtight container to prevent them from becoming soggy before assembling.
- These sushi cups are best enjoyed fresh but can be stored covered in the refrigerator for up to 1 day.
Keywords: baked salmon sushi cups, sushi recipe, easy sushi cups, Japanese appetizer, baked sushi, salmon recipes