Classic Cheesecake Recipe
I’m so excited to share this Classic Cheesecake Recipe with you because it’s truly a dessert that never goes out of style. From the moment you slice into that creamy, smooth filling with its perfectly crunchy graham cracker crust, you’ll know why it’s a favorite in my kitchen. Whether it’s a special family gathering, a birthday celebration, or just because you want to treat yourself, this cheesecake fits the bill beautifully.
One of the reasons I keep coming back to this Classic Cheesecake Recipe is how reliably it turns out rich, smooth, and buttery without any complicated steps. Plus, with just a handful of ingredients, most of which you probably already have on hand, you can whip up a dessert that tastes like it came from a fancy bakery. I can’t wait for you to try it—you’ll see why it deserves a permanent spot in your dessert rotation!
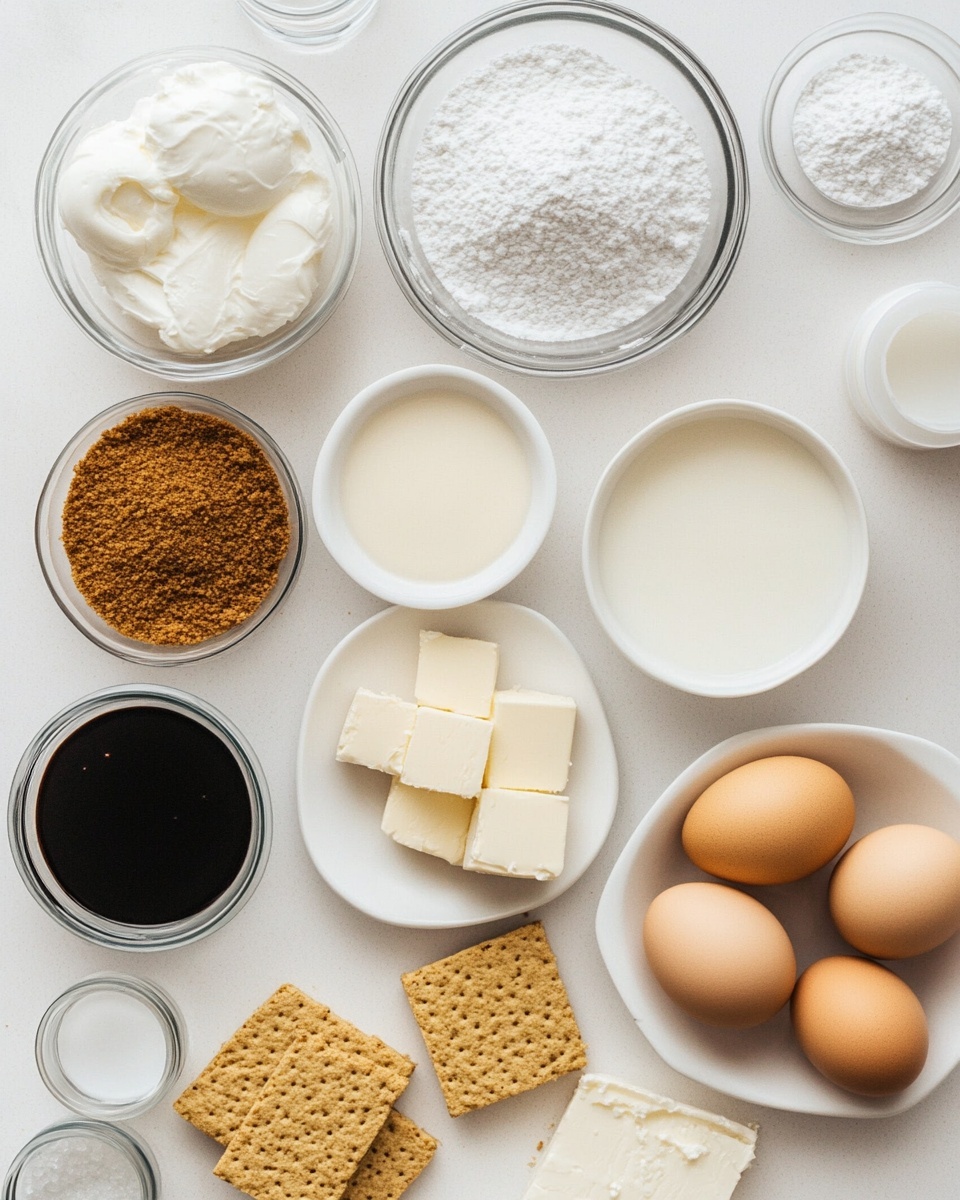
Ingredients You’ll Need
This combination of ingredients hits the sweet spot between creamy richness and subtle tang, while the crust adds that perfect buttery crunch. When shopping, grab good-quality cream cheese and fresh eggs to get the best texture and flavor in your cheesecake.
- Graham cracker crumbs: Using finely crushed crumbs gives your crust that classic texture. You can crush them yourself or buy pre-crushed for convenience.
- Granulated sugar: Sweetens both crust and filling in just the right amount without overpowering.
- Butter: Melted butter binds the crust crumbs together and adds richness—unsalted works best so you can control the salt level.
- Kosher salt: Just a pinch to enhance flavors and balance sweetness.
- Cream cheese: The star of the show! Make sure it’s at room temperature so it blends smoothly without lumps.
- Vanilla extract: Adds depth and warmth to the flavor profile—pure vanilla is well worth it.
- Sour cream: Brings a subtle tang and silky finish to the cheesecake’s texture.
- Fresh lemon juice: Just a bit brightens and lifts the flavors beautifully.
- Large eggs: At room temperature for even mixing and to help set the cheesecake properly.
Variations
While I love this Classic Cheesecake Recipe as is, I’ve found a few tweaks that let you make it your own. Whether you want to add some fruit, adjust sweetness, or make it a little more diet-friendly, feel free to experiment and find what suits your taste.
- Berry Swirl: I love folding in fresh raspberry or blueberry puree just before baking for a stunning visual effect and tart bite.
- Chocolate Cheesecake: Add melted bittersweet chocolate to the filling for a decadent twist—this one’s a crowd pleaser!
- Gluten-Free Crust: Swap graham crackers for gluten-free cookies or crushed nuts to keep it allergy-friendly without sacrificing crunch.
- Lower Sugar Version: You can reduce sugar slightly and replace with a touch of honey or maple syrup, but expect subtle differences in texture.
- Mini Cheesecakes: Use muffin tins or mini springform pans to bake individual portions—perfect for parties or quick desserts.
How to Make Classic Cheesecake Recipe
Step 1: Create your perfect graham cracker crust
Start by preheating your oven to 350°F and placing the rack low enough to fit your roasting pan later on. Use a food processor to finely crush your graham crackers—if you don’t have one, a zip-top bag and rolling pin do the trick. Mix the crumbs with sugar and melted butter, then press them firmly into your springform pan. I like to use the bottom of a measuring cup to really pack it down—it helps avoid a crumbly crust later. Bake for about 8 to 10 minutes until it feels firm to the touch and smells toasty. Set it aside to cool a bit while you make the filling.
Step 2: Whip up a creamy filling
Lower your oven temperature to 325°F while you get to work on the filling. Beat the cream cheese and sugar together until totally smooth and creamy—this usually takes a couple of minutes with a mixer. Then, add sour cream, vanilla, and lemon juice and mix just until combined. The eggs come in last: add them one at a time on low speed so the mixture stays silky and doesn’t trap too much air. Overmixing here is one of the biggest reasons cheesecakes crack, so take your time!
Step 3: Bake in a water bath for that perfect finish
Wrap the bottom and sides of your springform pan tightly with heavy-duty foil—this prevents water from leaking in when you place it in the roasting pan. Pour your batter evenly over the crust, smoothing the top carefully with a spatula. Place your pan inside the roasting pan, then pour boiling water into the roasting pan until it comes about an inch up the sides of your springform pan. This gentle steam bath keeps the cheesecake moist and prevents cracks. Bake for 55 to 70 minutes—when done, the center should only jiggle a little when you shake it. Switch off the oven, crack the door, and let the cheesecake cool inside the water bath for an hour. This step is key for a flawless texture!
Step 4: Chill and serve
Once cooled, remove the cheesecake from the water bath and let it sit at room temperature until completely cool. Then cover and refrigerate for at least 4 hours, though I prefer overnight for the best flavor and firmness. Before serving, run a knife around the pan’s edge to loosen the cheesecake, then unlock and remove the rim. Slice with a sharp, clean knife for beautiful, clean pieces.
How to Serve Classic Cheesecake Recipe
Garnishes
I’m a fan of keeping it simple with this cheesecake—sometimes a dusting of powdered sugar or fresh berries on top is all it needs. If I’m feeling fancy, I drizzle some homemade strawberry sauce or whipped cream for that extra wow factor. Fresh mint leaves add a pop of color and freshness. These little touches really elevate the experience but don’t overpower the creamy cheesecake itself.
Side Dishes
This cheesecake pairs wonderfully with a cup of freshly brewed coffee or a glass of dessert wine for an indulgent finish. I also like serving it alongside fresh fruit salads or light lemon sorbet to balance the richness. If you’re bringing it to a party, offering some assorted nuts or cookies on the side lets everyone customize their bites.
Creative Ways to Present
For special events, I’ve tried layering this Classic Cheesecake Recipe in clear glass trifle bowls with layers of fruit compote for a show-stopping presentation. Mini cheesecakes decorated with edible flowers or gold leaf make elegant, bite-sized sweets. If you make a larger cheesecake, piping whipped cream around the edges and topping with fresh fruit arranged in patterns always draws compliments.
Make Ahead and Storage
Storing Leftovers
Leftover cheesecake is honestly a gift—if you have any! I store mine in an airtight container or tightly wrapped with plastic wrap to keep it from drying out. It keeps beautifully in the fridge for up to 5 days, and I often find the flavors deepen the next day.
Freezing
If you want to prepare ahead or save slices for later, freezing works well. I recommend slicing the cheesecake first, wrapping each piece tightly in plastic wrap and then foil to prevent freezer burn. When you’re ready to enjoy, thaw overnight in the fridge for the best texture.
Reheating
Cheesecake is best enjoyed cold, but if you’d like it a bit softer, I pop slices in the microwave for 10-15 seconds—just enough to take the chill off without melting. Avoid reheating for too long as it can change the texture.
FAQs
-
Can I make the Classic Cheesecake Recipe without a water bath?
Technically yes, but I highly recommend using a water bath for moisture and even baking. Without it, you risk dry edges and cracks. Wrapping the pan with foil and baking in a water bath keeps the cheesecake silky smooth.
-
Why does my cheesecake crack and how can I prevent it?
The most common cause is overmixing or baking at too high a temperature. To avoid cracks, mix ingredients gently, bake in a water bath, and cool the cheesecake gradually in the oven with the door cracked open.
-
Can I use whipped cream cheese instead of block cream cheese?
I’d stick with block cream cheese because whipped versions have added air and stabilizers that can affect the texture and consistency of your cheesecake.
-
How do I know when the cheesecake is done baking?
The edges should be set and the center will still jiggle slightly when you gently shake the pan. It continues to cook as it cools, so remove it once this stage is reached.
-
Can I prepare the crust ahead of time?
Absolutely! You can make and bake the crust a day ahead and keep it covered at room temperature. Just be sure it’s cool before adding the filling.
Final Thoughts
There’s something so comforting about this Classic Cheesecake Recipe—its creamy texture, subtle tang, and buttery crust remind me of every celebration and cozy night in. I honestly can’t recommend it enough if you want a reliable, crowd-pleasing dessert that feels a little fancy but isn’t fussy. Give it a try, take your time with the steps, and soon you’ll have a cheesecake that friends and family will be asking for again and again. Trust me, once you make it, this recipe will become your new go-to classic.
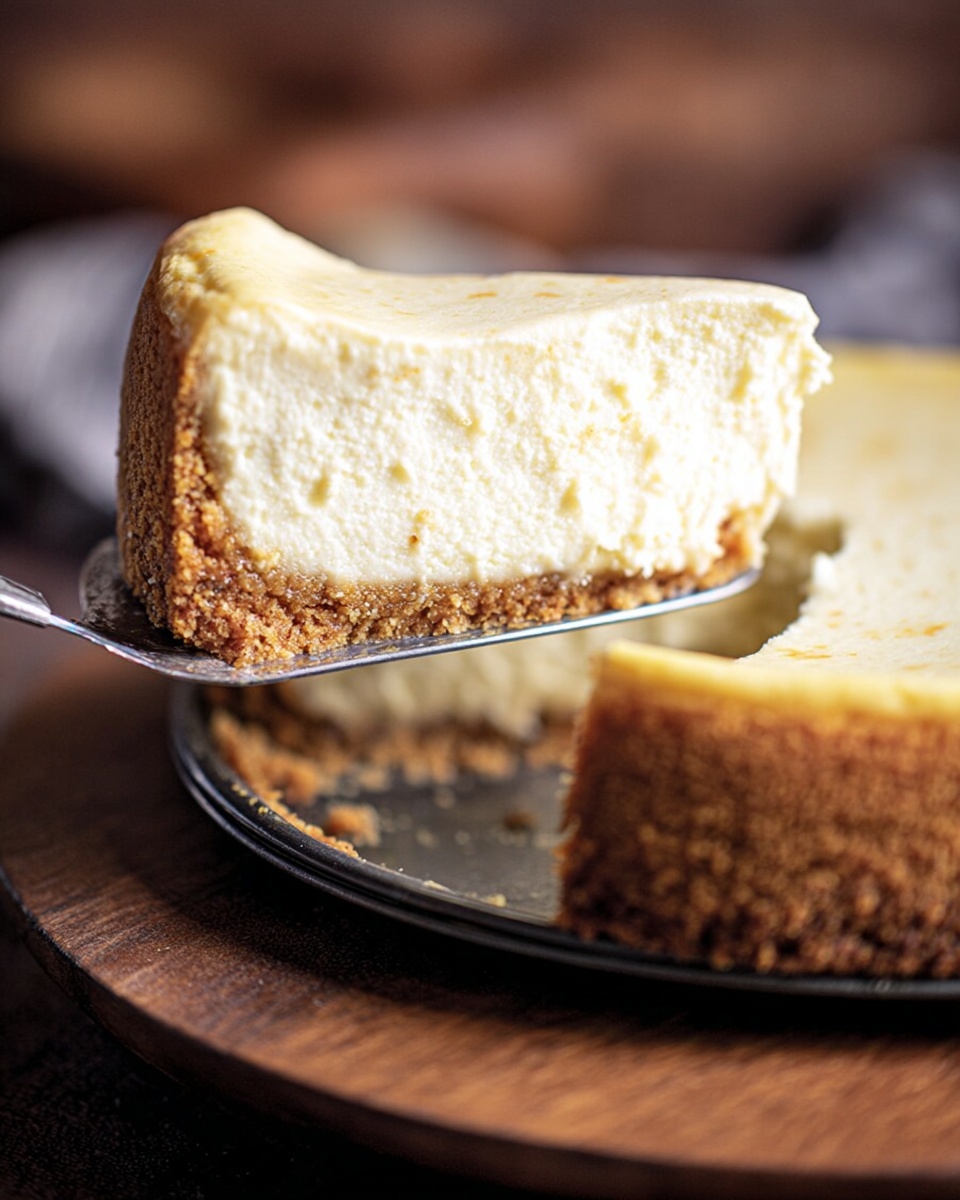
PrintClassic Cheesecake Recipe

This Classic Cheesecake Recipe features a creamy, rich filling set atop a buttery graham cracker crust, baked in a water bath to ensure a smooth, crack-free texture. Perfect for celebrations or a special dessert, this cheesecake is silky, tangy with a hint of lemon, and can be served plain or with your favorite toppings.
- Prep Time: 20 minutes
- Cook Time: 1 hour 15 minutes
- Total Time: 9 hours 35 minutes
- Yield: 12 servings 1x
- Category: Dessert
- Method: Baking
- Cuisine: American
Ingredients
Graham Cracker Crust
- 2 cups graham cracker crumbs
- ¼ cup granulated sugar
- 7 tablespoons butter, melted
- Pinch kosher salt
Cheesecake Filling
- 4 blocks (8 ounces each) cream cheese, room temperature
- 1 cup granulated sugar
- 1 teaspoon vanilla extract
- 1 cup sour cream, room temperature
- 2 teaspoons fresh squeezed lemon juice
- 3 large eggs, room temperature
Instructions
- Making the Graham Cracker Crust: Preheat oven to 350°F (175°C) and adjust the oven rack to the lower middle position to fit the roasting pan. Pulse graham crackers in a food processor until fine crumbs form. Add sugar and melted butter; pulse until combined and sandy in texture. Pour this mixture into the bottom of a 9 or 10 inch springform pan lined with parchment paper or foil if desired.
- Pressing and Pre-baking the Crust: Press the crumb mixture firmly into the bottom and slightly up the sides of the springform pan, using the bottom of a measuring cup for even pressing. Bake the crust for 8 to 10 minutes, then remove and let cool slightly on a cooling rack while preparing the filling.
- Preparing the Cheesecake Filling: Lower the oven temperature to 325°F (163°C). Using a stand or handheld mixer with paddle attachment, beat the cream cheese and sugar on medium-high speed until smooth and creamy, about 2 minutes. Add sour cream, vanilla, and lemon juice; beat until combined. On medium-low speed, add eggs one at a time, mixing each completely before adding the next, to avoid over mixing and cracking.
- Setting Up the Water Bath and Baking: Boil enough water to fill a roasting pan with 1 inch depth. Wrap the outside of the springform pan with heavy-duty aluminum foil to prevent water leakage. Pour the cheesecake batter evenly over the crust and smooth the top with a spatula.
- Baking the Cheesecake: Place the foil-wrapped springform pan into the roasting pan. Carefully pour the hot water into the roasting pan around the springform pan. Bake for 55 to 70 minutes until the center is almost set but still jiggles slightly when gently shaken.
- Cooling: Turn off the oven and slightly open the door. Let the cheesecake sit in the water bath inside the oven for 1 hour to cool gradually. Then remove from oven and water bath; cool completely at room temperature.
- Chilling: Refrigerate the cheesecake for at least 4 hours, preferably overnight, to fully set.
- Serving: Run a knife along the edges of the springform pan to loosen the cheesecake before unlocking and removing the rim. Slice with a clean sharp knife and serve as is or with toppings of your choice.
- Storage: Cover and store any leftovers in the refrigerator for up to 5 days.
Notes
- Using room temperature ingredients helps achieve a smooth batter and prevents lumps.
- Wrapping the springform pan with foil is crucial to prevent water from seeping into the crust during the water bath baking.
- Do not overbeat the eggs into the batter to avoid cracking the cheesecake.
- The water bath method ensures gentle and even cooking to create a creamy texture.
- Allow the cheesecake to cool gradually in the oven with the door slightly open to prevent cracking from sudden temperature changes.
- Use a hot, wet knife for clean slicing.
Keywords: classic cheesecake, graham cracker crust, creamy cheesecake, baked cheesecake, homemade cheesecake