Chocolate Babka Recipe
There’s something truly magical about making a Chocolate Babka Recipe from scratch, isn’t there? I remember the first time I made this rich, swirled bread filled with luscious chocolate – the aroma that filled my kitchen was irresistible. Chocolate Babka is special because it strikes that perfect balance between sweet, buttery bread and a decadent chocolate swirl, making it a delightful treat whenever you want to impress or simply indulge.
This Chocolate Babka Recipe works wonders for cozy weekends, holiday brunches, or even as a thoughtful homemade gift. What I love most is how approachable it is – even if you think bread baking is intimidating, I’ll guide you through every step to help you succeed. You’ll discover that with a little patience and love, you can whip up a stunning loaf that tastes way more complicated than it really is.
Ingredients You’ll Need
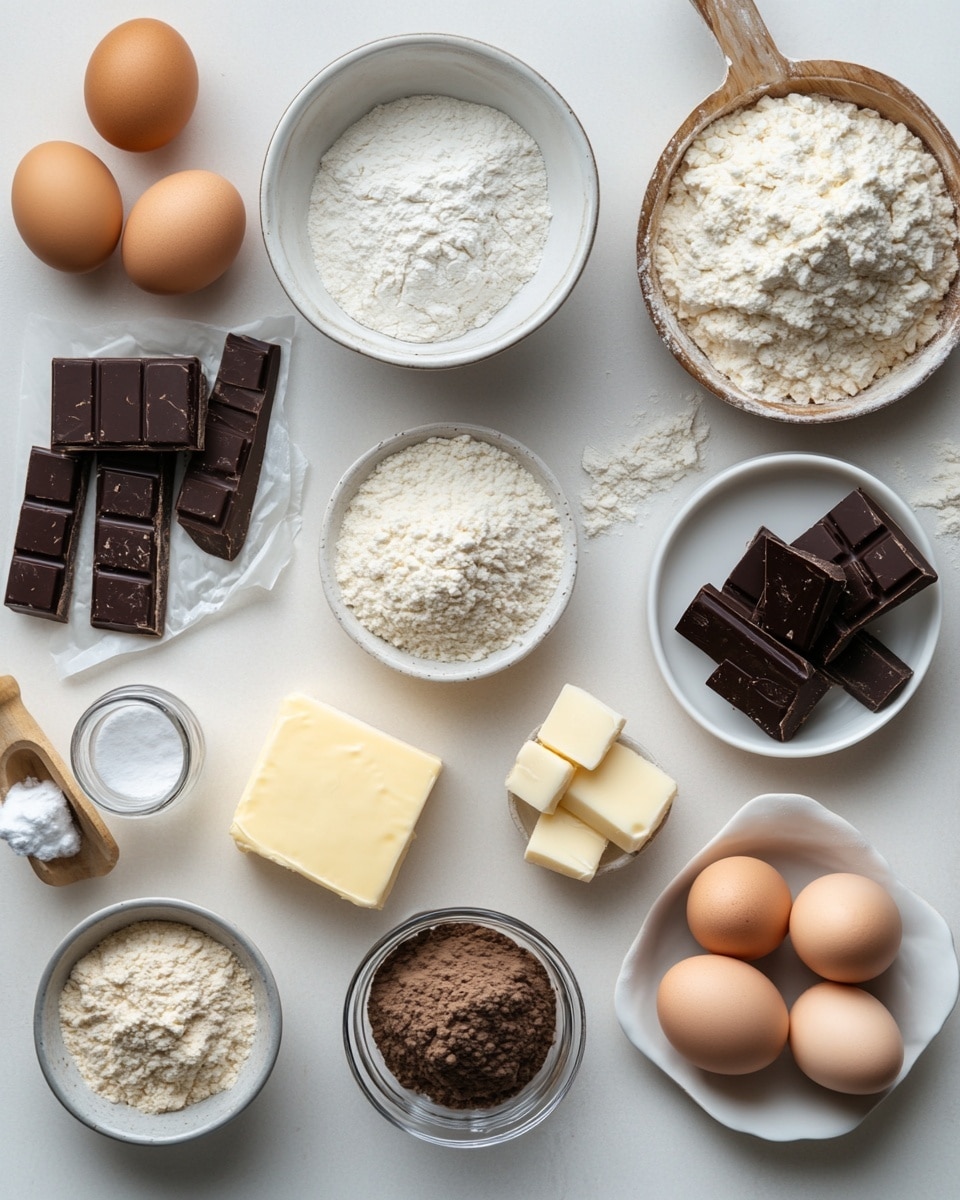
The magic of this Chocolate Babka Recipe lies in simple yet well-chosen ingredients. Using room temperature components and good quality chocolate really makes all the difference – trust me, the payoff is worth having those small details nailed down.
- All-purpose flour: This is the backbone of your dough; pick a good quality one for that tender crumb.
- Granulated sugar: Sweetens the dough just right without overpowering the chocolate.
- Instant yeast: Helps the dough rise perfectly without the fuss of proofing warm yeast first.
- Large eggs (room temperature): Room temp eggs blend better, making your dough silkier.
- Whole milk (room temperature): Adds richness and helps the yeast activate smoothly.
- Kosher salt: Balances sweetness and enhances flavor in the dough.
- Unsalted butter (room temperature): Key for a tender crumb and rich flavor throughout the dough.
- Heavy cream: Makes the filling creamy and luxurious.
- Dark chocolate (chopped): Use a good quality dark chocolate for an intense, fudgy filling.
- Powdered sugar: Sweetens the filling without a gritty texture.
- Unsweetened cocoa powder: I love Dutch-processed cocoa here for its deep color and smooth flavor.
- Granulated sugar and water for the syrup: This glaze locks in moisture and adds a beautiful shine to your babka.
Variations
One of the best things about this Chocolate Babka Recipe is how flexible it is. I like to switch things up depending on my mood or what’s in my pantry – and you should too! Feel free to get creative and make it uniquely yours.
- Nutty twist: Adding chopped walnuts or pistachios to the filling gives a lovely crunch and depth. I baked a batch with walnuts once and it was a big hit at family brunch.
- Spiced chocolate: A pinch of cinnamon or chili powder in the filling adds warmth and spice that’s perfect for colder months.
- Dairy-free swap: Substitute almond milk and coconut cream for a dairy-free version. I tried it for a friend and was pleasantly surprised by how tasty it turned out.
- White chocolate version: Use white chocolate chunks instead of dark for a sweeter, creamier filling – perfect if you prefer milder chocolate.
How to Make Chocolate Babka Recipe
Step 1: Mix and Knead the Dough
Start by whisking the flour, sugar, and instant yeast together in your stand mixer bowl. Then add the eggs, whole milk, and salt, mixing on low speed with the dough hook until the dough starts to come together—about 2 minutes. Now for the fun part: slowly add the butter, a tablespoon at a time, waiting for each addition to fully incorporate before adding more. Knead everything for about 10 minutes until you’ve got a smooth, elastic dough that’s still slightly sticky but wonderfully stretchy. Trust me, this step sets the foundation — so don’t rush it. If you don’t have a mixer, a long session with a wooden spoon and your hands works too; just be patient.
Step 2: Chill Overnight
Transfer your dough to a large oiled bowl and turn it around to coat. Cover tightly and let it chill in the fridge overnight or at least 8 hours. This slow fermentation adds flavor and makes the dough easier to handle when rolling out. I love doing this step in the evening and baking in the morning for a fresh breakfast surprise.
Step 3: Make the Chocolate Filling
In a small saucepan, gently heat butter and heavy cream over medium heat just until the butter melts and things start to steam. Remove from heat and stir in the chopped dark chocolate until silky smooth. Then whisk in powdered sugar and cocoa powder until perfectly spreadable. This filling is thick but soft enough to spread—if it’s still too runny after cooling for an hour, just pop it back in the fridge for a bit longer.
Step 4: Roll, Fill, and Twist
Butter your loaf pans and line them with parchment paper (this is crucial for easy removal later). On a floured surface, divide the dough in half and roll one half into a 12×16-inch rectangle. Spread half the chocolate filling evenly, leaving about a 1-inch border on one short side. Don’t fret if the dough pulls a bit—just spread gently without tearing. Starting from the short side opposite the border, roll the dough tightly into a coil, then pinch the seam closed.
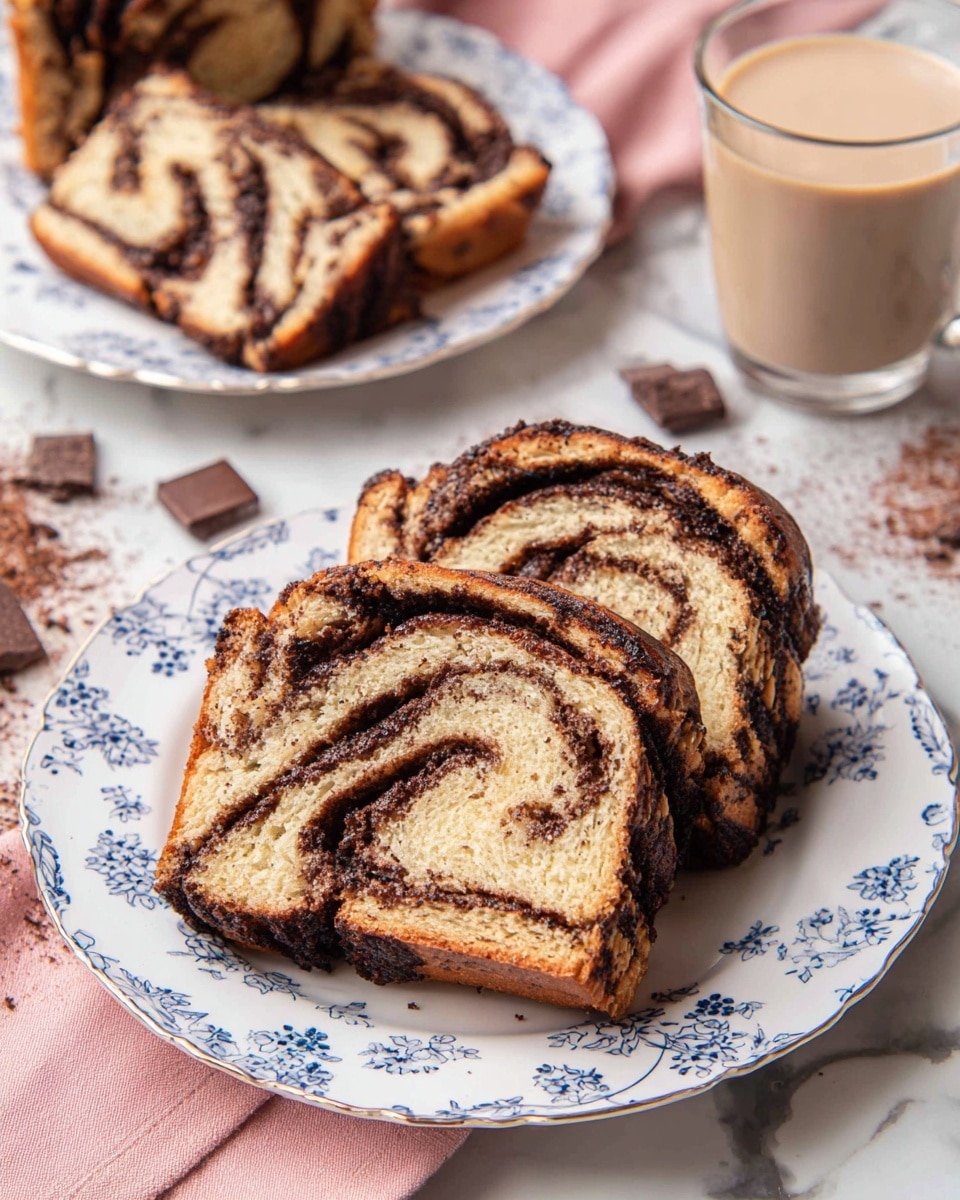
Next, cut the roll lengthwise with a sharp knife, revealing the beautiful chocolate layers inside. Lay the two strips side by side, cut sides up, and twist them together gently, then tuck the ends underneath and place inside the loaf pan. Repeat with the second half.
Step 5: Rise and Bake
Let your babkas rise in a warm spot, covered loosely, for about 1.5 to 2 hours. They should puff noticeably but won’t quite double in size – that’s normal! Meanwhile, preheat your oven to 350°F. Bake for around 40 minutes until the tops are a gorgeous golden brown and a wooden pick inserted into the center comes out clean. A quick tip: I sometimes use an instant-read thermometer to check for 190°F internally when I want that extra reassurance.
Step 6: Glaze and Cool
As your babkas bake, whip up the syrup by simmering sugar and water until the sugar dissolves completely. Right out of the oven, brush the loaves generously with this syrup to give that signature shiny finish and to keep the bread moist. Let the babkas cool in their pans for about 30 minutes—this part is tough because it smells so heavenly!
How to Serve Chocolate Babka Recipe
Garnishes
I often keep the garnishes simple because the Chocolate Babka is so rich on its own, but a light dusting of powdered sugar or a sprinkle of chopped toasted nuts on top can add a nice touch. A smear of softened butter on a warm slice never disappoints either.
Side Dishes
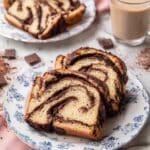
This babka is fantastic alongside a cup of coffee or a rich hot chocolate. For breakfast or brunch, I like pairing it with fresh fruit or even a dollop of crème fraîche to balance the richness.
Creative Ways to Present
If you’re serving Chocolate Babka Recipe for a special occasion, I sometimes slice the loaves and arrange the pieces in a pretty basket lined with a colorful napkin. You can also give individual slices a quick toast and serve them with a drizzle of honey or a side of whipped cream for a fancy touch that guests love.
Make Ahead and Storage
Storing Leftovers
Leftover babka keeps really well at room temperature when wrapped tightly in plastic wrap or stored in an airtight container. I usually keep mine on the kitchen counter for up to two days, but you can safely store it for around three days if it’s well sealed.
Freezing
One of my favorite tricks is freezing babka slices individually wrapped in parchment and foil. This way, I can grab a slice whenever the chocolate craving hits. Just thaw them at room temperature or warm them slightly in the oven or toaster.
Reheating
To reheat, I find lightly toasting the slices or warming them in a 300°F oven for about 5-7 minutes works beautifully. It helps revive that fresh-baked warmth and makes the chocolate gooey again without drying out the bread.
FAQs
-
Can I make the Chocolate Babka Recipe without a stand mixer?
Absolutely! While a stand mixer with a dough hook makes kneading easier and faster, you can mix the dough by hand with a sturdy spoon first, then knead it on a lightly floured surface by hand for about 10-15 minutes until smooth and elastic. It takes more elbow grease but is totally doable.
-
Why do you chill the dough overnight?
Chilling the dough overnight allows the yeast to ferment slowly, enhancing the flavor and making the dough easier to roll out and shape. It also helps develop that beautiful texture and makes for a more tender babka.
-
Can I substitute dark chocolate with milk chocolate?
You can, but switching to milk chocolate will result in a sweeter and less intense filling. If you prefer that, go ahead! Just keep in mind it will be less rich and fudgy compared to the classic dark chocolate version.
-
Is it necessary to brush the syrup on the babka?
Yes, this step is key! The syrup adds a lovely shine and keeps the bread moist so it doesn’t dry out quickly. Skipping it might leave your babka looking dull and less luscious.
Final Thoughts
Making this Chocolate Babka Recipe always feels like a little celebration in my kitchen. The process is wonderfully rewarding and the result is a show-stopping, delicious treat that you’ll be proud to share. If you’ve been hesitant about bread baking, this is a perfect place to start – it’s forgiving, delicious, and honestly, the best way I know to fill your home with the smell of warmth and chocolate. Give it a try, and I promise you’ll be hooked!
PrintChocolate Babka Recipe
This indulgent Chocolate Babka recipe features a rich, buttery yeast dough swirled with a luscious chocolate filling and finished with a sweet syrup glaze. Perfect for breakfast, dessert, or any special occasion, this homemade babka boasts a tender crumb and a shiny, flavorful crust.
- Prep Time: 9 hours
- Cook Time: 40 minutes
- Total Time: 9 hours 40 minutes
- Yield: 16 servings (2 loaves) 1x
- Category: Bread
- Method: Baking
- Cuisine: Jewish
Ingredients
For the Dough:
- 4½ cups all-purpose flour (540g)
- ½ cup granulated sugar (100g)
- 2¼ teaspoons instant yeast (1 ¼-ounce packet)
- 4 large eggs, room temperature
- ½ cup whole milk, room temperature
- 1½ teaspoons kosher salt
- 10 tablespoons unsalted butter, room temperature (142g)
For the Filling:
- ½ cup unsalted butter, cubed (113g)
- ½ cup heavy cream (120mL)
- 8 ounces chopped dark chocolate (225g)
- ¾ cup powdered sugar (90g)
- ⅓ cup unsweetened cocoa powder (30g)
For the Syrup:
- ⅓ cup granulated sugar (66g)
- ⅓ cup water (80mL)
Instructions
- Make the Dough: Whisk together the flour, sugar, and yeast in the bowl of a stand mixer. Add the eggs, milk, and salt and mix on low speed using the dough hook attachment until combined and a dough starts to form, about 2 minutes.
- Add Butter and Knead: Add the butter a tablespoon at a time, waiting until it is incorporated before adding more. Continue kneading until a smooth, elastic dough forms, about 10 minutes, scraping down the bowl occasionally. The dough will be sticky but very stretchy.
- Chill the Dough: Transfer the dough to a large oiled bowl, turning to coat. Cover and chill overnight or at least 8 hours.
- Prepare the Filling: In a small saucepan over medium heat, combine butter and cream. Heat until butter melts and mixture steams. Add the chopped chocolate and stir until melted. Remove from heat and whisk in powdered sugar and cocoa powder. Let cool until thickened to a spreadable consistency, about 1 hour.
- Prepare Loaf Pans: Butter two 8×4-inch loaf pans or spray with baking spray and flour. Line pans with parchment paper.
- Divide and Roll Dough: On a lightly floured surface, halve the chilled dough. Return one half to the fridge. Roll the other half into a 12×16-inch rectangle.
- Spread Filling: Spread half of the chocolate filling evenly over the dough, covering all but a 1-inch border on one short side. The dough may pull but should not tear.
- Roll Dough: Starting opposite the border, roll the dough into a tight coil and pinch the seam to seal.
- Cut and Twist: Using a sharp knife, cut the roll lengthwise in half. Place halves side by side with cut sides up. Twist them together, keeping cut sides facing up, and tuck the ends under. Place gently into a prepared loaf pan.
- Repeat: Repeat the rolling, filling, cutting, twisting, and placing process with the second dough half and remaining filling.
- Let Rise: Loosely cover the pans and let rise in a warm place for 1½ to 2 hours until puffed (not quite doubled).
- Preheat Oven: Preheat the oven to 350°F (175°C).
- Bake: Bake loaves for 40 minutes or until tops are golden brown and a wooden pick inserted into the center comes out clean.
- Make Syrup: While baking, combine sugar and water in a small saucepan. Simmer over medium heat, stirring until sugar dissolves. Remove from heat.
- Brush Syrup: Brush the hot loaves immediately with the syrup after removing them from the oven. Let cool in pans for 30 minutes before serving warm or at room temperature.
Notes
- Makes 2 (8×4-inch) loaves.
- Use high-quality Dutch-processed cocoa powder for a deeper flavor and fudgier texture; Hershey’s or Ghirardelli are recommended.
- To ensure doneness, use an instant-read thermometer to check that the internal temperature reaches 190°F.
- The syrup glaze adds shine and moisture to keep the bread from drying out.
- If you don’t have a stand mixer, you can mix by hand with a wooden spoon and knead for 10-15 minutes, being careful not to add too much extra flour.
Keywords: Chocolate Babka, Yeast Bread, Sweet Yeast Dough, Chocolate Swirl Bread, Holiday Bread, Jewish Bakery Recipe