Chicken Onigiri with Teriyaki Chicken Filling Recipe
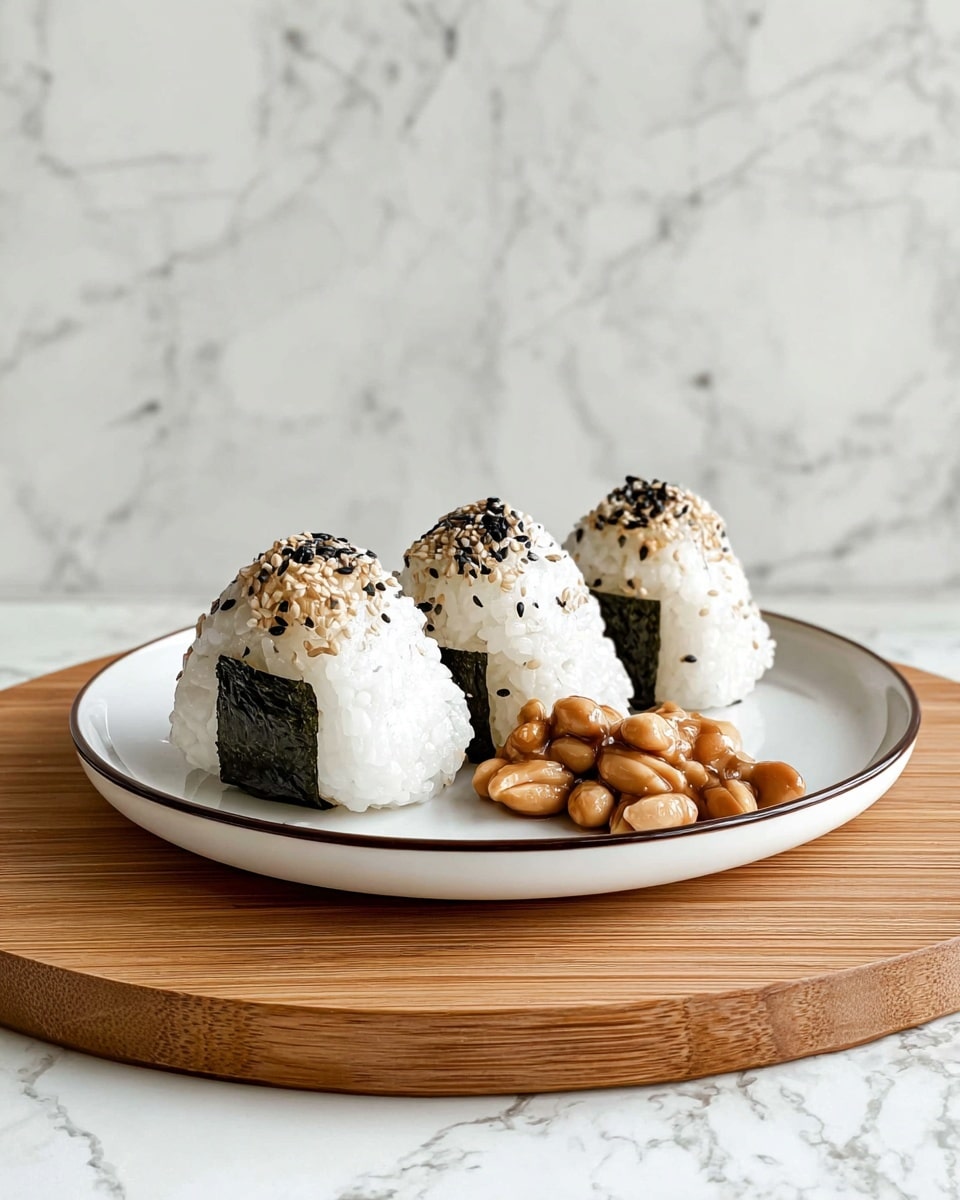
If you’ve ever wanted to bring a little taste of Japan into your kitchen, this Chicken Onigiri with Teriyaki Chicken Filling Recipe is a perfect place to start. These handheld rice balls filled with tender teriyaki chicken are the ultimate comfort snack that’s both satisfying and fun to make. Whether you’re packing lunch for work, prepping an easy dinner, or serving something special for a gathering, this recipe hits all the right notes.
I remember first making these onigiri when I was craving something warm, portable, and totally flavorful without fussing over complicated techniques. The magic really lies in the juicy teriyaki chicken wrapped in seasoned sushi rice, which creates this perfect balance of savory and sweet. Plus, they’re great to customize, so you’ll find yourself wanting to make them again and again.
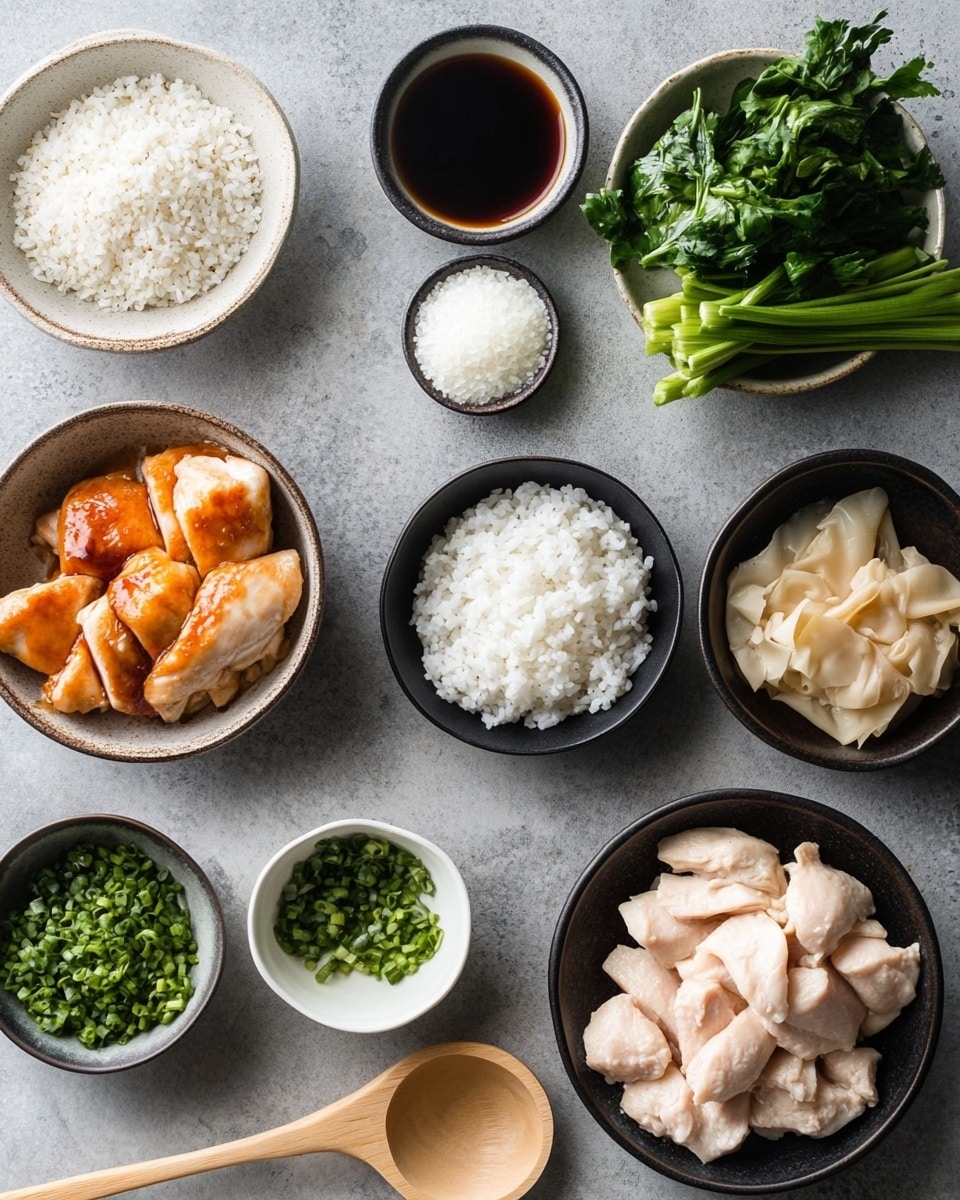
Ingredients You’ll Need
I love that the ingredients for this Chicken Onigiri with Teriyaki Chicken Filling Recipe come together simply but pack a real punch in flavor. Ingredients like sushi rice and furikake make the rice tasty on its own, while the marinade and teriyaki sauce bring that crave-worthy glaze to the chicken. When shopping, fresh chicken and good quality soy sauce make a noticeable difference.
- Sushi Rice: Use short-grain Japanese rice for the perfect sticky texture essential for shaping onigiri.
- Salt: Fine salt dissolves evenly, seasoning the rice without any graininess.
- Furikake (optional): A Japanese seasoning mix that adds umami and a little crunch—feel free to sprinkle it directly into the rice or on the finished onigiri.
- Boneless Skinless Chicken Meat: I prefer using drumsticks for extra juiciness, but chicken breast works fine too.
- Soy Sauce: Look for a naturally brewed soy sauce to give the chicken that rich umami flavor.
- Sake (or Water): Adds moisture and depth to the chicken marinade.
- Baking Soda: Helps tenderize the chicken for that melt-in-your-mouth bite.
- Cornstarch: Gives the chicken a nice sheen and helps thicken the teriyaki glaze.
- Mirin: This adds sweetness and gloss to the teriyaki sauce; if you don’t have it, a sweet white wine or additional sugar can work.
- Brown Sugar: Adds caramel notes making the teriyaki sauce irresistible.
- Oil: For cooking the chicken evenly and preventing sticking.
- Minced Garlic: Garlic pairs beautifully with the teriyaki glaze, boosting flavor complexity.
- Nori Sheets: Cut into small rectangles to wrap the onigiri — the seaweed adds texture and an ocean-fresh taste.
Variations
I’m all about mixing things up depending on what’s in my fridge or what I’m craving. This Chicken Onigiri with Teriyaki Chicken Filling Recipe lends itself to easy customization — don’t be shy about adding your own twist!
- Spicy Kick: Add a teaspoon of chili paste or sprinkle some shichimi togarashi (Japanese seven-spice) into the teriyaki sauce for a fiery version. I tried this once for a game night, and it was a hit.
- Vegetarian Option: Swap the chicken for sautéed mushrooms or marinated tofu with the same teriyaki sauce—surprisingly delicious and perfect for meatless Mondays.
- Seasonal Add-ins: Mix some finely chopped green onions, grated ginger, or toasted sesame seeds in the rice for extra aroma and flavor.
- Brown Rice: For a healthier twist, try using cooked brown rice, though shaping can be slightly trickier since it’s less sticky.
How to Make Chicken Onigiri with Teriyaki Chicken Filling Recipe
Step 1: Season Your Sushi Rice
Once your sushi rice is cooked and still warm, sprinkle in about half a teaspoon of fine salt and the furikake if you’re using it. Mixing it right into the rice ensures every bite has a nice balanced flavor. Trust me, it’s better than just sprinkling on later because the seasoning gets evenly absorbed and every grain tastes amazing.
Step 2: Marinate the Chicken
Slice the chicken into bite-sized pieces and mix with soy sauce, sake, baking soda, and cornstarch. The baking soda may sound unusual, but it really helps tenderize the chicken—like magic! Let it rest in the fridge for at least 30 minutes—it’s worth the wait as it makes the meat juicy and full of flavor.
Step 3: Prepare the Teriyaki Sauce
While the chicken marinates, mix soy sauce, mirin, and brown sugar in a small bowl. This simple blend is what transforms the chicken into that rich teriyaki filling that you’ll want to savor with every bite.
Step 4: Cook the Chicken and Make the Glaze
Heat oil in a large nonstick skillet over medium-high heat. Toss in the marinated chicken and cook for about 2 to 3 minutes until it’s fully cooked and sizzling. Lower the heat, add the minced garlic for a quick sauté, then pour in the sauce mixture. Let it simmer until it reduces into a sticky, glossy glaze—that’s the magic moment I always look for before taking it off the heat.
Step 5: Shape Your Onigiri
This is the fun part! Wet your hands with water so the rice won’t stick (a little salt on your hands helps flavor too). Scoop about a third of a cup of rice and gently create a small hollow in your palm. Add a tablespoon of that delicious teriyaki chicken filling, then cover it with another scoop of rice. Press everything together gently into a triangle shape. Wrap a strip of nori around the base for texture and a classic touch.
How to Serve Chicken Onigiri with Teriyaki Chicken Filling Recipe
Garnishes
I like to keep garnishes simple but flavorful. A sprinkle of toasted sesame seeds or a light dusting of extra furikake is my go-to. Sometimes, a tiny dollop of Japanese mayonnaise on the side adds creaminess that pairs beautifully with the savory chicken filling.
Side Dishes
When serving chicken onigiri, I often pair them with a simple miso soup or a crisp cucumber salad to balance the richness of the teriyaki. Pickled veggies like takuan or kimchi also cut through the flavor nicely and brighten the plate.
Creative Ways to Present
For special occasions, I like to turn these onigiri into cute Bento box stars—arranging them alongside colorful veggies, tamagoyaki (Japanese omelet), and little fruit sections. Wrapping nori into fun shapes or using decorative seaweed punches really impresses guests or kids, making the meal interactive and festive.
Make Ahead and Storage
Storing Leftovers
I usually store leftover onigiri in an airtight container in the fridge for up to two days. It’s best to keep the nori separate if you want to retain its crispiness, then wrap it on the day you eat them. The rice might firm up, but a quick reheat helps bring back the softness.
Freezing
Freezing onigiri is a lifesaver for meal prep. I wrap them individually in plastic wrap, then place them in a freezer bag. When you’re ready, just thaw in the fridge overnight or reheat gently in the microwave. The texture changes a bit but they still taste delicious and super convenient.
Reheating
To reheat, I unwrap the onigiri and microwave them covered with a damp paper towel for about 30–45 seconds. This steams the rice gently and keeps it moist. If you want to crisp up the nori again, give it a quick toast in a dry pan or under the broiler for a few seconds after reheating.
FAQs
-
Can I use regular long-grain rice instead of sushi rice for Chicken Onigiri with Teriyaki Chicken Filling Recipe?
While you can, sushi rice (short-grain) is ideal for onigiri because it’s sticky enough to hold its shape. Long-grain rice tends to be fluffier and less sticky, which can make shaping difficult and cause the onigiri to fall apart.
-
What’s the purpose of baking soda in the chicken marinade?
Baking soda tenderizes the chicken by breaking down proteins, resulting in juicier, softer meat. Just be careful not to add too much, or it can affect the taste.
-
Can I make Chicken Onigiri with Teriyaki Chicken Filling Recipe vegan?
Absolutely! Swap the chicken with your favorite plant-based protein like tofu or seasoned mushrooms and use vegan substitutes for soy sauce or mirin to keep the recipe plant-friendly.
-
How long can I keep prepared onigiri in the fridge?
For the best taste and texture, eat them within 1-2 days of making. Store in an airtight container to prevent drying out. Avoid keeping rice at room temperature for too long to reduce the risk of bacteria growth.
-
Is it okay to freeze Chicken Onigiri with Teriyaki Chicken Filling Recipe?
Yes! Freezing is a great option for meal prepping. Just freeze them individually wrapped, then thaw in the fridge before microwaving. It won’t be quite as perfect as fresh but still very enjoyable.
Final Thoughts
This Chicken Onigiri with Teriyaki Chicken Filling Recipe is one of those versatile dishes that always makes me feel like I’ve got a delicious secret up my sleeve. It’s approachable, dependable, and just plain comforting — plus, it’s an absolute crowd-pleaser whenever I bring it to picnics or potlucks. If you give it a try, I bet you’ll find yourself making it again and again, too!
PrintChicken Onigiri with Teriyaki Chicken Filling Recipe
This Chicken Onigiri recipe combines flavorful marinated chicken with seasoned sushi rice to create delicious Japanese rice balls, perfect for a light meal or snack. The chicken is cooked with a sweet teriyaki glaze and wrapped in nori, providing a delightful balance of savory and umami flavors.
- Prep Time: 35 minutes
- Cook Time: 10 minutes
- Total Time: 45 minutes
- Yield: 4 servings 1x
- Category: Lunch
- Method: Stovetop
- Cuisine: Japanese
Ingredients
Rice
- 4 cups cooked sushi rice
- ½ teaspoon fine salt
- 2 tablespoons furikake (optional)
Chicken Marinade
- ½ pound boneless skinless chicken meat (preferably drumsticks)
- 2 teaspoons soy sauce
- 1 tablespoon sake (or water)
- ¼ teaspoon baking soda
- 1 teaspoon cornstarch
Teriyaki Sauce
- 1 ½ tablespoons soy sauce
- 1 tablespoon mirin
- 1 tablespoon firmly packed brown sugar
The Rest
- 1 tablespoon oil
- 1 tablespoon minced garlic
- 1 sheet nori (cut into small rectangles)
Instructions
- Season the Rice: After cooking the sushi rice, mix it thoroughly with ½ a teaspoon of fine salt and 2 tablespoons of furikake if using. This ensures the rice is well seasoned with a subtle savory flavor.
- Prepare the Chicken Marinade: Cut the chicken meat into small pieces and combine with soy sauce, sake (or water), baking soda, and cornstarch in a bowl. Mix well to coat the chicken evenly, then refrigerate for 30 minutes to allow the flavors to penetrate and the chicken to tenderize.
- Make the Teriyaki Sauce: In a small bowl, thoroughly combine soy sauce, mirin, and brown sugar to create a balanced sweet and salty glaze.
- Cook the Chicken: Heat 1 tablespoon of oil in a large nonstick pan over medium-high heat. Add the marinated chicken pieces and cook for 2-3 minutes, stirring occasionally, until the chicken is fully cooked through and no longer pink inside.
- Flavor the Chicken: Reduce the heat to medium, add minced garlic, and cook for 30 seconds to release its aroma. Pour in the teriyaki sauce mixture and continue to cook while stirring until the sauce thickens into a glossy glaze that coats the chicken perfectly. Remove from the heat once done.
- Shape the Onigiri: Wet your hands with water to prevent sticking. Scoop about ⅓ cup of the seasoned rice into one palm, create a small well in the center, and add 1 tablespoon of the glazed chicken as the filling. Cover with another ⅓ cup of rice and shape into a compact triangle by pressing gently with your hands.
- Wrap with Nori: Finally, wrap each onigiri with a small rectangular strip of nori to add flavor and make it easy to hold while eating. Serve immediately or pack for later.
Notes
- Use fine salt to season the rice for even distribution of flavor.
- Furikake can be added directly into the rice or sprinkled on top of the formed onigiri for extra flavor.
- Refrigerate the marinated chicken to tenderize and enhance flavor before cooking.
- Wet your hands with water while shaping onigiri to prevent rice from sticking.
- Feel free to substitute sake with water if unavailable.
- Onigiri are best enjoyed fresh but can be stored in an airtight container for up to a day.
Keywords: Chicken Onigiri, Japanese rice ball, teriyaki chicken, sushi rice, Japanese snack, onigiri recipe