Valentine Hearts Fudge Recipe
I can’t wait to share this Valentine Hearts Fudge Recipe with you — it’s such a treat that’s perfect for celebrating love, friendship, or just indulging your sweet tooth. I first made this recipe a few years ago for Valentine’s Day, and it instantly became a favorite around my kitchen because it’s beautiful, delicious, and has that nostalgic fudge texture we all adore.
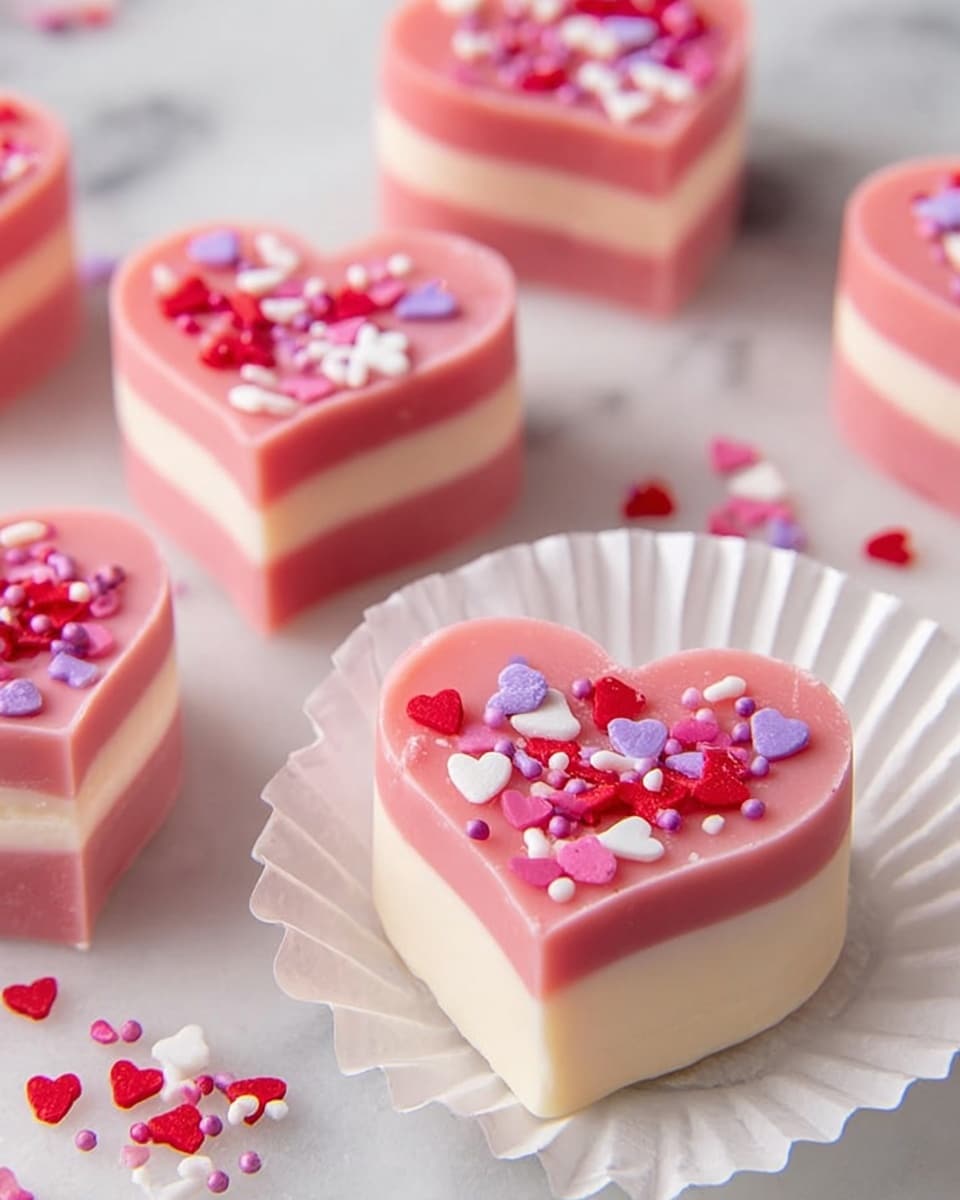
This Valentine Hearts Fudge Recipe works perfectly when you want a show-stopping dessert that’s surprisingly easy to make. What I love is how it layers creamy white chocolate with a vibrant red heart layer, then gets cut into adorable heart shapes — it’s almost as fun to make as it is to eat!
Ingredients You’ll Need
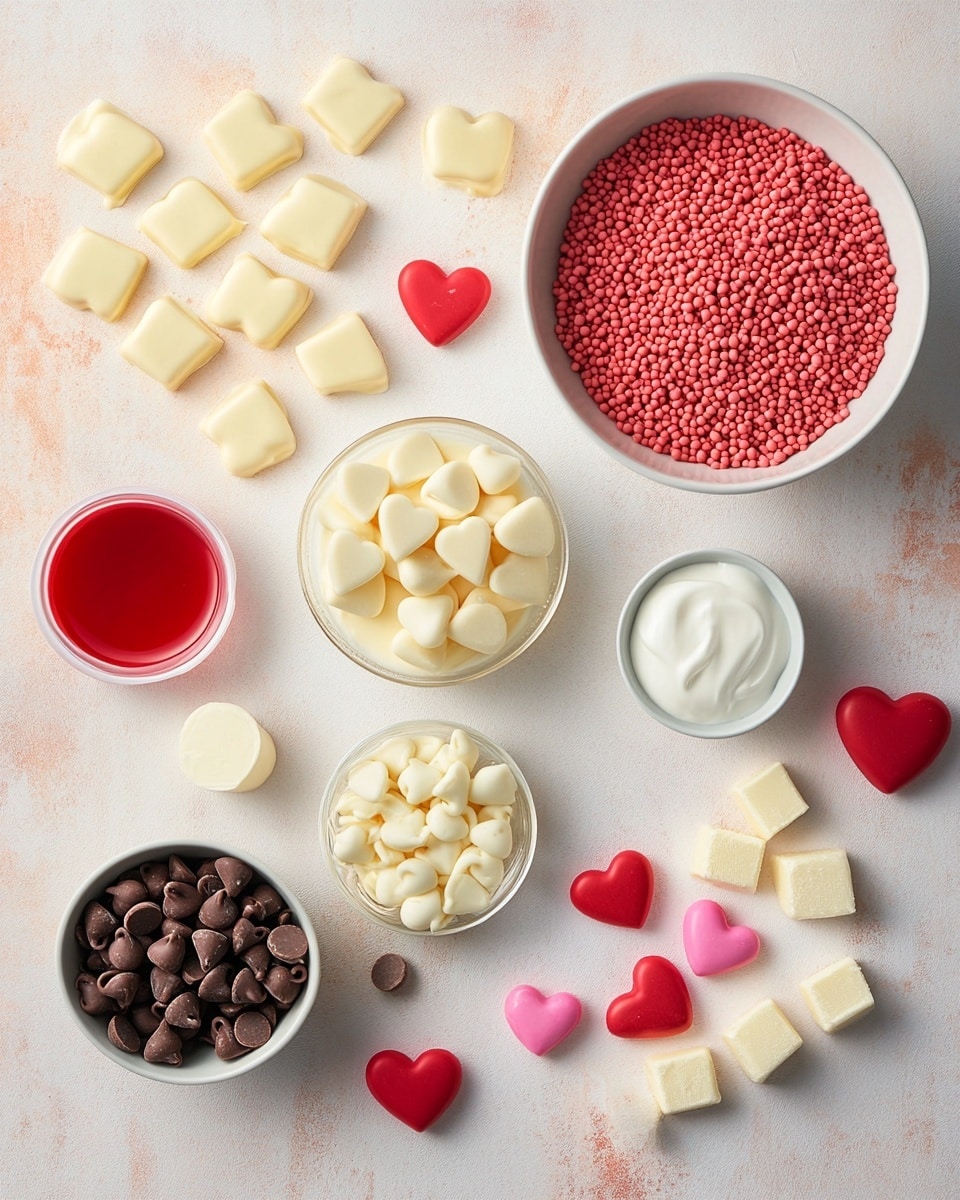
Each ingredient in this Valentine Hearts Fudge Recipe is chosen for its smooth texture and rich flavor, making your fudge melt-in-your-mouth perfection. When shopping, look for high-quality white chocolate chips for the best melt and flavor, and don’t forget the heart-shaped sprinkles for that final festive touch!
- White Chocolate Chips: Use a good quality brand to ensure smooth melting and creamy texture; avoid generic brands that can be grainy.
- Sweetened Condensed Milk: Essential for that classic fudge consistency—don’t substitute with evaporated milk or it won’t set properly.
- Unsalted Butter: Adds richness and helps the fudge set nicely without introducing extra saltiness.
- Red Food Coloring: This gives the Valentine Hearts Fudge its signature vibrant red hue; gel food coloring works best to avoid thinning the mixture.
- Heart-Shaped Sprinkles: These add a playful, festive pop of texture and color, perfect for the Valentine’s Day theme.
Variations
I like to play around with this Valentine Hearts Fudge Recipe sometimes, personalizing it to fit different tastes or occasions. Feel free to change up the flavors or even get a little creative with the toppings — that’s part of the fun!
- Chocolate Swirl Variation: I’ve tried adding a layer of dark or milk chocolate fudge for an extra decadent twist. It makes the layers pop visually and taste-wise.
- Dietary Adjustments: For a dairy-free version, I experimented with vegan white chocolate chips — results were good but a bit softer, so keep that in mind.
- Flavor Boosts: A splash of peppermint extract or a hint of almond extract in the white layers can make a delightful surprise for your Valentine Hearts Fudge.
How to Make Valentine Hearts Fudge Recipe
Step 1: Prep Your Pan Like a Pro
Start by lining an 8×8 inch square pan with parchment paper or sprayed aluminum foil — trust me, this little step makes life so much easier. It allows you to lift the fudge out cleanly for cutting, so your hearts come out perfect without sticking or cracking.
Step 2: Melt the First Layer of Red Fudge
Combine two-thirds of the white chocolate chips, sweetened condensed milk, and butter in a microwave-safe bowl. Microwave in 20-second bursts, stirring well in between, so the chocolate melts evenly without scorching. Once smooth, mix in about 10 drops of red food coloring to get that beautiful Valentine red. Don’t rush this — patience here means silky fudge!
Step 3: Set the Red Base Layer
Spread half of the red fudge mixture into your prepared pan, smoothing it out gently with a spoon. This part is sticky, so take your time to finesse it into place and then pop it into the freezer for a few minutes to firm up. Keep the leftover red fudge warm by wrapping the bowl in towels — you’ll need it later!
Step 4: Melt and Spread the White Layer
Next, melt the remaining white chocolate chips, condensed milk, and butter just like before. When it’s smooth, carefully spoon the white layer over the set red layer and smooth out. Freeze for another short stint to make sure it’s firm enough for the final layer.
Step 5: Finish with the Final Red Layer
Gently rewarm the last bit of red fudge so it’s stirrable again, then spoon it over the white fudge layer. Smooth this layer as best you can. Then cover the entire fudge with plastic wrap and chill in the fridge for at least 2 hours — this helps the layers set perfectly for cutting.
Step 6: Cut and Decorate Your Valentine Hearts
Once chilled, lift the fudge out using the parchment. On a clean countertop, use a small heart-shaped cookie cutter to cut out your Valentine Hearts Fudge — this is the fun part! Be efficient to minimize waste. Finally, sprinkle heart-shaped sprinkles over your hearts for that extra festive sparkle.
How to Serve Valentine Hearts Fudge Recipe
Garnishes
I like topping these fudge hearts with simple heart-shaped sprinkles because they’re charming and don’t overwhelm the flavor. Sometimes, I add a light dusting of edible glitter on top for a touch of sparkle when serving to guests — it’s such a hit!
Side Dishes
This Valentine Hearts Fudge pairs beautifully with a rich cup of espresso or a creamy hot chocolate — I often serve it alongside these for cozy Valentine’s gatherings. Fresh berries also add a little brightness that balances the sweetness if you want a lighter option.
Creative Ways to Present
I’ve gifted this fudge by placing the hearts in pretty cupcake liners inside a decorative box tied with ribbon. Another time, I arranged them on a beautiful platter with rose petals sprinkled around for a truly romantic Valentine’s Day vibe. Presentation makes all the difference!
Make Ahead and Storage
Storing Leftovers
I store leftover Valentine Hearts Fudge in an airtight container in the fridge, where it keeps beautifully for up to two weeks. When ready to enjoy, I let it sit at room temperature for about 15 minutes — this softens the fudge to the perfect creamy texture.
Freezing
Freezing works great for this Valentine Hearts Fudge Recipe. I wrap the hearts tightly in parchment paper first, then a layer of foil to prevent freezer burn. When I thaw them, it’s almost like freshly made fudge — just make sure to thaw in the fridge overnight for best results.
Reheating
If your fudge is a little firm from the fridge or freezer, I gently warm individual pieces in the microwave for 5-7 seconds — just enough to soften without melting. It revives that melt-in-your-mouth feel instantly.
FAQs
-
Can I use regular chocolate instead of white chocolate chips in the Valentine Hearts Fudge Recipe?
White chocolate chips are key for the creamy layers and vibrant colors in this recipe, but you can experiment with regular milk or dark chocolate. Keep in mind that it will change the flavor profile and color contrast, and melting times may vary, so be patient and melt in short bursts.
-
What if I don’t have red food coloring?
You can try using natural alternatives like beet juice or powder, but they may affect the flavor and color intensity. For a Valentine Hearts Fudge Recipe that really pops, food-grade gel colors are your best bet.
-
How long does the fudge take to set?
Each fudge layer only needs a few minutes in the freezer to firm up before adding the next. The final chilling in the fridge takes at least 2 hours to fully set so you can cut clean heart shapes.
-
Can I make this Valentine Hearts Fudge Recipe ahead of Valentine’s Day?
Absolutely! You can make it a few days in advance and store it in the fridge or freeze it for longer storage. Just thaw it gently before serving to enjoy its perfect texture.
Final Thoughts
This Valentine Hearts Fudge Recipe is more than just a dessert to me—it’s a sweet way to share love and joy with those around you. Whether you’re gifting it, serving at a Valentine’s party, or just craving a special treat, this fudge has that magical combination of simple ingredients and heartfelt presentation that’s hard to beat. I hope you have as much fun making (and eating) it as I do—go ahead, give it a try and watch hearts light up around your kitchen!
PrintValentine Hearts Fudge Recipe

This Valentine Hearts Fudge recipe creates a delightful, creamy, layered treat featuring rich white chocolate fudge tinted with red food coloring and adorned with heart-shaped sprinkles. Perfect for gifting or sharing, this no-bake fudge is easy to make in just a few minutes and beautifully decorated with festive colors and shapes, making it an ideal sweet for Valentine’s Day or any special occasion.
- Prep Time: 10 minutes
- Cook Time: 3 minutes
- Total Time: 2 hours 13 minutes
- Yield: 10 servings 1x
- Category: Dessert
- Method: No-Cook
- Cuisine: American
Ingredients
Fudge Layers
- 3½ cups (2 – 12 ounce packages) white chocolate chips, divided
- 1 can (14 ounces) sweetened condensed milk, divided
- 3 tablespoons unsalted butter, divided
- Red food coloring, about 10 drops
Toppings
- 1 tablespoon heart-shaped sprinkles
Instructions
- Prepare Pan. Line a small square pan (8 x 8 inches or similar size) with parchment paper or sprayed aluminum foil to prevent sticking and allow easy removal of the fudge later.
- Make Red Fudge Base. In a microwave-safe bowl, combine 2 ¼ cups white chocolate chips (⅔ of total), ⅔ of the sweetened condensed milk, and 2 tablespoons unsalted butter. Microwave in 20-second intervals, stirring thoroughly each time until fully melted and smooth, about 2 minutes total. Avoid overheating to keep the fudge smooth.
- Add Color. Stir in approximately 10 drops of red food coloring until the mixture is evenly tinted and smooth. Adjust with extra drops if needed to reach desired color intensity.
- Set Red Layer. Pour half of the red fudge mixture into the prepared pan and smooth the top with a spoon. It will be sticky, so work carefully. Place the pan in the freezer for a few minutes to allow this layer to set. Wrap and keep the remaining red fudge warm in the bowl using towels.
- Make White Fudge Layer. In another microwave-safe bowl, combine the remaining 1 ¼ cups white chocolate chips, remaining sweetened condensed milk, and 1 tablespoon unsalted butter. Heat in 20-second bursts, stirring until fully melted and smooth, about 2 minutes total. Avoid overcooking.
- Build White Layer. Pour the melted white fudge over the set red layer in the pan. Smooth carefully with a spoon. Freeze again for a few minutes to let this layer firm up.
- Add Final Red Layer. Gently warm the reserved red fudge mixture so it is fluid enough to spread. Spoon this remaining red fudge over the set white layer and smooth out evenly.
- Chill Fully. Cover the entire fudge with plastic wrap and refrigerate for 2 hours to allow all layers to fully set and develop the perfect firm consistency.
- Cut Out Hearts. Remove the fudge block from the pan using the parchment paper. Place it on a counter and use a small heart-shaped cookie cutter to cut out heart shapes from the fudge carefully to minimize waste.
- Decorate and Serve. Evenly sprinkle the heart-shaped sprinkles over the cut-out fudge hearts. Enjoy your festive Valentine-themed fudge!
Notes
- Storage: Store fudge in an airtight container refrigerated for up to two weeks. For softer texture, let fudge come to room temperature before serving.
- Freezing: Freeze fudge wrapped tightly in parchment paper and then in aluminum foil for up to 2 months. Thaw before serving.
- Chocolate Quality: Use high-quality white chocolate chips to ensure smooth melting and texture; generic brands may not perform well.
- Milk Type: Use sweetened condensed milk specifically; evaporated milk will prevent the fudge from setting properly.
- Heating Caution: Heat fudge mixtures gently and avoid overcooking which can cause graininess.
- Pan Lining: Lining the pan with parchment or foil helps remove fudge easily and allows neat cookie cutter shaping.
Keywords: Valentine’s Day fudge, white chocolate fudge, layered fudge, heart-shaped fudge, holiday dessert, sweet treat