Strawberry Crunch Cheesecake Cones Recipe
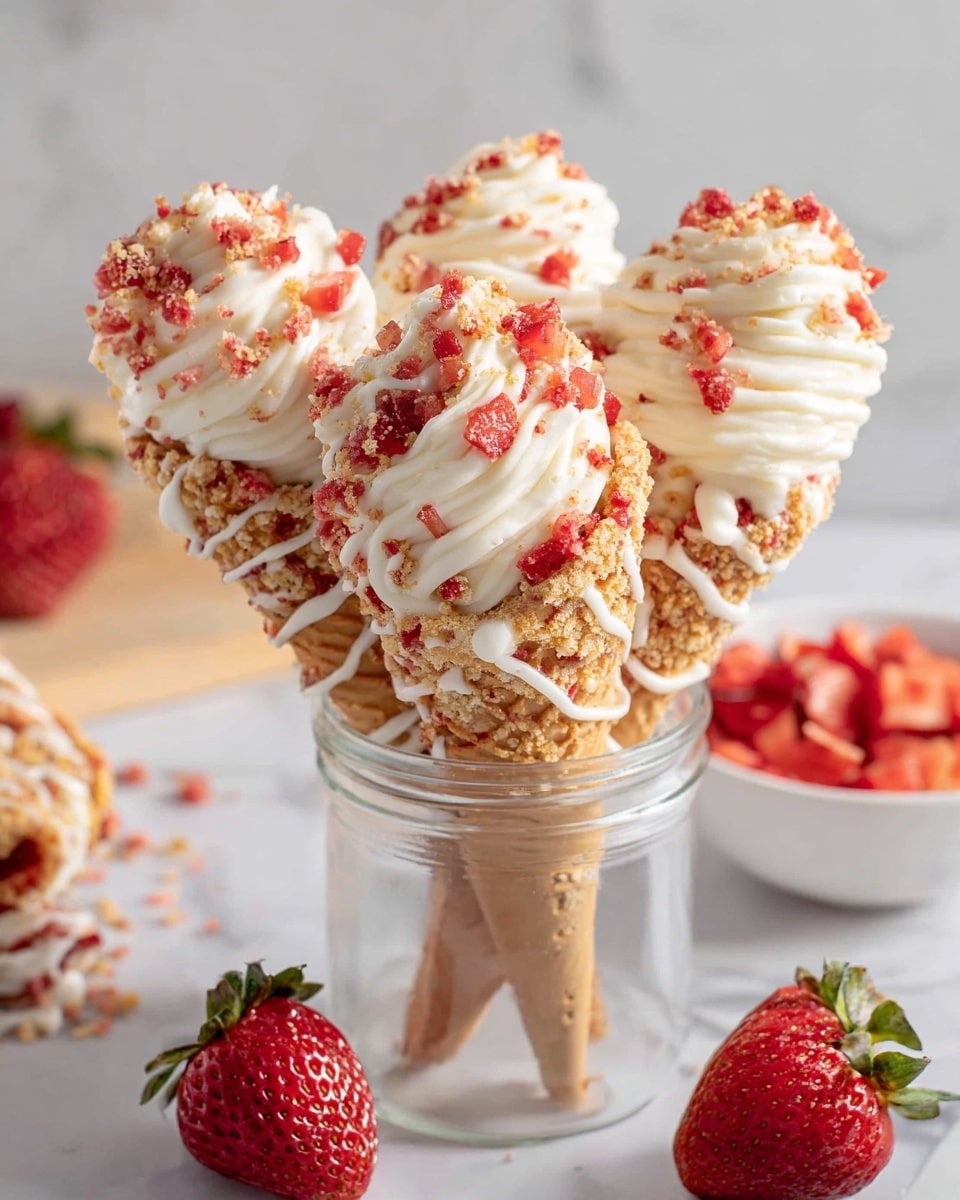
Have you ever stumbled upon a dessert that feels like an instant party in your mouth? That’s exactly how I feel about this Strawberry Crunch Cheesecake Cones Recipe! It’s this fun, handheld treat that combines creamy cheesecake filling, a crispy strawberry-flavored cone exterior, and fresh strawberry bits for that perfect balance of textures and flavors. The cones are decorated with golden Oreo crumbs and strawberry gelatin that give this recipe a fun twist—not your everyday cheesecake, that’s for sure!
I find these cones perfect for summer get-togethers or any time you want a fuss-free yet impressively delicious dessert. Plus, they’re great if you want something no-fork-required but still feel fancy. Honestly, whether you’re serving them at a casual family BBQ or a birthday party, this Strawberry Crunch Cheesecake Cones Recipe is a total crowd-pleaser that will keep everyone coming back for more.
Ingredients You’ll Need
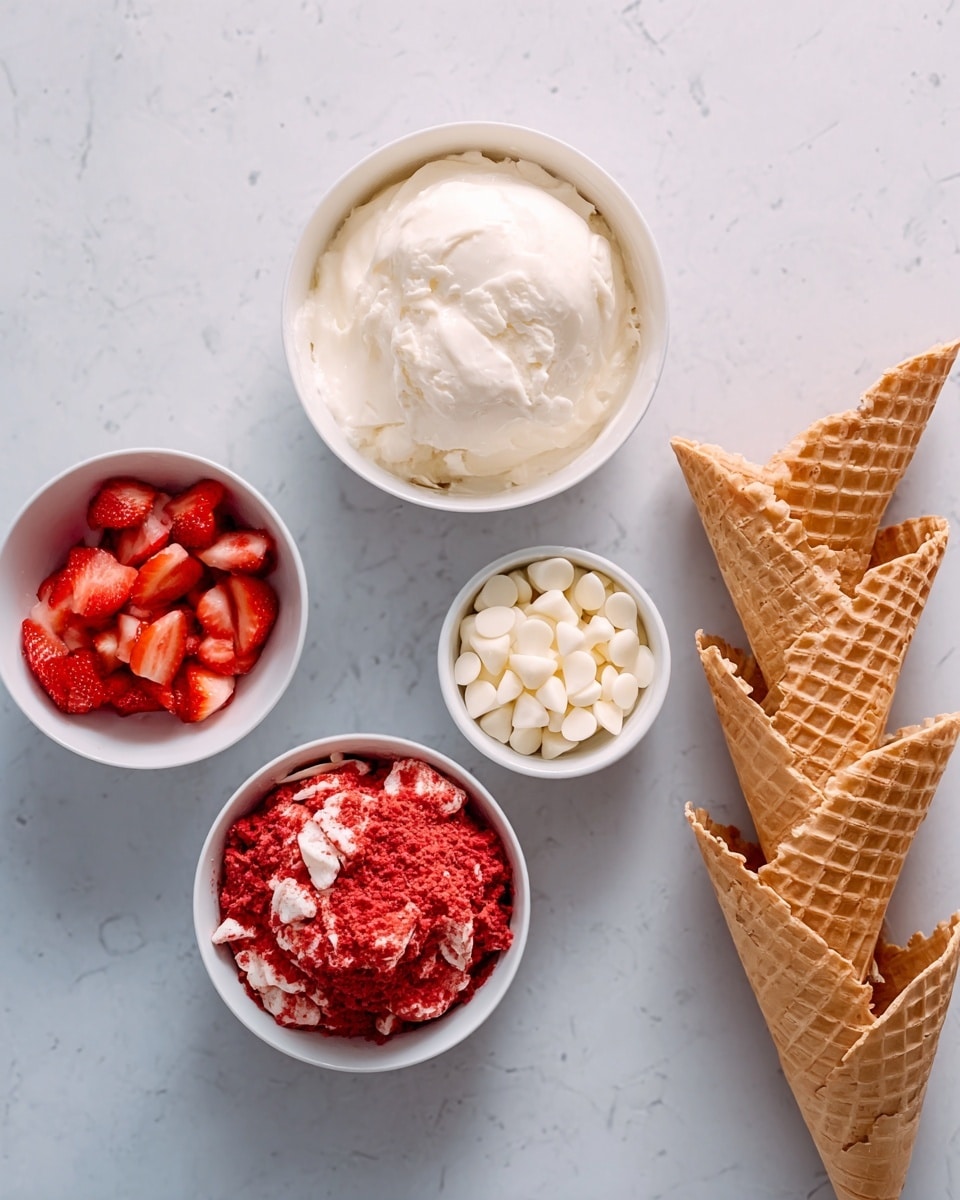
Each ingredient here plays a key role—think of the golden Oreos and strawberry gelatin powder as the crunchy, flavorful shell that makes the cones unique. The cream cheese and heavy cream give you that classic cheesecake richness, while white chocolate adds sweet, silky smoothness. I always recommend using room temperature cream cheese to avoid lumps in the filling!
- Golden Oreo cookies: These add buttery, vanilla flavor and crunch when crushed for the cone coating.
- Unsalted butter: Helps bind the crushed Oreos for a nice crumbly texture that sticks to the cones.
- Strawberry gelatin powder: This is the secret to that vibrant strawberry crunch coating – you can find it in most grocery stores.
- White chocolate melting wafers: Ghirardelli brand works beautifully for smooth melting and great taste.
- Waffle cones: Your canvas for this recipe—make sure to get sturdy ones that won’t break easily.
- Heavy cream: Whipped to give the filling a light, airy texture—don’t skip on the cream because it really balances the richness.
- Cream cheese (block-style): It’s important that this is room temperature for silky, lump-free filling.
- Vanilla extract: Adds that classic cheesecake flavor note that elevates everything.
- Powdered sugar, sifted: Sifting prevents any gritty bits in your smooth filling.
- Diced fresh strawberries: Freshness that brightens and complements the strawberry crunch.
- Strawberry crunch (reserved from cone decorating): Keeps the strawberry magic going, perfect for garnishing.
Variations
While I adore the classic strawberry crunch version, I love how versatile this recipe is! You can tweak it easily to suit your preferences or seasonal produce, so feel free to get creative.
- Berry mix: I’ve swapped diced strawberries for a mix of raspberries and blueberries, which adds a colorful burst and different tartness that my family loved.
- Dairy-free option: Use coconut cream instead of heavy cream and dairy-free cream cheese – the texture is surprisingly similar and still dreamy.
- Chocolate twist: Try dipping cones in melted dark chocolate before adding the Oreo mixture—it makes them extra indulgent.
- Nutty crunch: Mix some finely chopped toasted almonds or pistachios into the strawberry crunch coating for an added nutty depth.
- Mini cones: For parties with kids, I sometimes use mini ice cream cones to make bite-sized treats that are easier to handle.
How to Make Strawberry Crunch Cheesecake Cones Recipe
Step 1: Prepare the Crunchy Cone Coating
Start by crushing your golden Oreos until they’re nice and fine—no big chunks here! I like using a food processor because it’s quick and creates a beautifully even crumb. Then melt your unsalted butter and stir it into the crushed cookies along with the strawberry gelatin powder until everything is evenly mixed. This sticky mixture will be your crunchy coating. A little tip: keep the mixture chilled if you aren’t ready to use it right away, so it doesn’t get too soft.
Step 2: Coat the Waffle Cones
Melt your white chocolate wafers gently—either in the microwave in short bursts or over a double boiler to avoid burning. Once melted, dip the top half of each waffle cone into the white chocolate, then immediately roll or dip them into the coated Oreo and strawberry crunch mixture. Place the cones upright—sometimes I fashion a little stand with a glass or egg carton—to let the coating set. This part is fun and a bit messy, but trust me, it’s worth it for that gorgeous color and texture contrast.
Step 3: Make the Cheesecake Filling
Use a mixer to whip the heavy cream until stiff peaks form, then set it aside. In another bowl, beat the room temperature cream cheese and sifted powdered sugar together until smooth and fluffy. Add vanilla extract and gently fold in the whipped cream with a spatula. This folding step helps keep the filling light and airy—you don’t want to deflate it! The result is a creamy, dreamy cheesecake filling that’s perfect for piping or spooning into your cones.
Step 4: Assemble the Strawberry Crunch Cheesecake Cones
Fill each cone with your cheesecake filling. I like using a piping bag for this step because it lets me get the filling all the way down the cone without making a mess. Once filled, sprinkle diced fresh strawberries and a little extra strawberry crunch on top for a festive finish. Pop the cones in the fridge for about an hour before serving if you want that cheesecake firmness, or enjoy right away if you love a softer texture.
How to Serve Strawberry Crunch Cheesecake Cones Recipe
Garnishes
When it comes to garnishes, I keep it simple because the cones already look so inviting. A sprinkle of extra strawberry crunch and a few fresh strawberry slices are my go-tos—they add freshness and just enough extra texture. Sometimes I drizzle a little melted white chocolate on top for extra decadence, especially if I’m serving guests.
Side Dishes
Though these cones are a sweet treat on their own, I’ve found they pair wonderfully with light, fruity sides like a fresh mixed berry salad or a simple mint lemonade. It’s a refreshing contrast to the sweet richness of the cheesecake.
Creative Ways to Present
If you want to impress your guests, try serving the cones standing upright in a decorated wooden box filled with colorful paper shreds or natural raffia. I once made a “cheesecake cone bouquet” by arranging them in a foam base wrapped in pretty paper for a birthday party—a total hit! It’s an easy way to elevate this recipe from simple dessert to centerpiece.
Make Ahead and Storage
Storing Leftovers
If you have any leftovers (and sometimes I do, sometimes I don’t!), store the filled cones upright in the fridge, covered loosely with plastic wrap. The cheesecake filling keeps for about 2-3 days, but the cones may lose a bit of their crunchiness over time, so I recommend enjoying them sooner rather than later.
Freezing
I’ve frozen the cheesecake filling before without any issue, but freezing the cones with the coating and filling isn’t ideal because the texture can get soggy. If you want to freeze, try freezing just the filling in a sealed container, then thaw and fill freshly coated cones later for the best texture.
Reheating
Since this is a cold dessert, reheating isn’t necessary or recommended. But if you want to take the filling out of the fridge just 10-15 minutes before serving, it softens perfectly for a creamier mouthfeel without losing any flavor.
FAQs
-
Can I use regular gelatin instead of strawberry gelatin powder for the cone coating?
You can use unflavored gelatin, but you’ll lose the strawberry flavor and color that make the coating special. If you want to keep the strawberry vibe, try strawberry-flavored gelatin powder as in the recipe or add a small amount of strawberry extract along with plain gelatin.
-
Is it okay to use pre-whipped cream instead of whipping it fresh?
Freshly whipped cream gives the filling a lighter, fresher texture, which I prefer. Pre-whipped cream from a can or container tends to be too soft and can make the filling runny. For best results, whip your cream just before assembling.
-
Can these Strawberry Crunch Cheesecake Cones be made ahead of time?
Yes! You can prepare and coat the cones a day ahead and keep them in an airtight container. Assemble them with filling and garnish a few hours before serving to keep everything fresh and crunchy.
-
What’s the best way to avoid the cones getting soggy?
Coating the cones in melted white chocolate first creates a moisture barrier that helps keep the waffle cones crispy. Also, fill them with the cheesecake filling just before serving for maximum crunch. Stored cones with filling can soften in the fridge after some time.
-
Where can I find strawberry crunch for garnishing?
Strawberry crunch is often made by mixing crushed strawberry-flavored cereal or crushed freeze-dried strawberries with a bit of sugar or gelatin powder. Sometimes it’s included in the coating mixture you make for the cones and reserved for garnish, making it easy to keep on hand!
Final Thoughts
This Strawberry Crunch Cheesecake Cones Recipe has become a favorite in my kitchen because it’s just so joyful and easy to share. Whether it’s the crunchy, strawberry-kissed exterior or the creamy, dreamy filling, there’s something about eating cheesecake in a cone that makes it feel special and festive. I hope you give this recipe a try—it’s perfect for making memories and delicious moments with friends and family.
PrintStrawberry Crunch Cheesecake Cones Recipe

Indulge in delightful Strawberry Crunch Cheesecake Cones, a fun and elegant dessert featuring creamy vanilla cheesecake filling nestled inside crisp waffle cones coated with a strawberry-infused golden Oreo crunch and white chocolate. Perfect for summer parties or a charming treat.
- Prep Time: 25 minutes
- Cook Time: 0 minutes
- Total Time: 25 minutes
- Yield: 6 cheesecake cones 1x
- Category: Dessert
- Method: No-Cook
- Cuisine: American
- Diet: Vegetarian
Ingredients
For the Decorated Cones
- 13 golden Oreo cookies
- 2 tablespoons unsalted butter, melted
- 1½ tablespoons strawberry gelatin powder
- 10 ounces white chocolate melting wafers (Ghirardelli brand recommended)
- 6 waffle cones
For the Cheesecake Filling
- 1 cup heavy cream
- 16 ounces block-style cream cheese, room temperature
- 1 tablespoon vanilla extract
- 1 cup powdered sugar, sifted
For the Garnish
- ½ cup diced fresh strawberries
- 2 tablespoons strawberry crunch (reserved from decorated cones)
Instructions
- Prepare the Strawberry Crunch: Crush the golden Oreo cookies finely and mix with the melted butter and strawberry gelatin powder until evenly combined. Set aside a small portion (2 tablespoons) for garnish, and the rest will be used to decorate the cones.
- Decorate the Cones: Melt the white chocolate wafers in a microwave-safe bowl in 30-second intervals, stirring in between until smooth. Dip the top half of each waffle cone into the melted white chocolate, then immediately sprinkle the prepared strawberry Oreo crunch all around the dipped section. Place the cones upright on parchment paper and allow the chocolate to set completely at room temperature or in the refrigerator.
- Make the Cheesecake Filling: In a mixing bowl, beat the room temperature cream cheese until smooth and creamy. Add vanilla extract and sifted powdered sugar, mixing thoroughly. In a separate bowl, whip the heavy cream until stiff peaks form, then gently fold it into the cream cheese mixture to create a light, fluffy cheesecake filling.
- Fill the Cones: Once the decorated cones are set, transfer the cheesecake mixture into a piping bag or spoon it carefully into each cone, filling them generously up to the top.
- Garnish and Serve: Top each filled cone with diced fresh strawberries and a sprinkle of the reserved strawberry crunch for added texture and flavor. Serve immediately or chill in the refrigerator until ready to serve.
Notes
- Ensure cream cheese is at room temperature to avoid lumps in the filling.
- The white chocolate coating will firm up quickly; work with one cone at a time for best results.
- You can prepare the decorated cones in advance and store them in a cool, dry place before filling to save time.
- For a gluten-free version, substitute gluten-free Oreo cookies and check waffle cone ingredients.
- Keep filled cones refrigerated if not serving immediately to maintain freshness and prevent melting.
Keywords: strawberry cheesecake cones, no-bake dessert, strawberry crunch, white chocolate cones, summer dessert, party treats, easy cheesecake