Santa Cookie Recipe with Vanilla Frosting Recipe
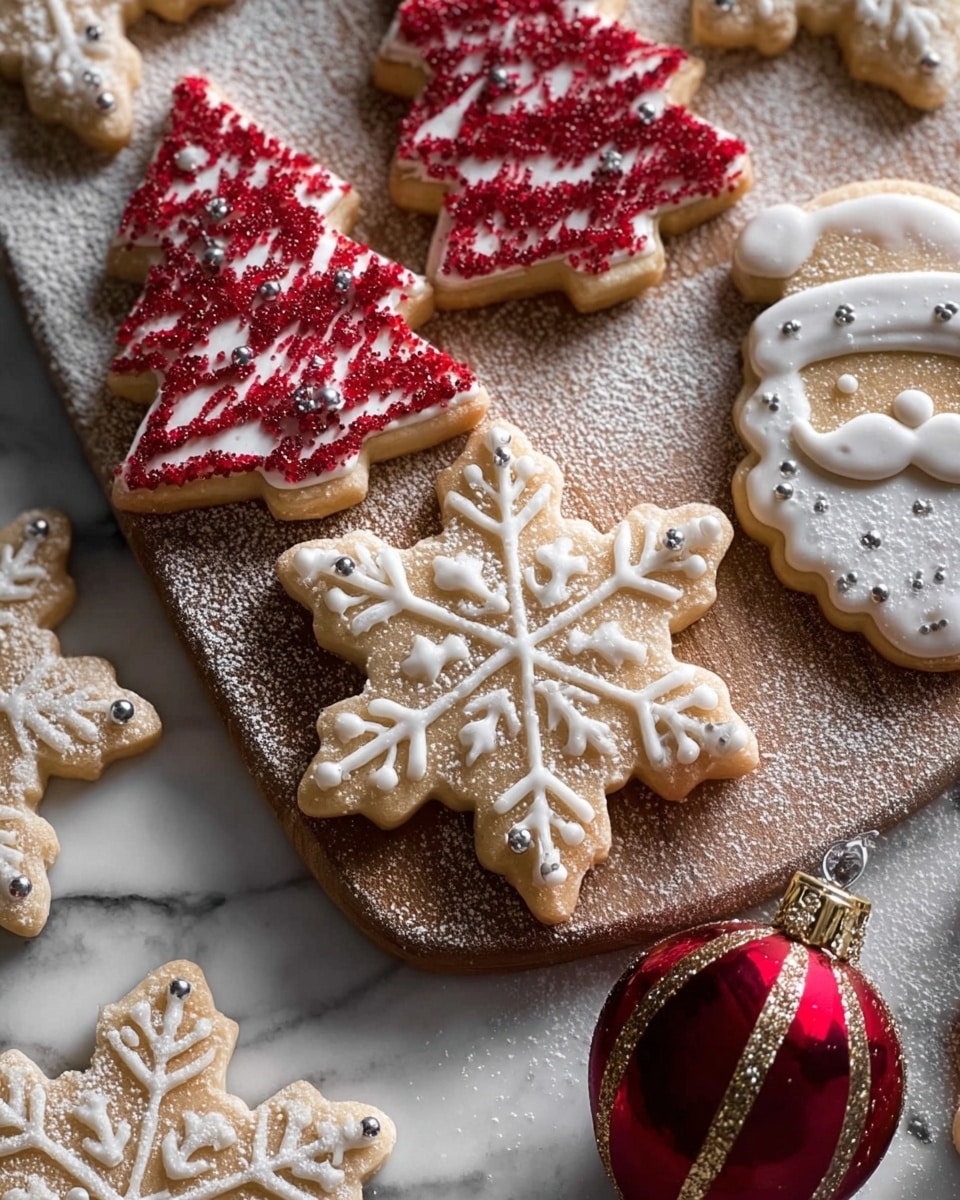
There’s something truly magical about baking during the holidays, and this Santa Cookie Recipe with Vanilla Frosting Recipe instantly brings a smile to anyone’s face. The cookies are buttery and soft, with just the right amount of sweetness, paired perfectly with a creamy vanilla frosting that you can decorate however you like. Whenever I’ve brought these to a holiday party or gifted them to friends, I’ve seen grown-ups and kids alike light up with delight — it’s that kind of recipe that makes festive moments extra special.
What I love most is how approachable this Santa Cookie Recipe with Vanilla Frosting Recipe is, even if you’re not a baking pro. The dough is forgiving, and the frosting is simple to whip up but tastes like it took hours of effort. Plus, you get to customize every cookie with sprinkles, sanding sugar, or vanilla sugar. Whether you’re baking with the kids or prepping cookies for a crowd, this recipe fits the bill beautifully.
Ingredients You’ll Need
Each ingredient in this Santa Cookie Recipe with Vanilla Frosting Recipe works together to create a rich, tender cookie with a flavorful vanilla finish. A few shopping notes: use good quality butter and vanilla extract, as they really shine through in the final taste.
- Salted butter: Using salted butter gives a great balance of flavors, but if you only have unsalted, just add a pinch of salt.
- Light brown sugar: Its molasses content adds moisture and a subtle caramel note that makes these cookies extra cozy.
- Hazelnut liqueur (optional): This might seem fancy, but it’s totally optional. I add it for a subtle nutty warmth that’s fantastic, but feel free to skip.
- Vanilla extract: Pure vanilla extract is key for that classic flavor. Don’t cheat here—it makes a big difference.
- Egg: This helps bind everything together and keeps your cookies soft.
- All-purpose flour: The base of our dough, sifted if you want extra tender cookies.
- Baking soda: This little helper keeps your cookies from being too dense.
- Kosher salt: Enhances all the flavors, so don’t omit it.
- Powdered sugar: For that silky-smooth vanilla frosting—make sure it’s sifted to avoid lumps.
- Assorted sprinkles, vanilla sugar, sanding sugar: The fun part! Use whatever you have on hand to decorate your Santas with personality.
- Cream cheese (optional) for frosting: If you want a tangy twist, adding cream cheese to the vanilla buttercream gives a lovely richness.
Variations
While I stick mostly to the classic Santa Cookie Recipe with Vanilla Frosting Recipe, I love experimenting to suit the occasion—or my mood. You can’t go wrong tweaking this to your taste or dietary needs.
- Gluten-Free Version: I’ve swapped in a gluten-free all-purpose flour blend before with great results—just check your brand’s baking soda content.
- Nut-Free: Skip the hazelnut liqueur entirely and use a splash of almond extract for a different but delicious twist.
- Vegan Adaptation: You can replace butter with vegan butter and use flax eggs to make a dairy-free, egg-free version. The frosting can be made with vegan margarine too.
- Extra Spice: Around the holidays, I sometimes add a teaspoon of cinnamon or pumpkin pie spice to the dough, turning these into a cozy winter treat.
How to Make Santa Cookie Recipe with Vanilla Frosting Recipe
Step 1: Cream Together Butter and Sugars
Start by beating the salted butter and light brown sugar together until they’re fluffy and light in color—this usually takes about 3–4 minutes with an electric mixer. I find this step crucial since it gives your cookies that soft, tender crumb. If you’re adding hazelnut liqueur and vanilla extract, mix them in right after the butter-sugar mixture looks perfect. This little liquid boost adds beautiful depth to your cookie flavor.
Step 2: Incorporate the Egg
Next, add your room temperature egg and beat it in fully—this helps your dough come together nicely without being dense. Make sure the egg isn’t cold right from the fridge; a warm egg blends better with the butter mixture.
Step 3: Mix Dry Ingredients and Combine
In a separate bowl, whisk together the flour, baking soda, and kosher salt. Now, gradually add this dry mix into the wet ingredients. Don’t rush this—fold gently until you see no streaks of flour, and add extra flour (up to 2-4 tablespoons) only if the dough feels too sticky. The dough should hold together but still be soft.
Step 4: Chill the Dough
I usually wrap the dough in plastic wrap and chill it for at least an hour. This keeps the cookies from spreading too much while baking, which is especially helpful when you’re cutting out Santa shapes. If you’re pressed for time, 30 minutes in the fridge works, but I recommend the full hour for best shape and texture.
Step 5: Roll Out and Cut Shapes
Dust your work surface lightly with flour, then roll the dough to about 1/4-inch thickness. Use your favorite Santa cookie cutters (or any festive shapes) to cut out designs. Pro tip: Flour your cutters between cuts to prevent sticking. Arrange the cookies on parchment-lined baking sheets with a little space between each.
Step 6: Bake and Cool
Bake at 350°F (175°C) for 10–12 minutes, until the edges just start to turn golden. I like to rotate the baking sheet halfway through baking for even color. Once done, let the cookies cool on the sheet for a couple of minutes before transferring to a wire rack — it helps them firm up without breaking.
Step 7: Make the Vanilla Frosting
While the cookies bake, whip up your frosting. Beat together the softened butter (and cream cheese if you’re using it) until smooth and creamy. Gradually add the powdered sugar, beating until fluffy. The frosting should be thick enough to hold its shape but still spreadable. If it’s too thick, add a splash of milk; if too thin, add more powdered sugar.
Step 8: Frost and Decorate
Once your cookies are completely cool, spread or pipe the vanilla frosting on top. This is the fun part—I like to use a small offset spatula for smooth coverage, then sprinkle a little sanding sugar and colorful sprinkles right after frosting. If decorating with kids, keep some extra sprinkles handy—they love getting creative!
How to Serve Santa Cookie Recipe with Vanilla Frosting Recipe

Garnishes
I always reach for a mix of red and white sanding sugar and tiny silver dragees to decorate my Santa cookies. It adds sparkle and a little crunch. Vanilla sugar works beautifully if you want a more subtle shimmer. Fresh mint leaves could be a fun adult twist when serving on a holiday dessert platter.
Side Dishes
These cookies pair wonderfully with a warm cup of spiced hot chocolate or a classic holiday eggnog. At home, I like serving them alongside a cheese platter during holiday gatherings for that sweet-savory balance. If you’re serving for kids, a simple glass of cold milk is a timeless match.
Creative Ways to Present
One fun idea I’ve tried is arranging the cookies on a large wooden board in the shape of a Christmas tree, adding fresh rosemary sprigs as “branches.” For gifting, wrapping cookies in a clear cellophane bag tied with a festive ribbon and a small note always wins smiles. You can also make a cookie decorating party out of these and let everyone personalize their Santas.
Make Ahead and Storage
Storing Leftovers
After frosting, I store any leftover cookies in an airtight container at room temperature. They usually last about 4–5 days and stay soft if you include a slice of bread inside the container—the bread helps keep moisture balanced. If I’m storing unfrosted cookies, I separate layers with parchment paper to prevent sticking.
Freezing
I’ve had great luck freezing the dough before cutting out shapes—just wrap it tightly in plastic and freeze up to 2 months. When you’re ready, thaw overnight in the fridge before rolling. You can also freeze fully baked, unfrosted cookies in a single layer on a baking sheet, then transfer to a freezer bag. Frost after thawing for best texture.
Reheating
If you want to warm your leftover cookies, I gently heat them in a low oven (about 300°F) for 5 minutes. It refreshes their softness without melting the frosting too much. Avoid the microwave as it can make them rubbery or soggy.
FAQs
-
Can I make the Santa Cookie Recipe with Vanilla Frosting Recipe dairy-free?
Absolutely! Substitute the butter with a plant-based margarine, use a flax or chia egg in place of the egg, and swap cream cheese for a vegan alternative or simply omit it. Use powdered sugar certified vegan, and you’ll have a delicious dairy-free version that’s just as festive.
-
How do I prevent my cookies from spreading too much?
Chilling the dough is key. Make sure your dough is cold before rolling and cutting shapes—this keeps the cookies from melting too quickly in the oven. Also, avoid overbaking, as warmer dough can spread more easily while baking.
-
What’s the best way to decorate these Santa cookies?
I recommend frosting the cookies once cooled completely and using an offset spatula or piping bag for precision. Then, sprinkle sanding sugar or festive sprinkles immediately so they stick well. Let the frosting set fully before stacking or storing.
-
Can I use store-bought vanilla frosting instead?
You can, but making your own vanilla frosting from scratch really elevates the flavor and texture of these Santa cookies. It’s easy and fast, and you control the sweetness. If short on time, store-bought is a convenient backup.
-
How long does the frosting take to set?
Depending on room temperature and humidity, the vanilla frosting usually firms up within about 30 minutes to an hour. I like to let the cookies sit on a wire rack during this time to avoid any sogginess on the bottoms.
Final Thoughts
This Santa Cookie Recipe with Vanilla Frosting Recipe holds a warm place in my heart because it’s more than just cookies—it’s about gathering around the kitchen, sharing laughs, and making memories. I hope you’ll enjoy baking and decorating them as much as I do. Trust me, once you try this recipe, it’ll become a treasured holiday tradition you’ll look forward to year after year!
PrintSanta Cookie Recipe with Vanilla Frosting Recipe

This festive Santa Cookie Recipe features soft, buttery cookies flavored with vanilla and a touch of hazelnut liquor, topped with a smooth vanilla buttercream frosting and decorated with colorful sprinkles to create a delightful holiday treat perfect for celebrations and gift-giving.
- Prep Time: 20 minutes
- Cook Time: 12 minutes
- Total Time: 1 hour 32 minutes
- Yield: 24 cookies 1x
- Category: Baking
- Method: Baking
- Cuisine: American
Ingredients
Cookie Dough
- 1 1/2 sticks (3/4 cup) salted butter, at room temperature
- 3/4 cup packed light brown sugar
- 1 tablespoon hazelnut liquor (optional)
- 2 teaspoons vanilla extract
- 1 egg, at room temperature
- 2 cups all-purpose flour, plus an additional 2-4 tablespoons if needed
- 1/2 teaspoon baking soda
- 1/2 teaspoon kosher salt
Vanilla Frosting
- 2 cups powdered sugar
- Assorted sprinkles, vanilla sugar, and/or sanding sugar, for decorating
Vanilla Buttercream
- 1 stick (8 tablespoons) salted butter, at room temperature
- 2 ounces cream cheese, at room temperature (optional)
- 1 1/2 cups powdered sugar
Instructions
- Prepare the Cookie Dough: In a large mixing bowl, cream together the room temperature salted butter and packed light brown sugar until light and fluffy. Add the hazelnut liquor if using and the vanilla extract, mixing well to combine. Beat in the egg until fully incorporated.
- Combine Dry Ingredients: In a separate bowl, whisk together the all-purpose flour, baking soda, and kosher salt. Gradually add the dry ingredients to the wet ingredients, mixing until a smooth dough forms. Add additional flour (2-4 tablespoons) if the dough feels too soft or sticky.
- Chill the Dough: Wrap the dough in plastic wrap and chill in the refrigerator for at least 1 hour to firm up, which will make it easier to roll and cut.
- Roll and Cut Cookies: Preheat your oven to 350°F (175°C). On a lightly floured surface, roll out the dough to about 1/4 inch thickness. Use Santa-themed cookie cutters or desired shapes to cut the cookies and place them on an ungreased baking sheet lined with parchment paper.
- Bake the Cookies: Bake the cookies in the preheated oven for 10-12 minutes or until the edges are lightly golden. Remove from the oven and allow to cool on the baking sheet for 5 minutes before transferring to a wire rack to cool completely.
- Make the Vanilla Buttercream: While cookies cool, beat together the room temperature salted butter and cream cheese (if using) until smooth. Gradually add the powdered sugar, beating until light and fluffy and the frosting reaches a spreadable consistency.
- Frost and Decorate: Once cookies are completely cool, spread a generous layer of vanilla buttercream on each. Decorate immediately with assorted sprinkles, vanilla sugar, or sanding sugar to create a festive appearance.
Notes
- Ensure the butter and egg are at room temperature for better mixing and dough consistency.
- If you do not have hazelnut liquor, you can omit it or substitute with vanilla or almond extract for variety.
- Chilling the dough is crucial to maintain cookie shape during baking.
- For easier cleanup and even baking, line your baking sheets with parchment paper.
- The cream cheese in the buttercream is optional but adds a tangy richness that complements the vanilla flavor.
- Store cookies in an airtight container at room temperature for up to 5 days or freeze for longer storage.
Keywords: Santa cookies, vanilla frosting, holiday cookies, Christmas cookies, buttercream frosting, festive sugar cookies