Red Velvet Oreo Fudge Recipe
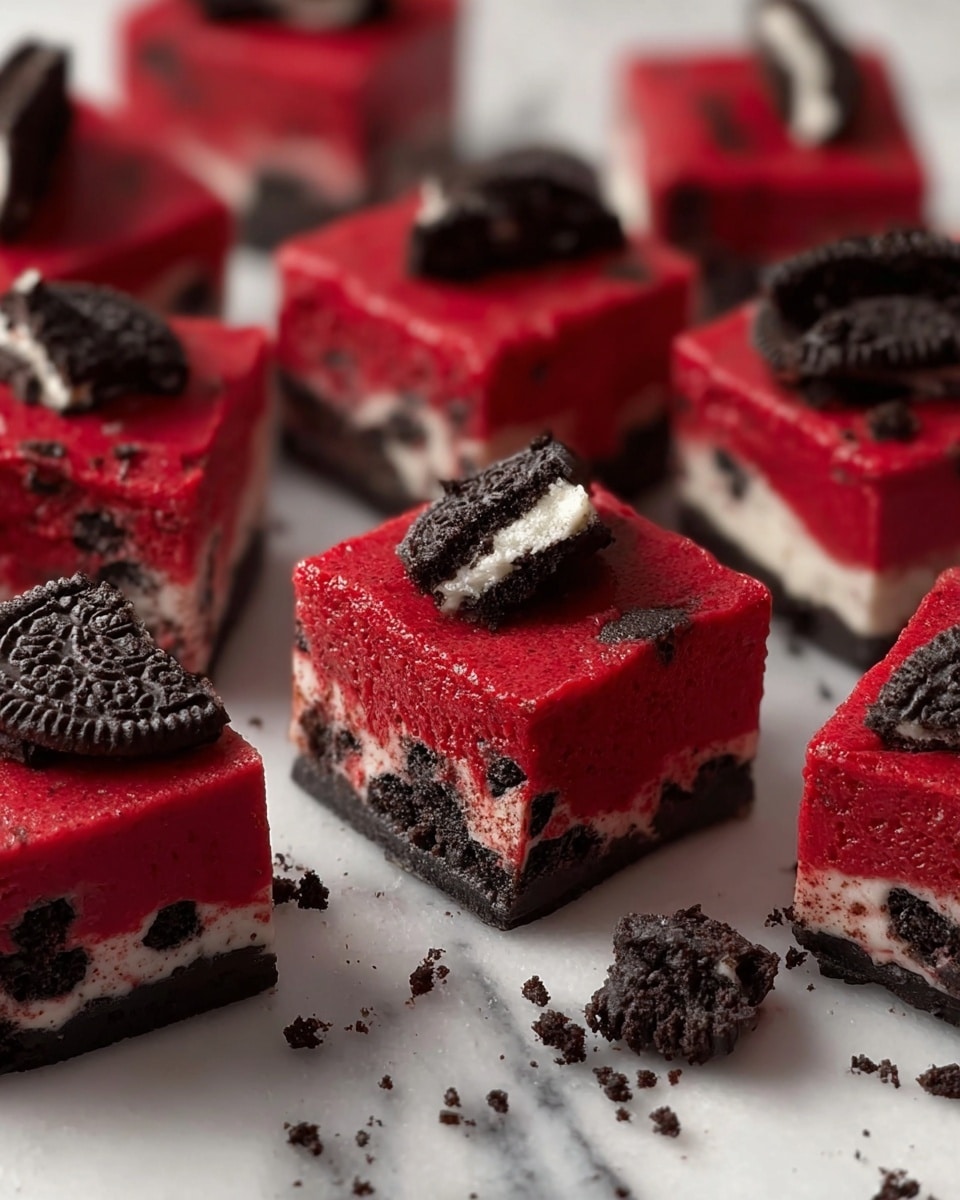
Oh, if you’re a fan of anything rich, creamy, and just a little bit decadent, this Red Velvet Oreo Fudge Recipe is going to be your new best friend. Picture this: a luscious blend of white and semi-sweet chocolate, vibrant red food coloring giving that classic red velvet charm, and of course, tons of crushed Oreos folded right in for that perfect crunch. I first tried making this for a holiday party, and honestly, it was the one dessert that vanished first. It’s just that good.
What makes this Red Velvet Oreo Fudge Recipe really stand out for me is how easy it is to whip up—even if fudge typically seems intimidating. Plus, it doesn’t require baking, so you’re saving on time and dishes. This treat works wonders for special occasions or when you want to surprise your family with something indulgent and homemade. Trust me, once you try it, you’ll find yourself making it over and over.
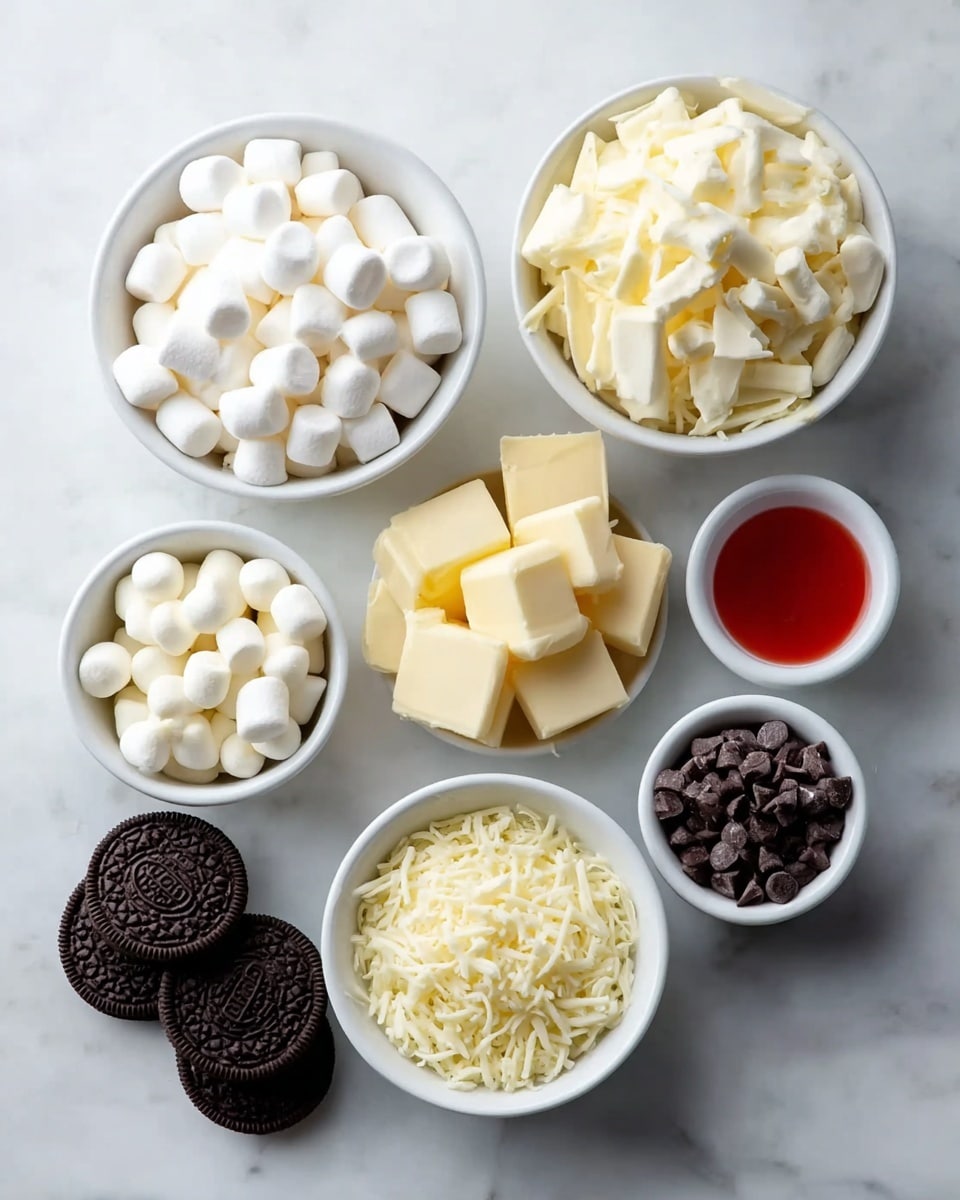
Ingredients You’ll Need
Each of the ingredients here plays a key role in balancing the creamy, sweet, and crunchy textures in this fudge. A little heads-up: use full-fat sweetened condensed milk and don’t skimp on the Oreos for that classic flavor and texture pairing that makes this Red Velvet Oreo Fudge Recipe so irresistible.
- Sweetened condensed milk: This creates the smooth, fudge-like texture, acting as the base that holds all flavors together.
- White chocolate chips: They give that creamy sweetness and pair beautifully with red velvet flavors.
- Semi-sweet chocolate chips: Adding a subtle chocolate kick, these help balance the sweetness from the white chocolate and marshmallows.
- Mini marshmallows: These melt during cooking and add extra fluffiness and body to the fudge.
- Unsalted butter: Adds richness and prevents the fudge from seizing up.
- Vanilla extract: A must-have to enhance the chocolate and red velvet flavors.
- Red food coloring: The iconic red velvet pop! Adjust based on how vibrant you want your fudge.
- Oreos (crushed): The star of the show—provides a delicious crunchy texture and that classic cookies and cream flavor.
Variations
Everyone loves to put a personal spin on recipes, and this Red Velvet Oreo Fudge Recipe is no exception. I often swap out semi-sweet chips for dark chocolate for a deeper chocolate note or add a pinch of espresso powder to really boost the flavor. Don’t be shy—try your own tweaks and see what you like best!
- Dairy-Free Variation: Use dairy-free chocolate chips and coconut condensed milk to make it vegan-friendly; I’ve done this with great success for a friend’s dietary needs.
- Nutty Addition: Toss in a handful of chopped pecans or walnuts for extra crunch.
- Extra Oreo Mix-In: Sprinkle additional crushed Oreos on top before setting for a double Oreo delight.
- White Chocolate Drizzle: Melt some white chocolate and drizzle over the top once set for an elegant finish.
How to Make Red Velvet Oreo Fudge Recipe
Step 1: Prep Your Workspace and Ingredients
First things first, line an 8×8-inch pan with parchment paper or foil—you’ll thank yourself later when it comes time to lift out the fudge cleanly. Also, crush your Oreos into rough crumbs; I like to leave some bigger chunks for texture. Have your butter sliced, marshmallows ready, and measuring spoons handy so the process flows nicely.
Step 2: Melt the Fudge Base
In a medium-sized saucepan over low heat, combine the sweetened condensed milk, white chocolate chips, semi-sweet chocolate chips, mini marshmallows, and butter. Stir gently but continuously—about every 30 seconds—to prevent scorching. You’ll see the marshmallows begin to melt and everything start blending into a glossy, rich mixture. This usually takes 5 to 7 minutes. Be patient here; rushing with high heat can cause it to seize or burn.
Step 3: Add Flavor and Color
Once the chocolate mixture is smooth and everything is incorporated, take your pan off the heat and stir in the vanilla extract and red food coloring. Here’s a little tip: start with half the recommended food coloring and adjust to your preferred shade. I like mine bright but not neon!
Step 4: Stir in the Oreos
Gently fold in about 2 ½ cups of your crushed Oreos, saving a handful to sprinkle on top. The key to success here is not over-stirring—just enough to coat the cookie pieces without breaking them down too much. You want those chunks and textures to really shine in every bite.
Step 5: Pour, Chill, and Set
Pour the mixture into your prepared pan, spreading it evenly with a spatula. Sprinkle the remaining Oreos on top to give it that extra pop of crunch and cookie goodness. Now, pop it in the fridge for at least 3 hours or until set. Pro tip: if you’re impatient like me, freezing for about an hour can speed this up, but avoid leaving it too long frozen to prevent texture changes.
How to Serve Red Velvet Oreo Fudge Recipe
Garnishes
I love keeping it simple with extra crushed Oreos on top, but sometimes I add a light dusting of powdered sugar or even a few mini white chocolate chips for a festive look. Sprinkling edible glitter or red velvet cake crumbs can make it pop for celebrations, too.
Side Dishes
This fudge pairs wonderfully with a cold glass of milk or a cup of strong coffee—the bitterness of the drink balances the sweetness nicely. For parties, try serving alongside vanilla ice cream or fresh berries to add a refreshing contrast.
Creative Ways to Present
For special occasions, I’ve arranged the fudge pieces on a tiered dessert tray, alternating with Oreo-stuffed cake pops or red velvet cupcakes for a coordinated theme. Wrapping individual fudge squares in cute parchment squares with a ribbon also makes for perfect party favors or gifts—people love receiving homemade treats!
Make Ahead and Storage
Storing Leftovers
I usually store leftover Red Velvet Oreo Fudge in an airtight container in the fridge. It stays fresh and moist for up to a week, and keeping it chilled preserves that perfect fudgy texture. Just bring it to room temperature a few minutes before serving, so it’s easier to cut.
Freezing
Freezing fudge works great too! I slice it into portions before freezing and store them in a freezer-safe container, separated by parchment paper to avoid sticking. When you’re ready to enjoy, thaw in the fridge overnight or on the counter for a couple of hours.
Reheating
I usually don’t reheat fudge since it’s best eaten soft but cool, but if you prefer it a little softer, letting it sit at room temperature for 20 minutes works wonders. Avoid microwaving, as it can melt unevenly and turn grainy.
FAQs
-
Can I use regular Oreos instead of mini Oreos?
Absolutely! The recipe calls for crushed Oreos, so whether you use regular or mini, just crush them to your preferred size. Regular Oreos give a chunkier texture since they’re bigger, which I personally love for that added crunch.
-
Is it necessary to use red food coloring? Can I skip it?
You can skip or reduce the red food coloring if you prefer, but it’s what gives the fudge that iconic red velvet look. If you want a natural alternative, beet juice powder is an option, though it might add a slight earthy flavor.
-
How long will the Red Velvet Oreo Fudge stay fresh?
Stored properly in the fridge inside an airtight container, this fudge stays fresh for up to one week. If you want it to keep longer, freezing is your best bet.
-
Can I make this Red Velvet Oreo Fudge Recipe ahead of time for a party?
Definitely! This fudge actually tastes better after sitting for a day because the flavors meld together beautifully. Just prepare it a day or two ahead, chill it, and slice it right before serving.
-
What’s the secret to getting smooth fudge without graininess?
Low and slow is key. Melting the ingredients over low heat and stirring gently helps the sugars dissolve properly. Also, avoid overheating or rapidly cooling, which can cause grainy texture.
Final Thoughts
Honestly, the Red Velvet Oreo Fudge Recipe has become one of my go-to sweet treats whenever I want to impress with minimal effort. It hits all the right notes: creamy, chocolaty, with that delightful red velvet vibe and Oreo crunch to keep things exciting. If you give it a try, make sure to stash some away because it’s dangerously addictive. You’ll love how simple yet special it feels—like a little bit of celebration in every bite.
PrintRed Velvet Oreo Fudge Recipe

Indulge in the rich and decadent Red Velvet Oreo Fudge, combining a luscious white and semi-sweet chocolate fudge base with the irresistible crunch of Oreo cookies. This no-bake treat features a creamy mixture infused with red food coloring for a festive red velvet look, layered over a crunchy Oreo crust and topped with additional Oreo pieces for extra texture and flavor. Perfect for dessert tables, parties, or just a sweet snack.
- Prep Time: 15 minutes
- Cook Time: 10 minutes
- Total Time: 2 hours 25 minutes
- Yield: 16 servings 1x
- Category: Dessert
- Method: No-Cook
- Cuisine: American
Ingredients
Fudge Base
- 1 can (14 oz) sweetened condensed milk
- 2 cups white chocolate chips
- 1 cup semi-sweet chocolate chips
- 2 cups mini marshmallows
- 2 tablespoons unsalted butter, sliced into smaller pieces
- ½ teaspoon vanilla extract
- 1 teaspoon red food coloring (adjust to preference)
Oreo Crust and Topping
- 2½ cups crushed Oreos (about 24–28 Oreos), plus extra for topping as desired
Instructions
- Prepare the Oreo Crust: Crush about 24 to 28 Oreo cookies into fine crumbs. Press the crushed Oreos evenly into the bottom of a lined square baking pan to form the crust layer. Set aside.
- Make the Fudge Mixture: In a medium saucepan over low heat, combine the sweetened condensed milk, white chocolate chips, semi-sweet chocolate chips, mini marshmallows, and unsalted butter. Stir continuously until all ingredients are melted and smooth, ensuring the mixture doesn’t burn.
- Add Flavor and Color: Remove the saucepan from heat and stir in the vanilla extract and red food coloring. Mix well until the color is evenly distributed.
- Assemble Fudge: Pour the warm fudge mixture over the prepared Oreo crust, spreading evenly with a spatula. Sprinkle additional crushed Oreos on top for garnish if desired, pressing lightly into the fudge layer.
- Chill and Set: Refrigerate the fudge for at least 2 hours or until firm. Once set, cut into squares and serve.
Notes
- Adjust red food coloring to achieve your preferred shade of red velvet.
- Use full-fat butter for best texture and richness.
- Store fudge in an airtight container in the refrigerator for up to one week.
- Allow fudge to come to room temperature for a few minutes before serving for easier cutting and better flavor.
- For a gluten-free version, substitute Oreos with gluten-free chocolate sandwich cookies.
Keywords: Red Velvet Fudge, Oreo Fudge, No-Bake Dessert, Chocolate Fudge, Holiday Treat