Pizza Pot Pie Recipe
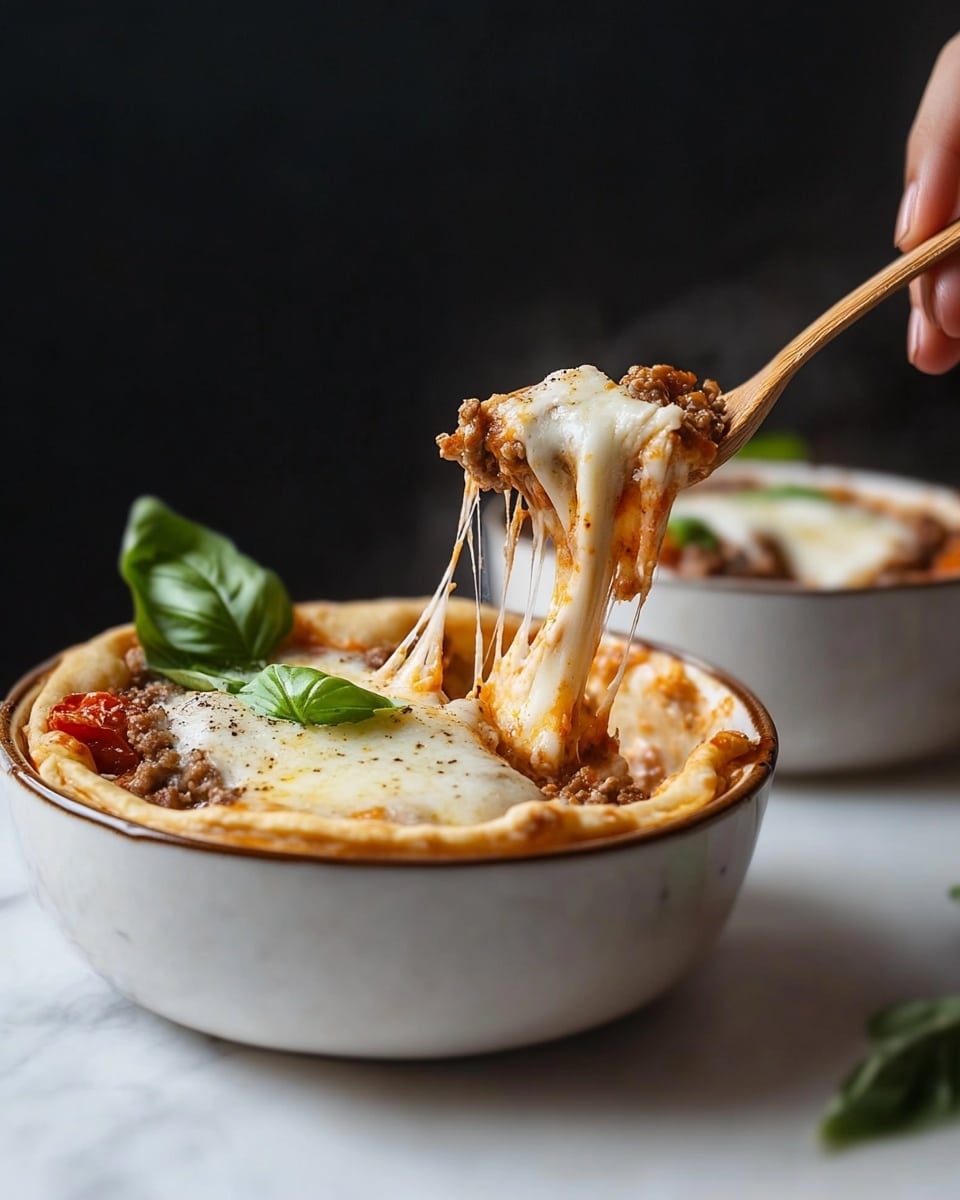
If you’re craving something that combines the comfort of a classic pot pie with the irresistible flavors of pizza, this Pizza Pot Pie Recipe is just what your dinner routine needs. It’s one of those fun, cozy meals that feels special but is so easy to make—perfect for weeknights or when you want a little homemade magic without too much fuss. I love how you get that bubbly cheese, melty sauce, and crispy crust all wrapped up in a cute individual pot pie form. It’s warm, cheesy, and hits all the right spots.
What makes this Pizza Pot Pie Recipe stand out is how perfectly it keeps that iconic pizza taste while bringing the convenient, portion-controlled joy of pot pies. It’s also super adaptable, so you can toss in your favorite pizza toppings without worrying about soggy crust or uneven cooking. Plus, baking each pot pie in a ramekin feels a little fancy, but it’s actually straightforward—and it’s a great excuse to get everyone involved in assembling their own pie. Trust me, once you try it, you’ll want to make it again and again.
Ingredients You’ll Need
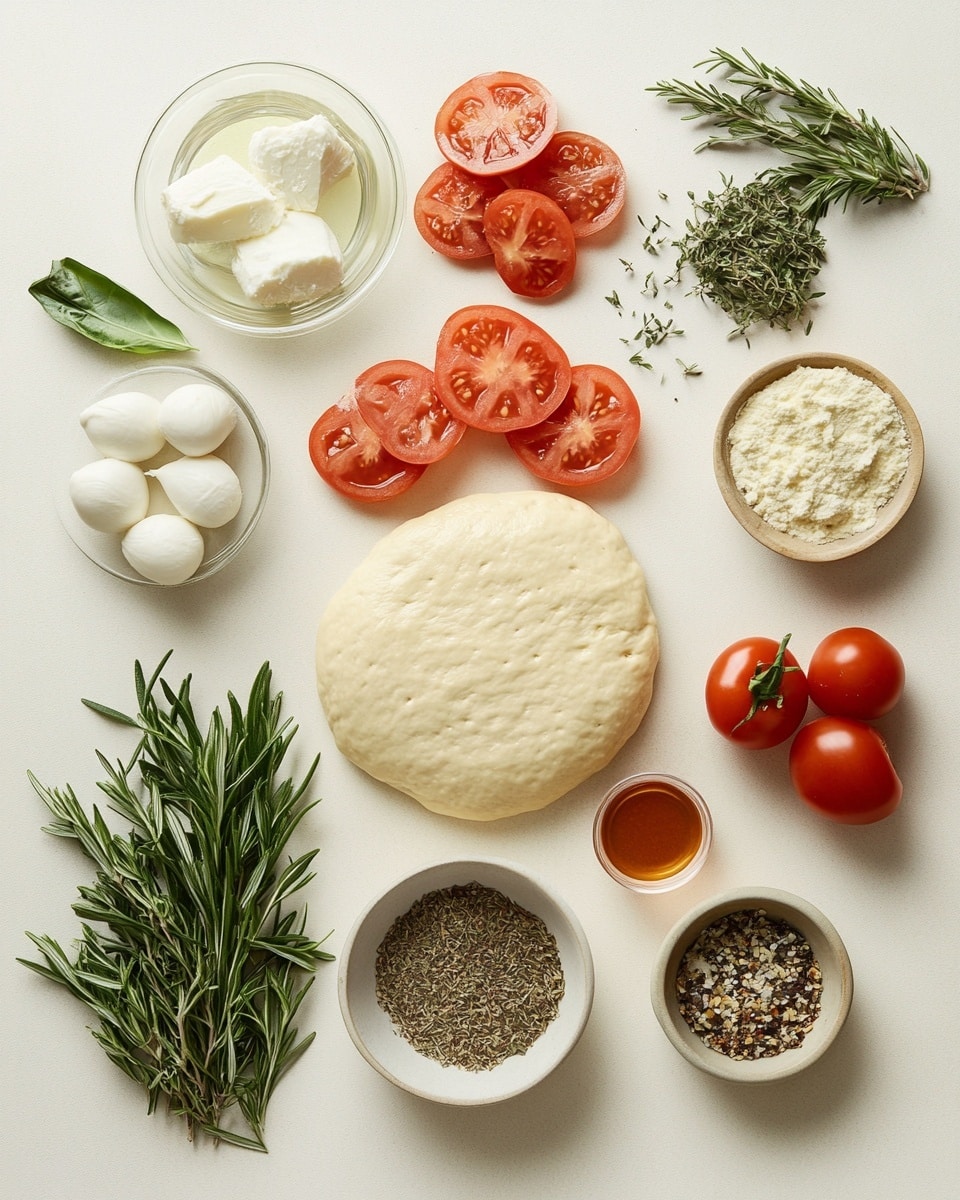
This recipe keeps things simple with classic pizza ingredients that work beautifully when layered in a ramekin. Using good-quality mozzarella and provolone cheeses really helps the flavors shine through, while homemade or store-bought pizza dough provides that perfect golden crust. When shopping, fresh mozzarella isn’t recommended here because it tends to release water, so stick with the sliced kind for sturdiness.
- Pizza dough: I usually go for a homemade yeast dough, but store-bought pizza crust can save time if you’re in a pinch—just be sure it’s fresh.
- Pizza sauce: Use your favorite jarred sauce or a quick homemade one; the sauce adds that tangy, flavorful heart to the pot pie.
- Mozzarella cheese: Sliced mozzarella (not fresh) melts nicely and forms that classic stretchy texture we all love.
- Provolone cheese: This makes a lovely melty layer on top, adding great flavor complexity.
- Additional pizza toppings: Whatever you love—pepperoni, bell peppers, olives, cooked Italian sausage—all work great. Just don’t overfill or the pot pies might overflow.
Variations
I like to mix things up based on what’s in my fridge or the season. It’s a really forgiving recipe that welcomes your favorite pizza toppings, so feel free to get creative with it. You can also tweak it to fit dietary preferences pretty easily.
- Vegetarian version: Load up on mushrooms, spinach, roasted red peppers, and artichoke hearts—I find it just as satisfying without meat.
- Meat lover’s delight: Adding cooked sausage or bacon pieces gives a smoky, savory punch; just remember to pre-cook any raw meats thoroughly.
- Gluten-free: Use a store-bought gluten-free pizza dough or your favorite homemade recipe to keep it accessible.
- Spicy kick: Add sliced jalapeños or a drizzle of hot honey on top for a fun twist.
How to Make Pizza Pot Pie Recipe
Step 1: Prep Your Oven and Ramekins
First things first, preheat your oven to 400°F. Then, spray four 10-ounce oven-safe ramekins with baking spray inside and outside so the pot pies won’t stick when you take them out. I like to place the ramekins on a baking sheet to catch any drips—trust me, it makes cleanup way easier.
Step 2: Layer the Cheese and Sauce
Start by placing slices of mozzarella cheese into the ramekins. I find that putting the short ends of each piece right in the center helps the cheese melt evenly. Next, spoon about 2 tablespoons of pizza sauce over the mozzarella. This layering creates that classic pizza flavor in every bite.
Step 3: Add Your Favorite Toppings
Here’s where you personalize your pizza pot pie. Add your desired toppings, but be mindful not to overfill—too many toppings can make it hard to seal with dough. If you want a saucier pie, add an extra tablespoon or two of sauce on top of the toppings for maximum flavor.
Step 4: Finish with Provolone and Dough
Top the filling with a slice of provolone to seal the cheesy goodness. Then divide your dough into four pieces, stretching each one so it’s about an inch larger than your ramekin’s opening. Carefully place the dough over the ramekins, pressing gently around the edges to seal. Don’t worry if it’s not perfect—rustic is delicious!
Step 5: Bake Until Golden and Bubbling
Pop the entire baking sheet with ramekins into your preheated oven and bake for about 15 to 25 minutes, until the crust turns golden brown and crispy. I keep an eye on mine around the 15-minute mark just in case my oven runs hot. That bubbling cheese aroma is a dead giveaway that it’s almost ready!
Step 6: Serve with a Flipping Trick
Once baked, carefully remove the ramekins (oven mitts are a must here), then place a plate on top of the ramekin and invert it to release your pizza pot pie. Sometimes the dough can stick a little, so I run a knife gently around the edge first and use tongs for a steady grip. It’s satisfying to see that pot pie come out perfectly intact and ready to enjoy.
How to Serve Pizza Pot Pie Recipe
Garnishes
I like to sprinkle fresh chopped basil or oregano over the top—that pop of green makes it look inviting and adds a fresh, herbal note. Sometimes a dash of red pepper flakes or Parmesan cheese elevates it even more. Choose garnishes that match your toppings to keep the flavors harmonious.
Side Dishes
This pizza pot pie is pretty hearty on its own, but pairing it with a crisp green salad or garlic roasted veggies rounds out the meal nicely. On colder days, a cup of tomato basil soup alongside adds warmth and extra comfort. I’ve also enjoyed it with a simple Caesar salad for a fresh, crunchy contrast.
Creative Ways to Present
For special occasions or a fun family dinner, I’ve tried topping each pot pie with a small fresh pizza dough cutout shape—think stars or hearts—before baking for a cute effect. Serving in colorful ramekins adds a festive touch as well. You could even make mini pot pies as appetizers by using small custard cups and adjusting baking time accordingly.
Make Ahead and Storage
Storing Leftovers
Leftover pizza pot pies store well in an airtight container in the fridge for up to three days. I recommend wrapping each one individually if you don’t have a container big enough—that helps keep the crust from getting soggy. When you’re ready to eat, it’s easy to reheat without losing that crisp crust.
Freezing
I’ve frozen assembled but unbaked pizza pot pies by wrapping tightly in plastic wrap and then foil, and placed them on a baking sheet to freeze solid before moving to a freezer bag. This way, you can bake fresh pot pies straight from frozen—just add a few extra minutes to the bake time and you’re set for an easy meal any night.
Reheating
To reheat leftover pizza pot pie, I always use the oven or toaster oven at 350°F to keep the crust crisp. It usually takes about 10-15 minutes—avoid the microwave if you want to dodge a soggy crust. If you’re in a hurry, microwaving is fine but then pop it in a hot skillet for a minute to crisp up the bottom.
FAQs
-
Can I use fresh mozzarella in this Pizza Pot Pie Recipe?
It’s best to avoid fresh mozzarella here because it contains more moisture, which can make the pie watery and the crust soggy. Using sliced, low-moisture mozzarella helps the cheese melt evenly and keeps the structure intact.
-
What if I don’t have ramekins—can I bake this Pizza Pot Pie differently?
If you don’t have ramekins, you can try using small oven-safe bowls or even muffin tins for mini versions. Just be sure the containers are oven safe and adjust baking time as necessary. The ramekins are perfect because they help the pot pie keep its shape and cook evenly.
- Can I prepare the Pizza Pot Pie Recipe ahead of time?
Absolutely! You can assemble the pot pies and refrigerate them for a few hours or freeze them before baking. If refrigerated, bake just a bit longer to ensure the dough is fully cooked. Freezing before baking requires slightly longer bake times as well.
- What toppings work best for this Pizza Pot Pie Recipe?
Classic pizza toppings like pepperoni, cooked sausage, bell peppers, olives, and mushrooms all work great. Just make sure any meat toppings are pre-cooked, and avoid overly watery veggies unless you sauté them first.
- Is there a way to make this Pizza Pot Pie recipe vegan?
You can swap regular cheese for vegan cheese alternatives and use dairy-free pizza dough. Load up on veggies and vegan-friendly toppings to keep it tasty. Just check your pizza sauce ingredients to make sure it’s free of animal products.
Final Thoughts
This Pizza Pot Pie Recipe holds a special place in my kitchen because it feels like such a fun way to enjoy pizza in a cozy, comforting form. It’s great for sharing or making just for yourself when you want an individual meal that’s both hearty and satisfying. Give it a try—the ease of assembly combined with customizable toppings means you can keep coming back to it with fresh ideas each time. I promise it’ll quickly become a new favorite in your dinner lineup, and you’ll love how rewarding and delicious making it feels.
PrintPizza Pot Pie Recipe

This Pizza Pot Pie recipe transforms the classic pizza into an individual savory pot pie with layers of gooey cheese, rich pizza sauce, and your favorite toppings, all enclosed in a golden homemade pizza dough crust. Baked in oven-safe ramekins, these personal pies are perfect for fun, customizable meals that combine the comfort of pizza with the creativity of pot pies.
- Prep Time: 20 minutes
- Cook Time: 20 minutes
- Total Time: 40 minutes
- Yield: 4 servings 1x
- Category: Main Course
- Method: Baking
- Cuisine: Italian-American
Ingredients
Pizza Pot Pie
- 1 large crust pizza dough (see dough recipe below)
- 1 cup pizza sauce
- 8 slices mozzarella cheese, not fresh, cut in halves
- 4 slices Provolone cheese
- Additional pizza toppings as desired (e.g., cooked Italian sausage, pepperoni, vegetables)
Pizza Dough
- 2 1/4 teaspoons active dry yeast
- 2 teaspoons sugar (white or brown), divided
- 1 1/4 cups water, heated to 115°F (46°C)
- 2 tablespoons oil (vegetable or olive oil)
- 3 cups all-purpose flour
- 1 teaspoon salt
Instructions
- Preheat Oven: Preheat your oven to 400°F (204°C) to ensure it’s ready for baking the pot pies.
- Prepare Ramekins: Spray four 10-ounce oven-safe ramekins inside and on the outside sides with baking spray to prevent sticking. Place the ramekins on a baking sheet for easy handling.
- Layer Cheese: Place slices of mozzarella cheese into each ramekin, arranging the short ends of each piece centered in the bottom of the ramekin to cover the surface evenly.
- Add Pizza Sauce: Spoon 2 tablespoons of pizza sauce over the mozzarella cheese in each ramekin to add moisture and flavor.
- Add Toppings: Add any desired pizza toppings such as cooked Italian sausage, vegetables, or pepperoni. Be careful not to overfill the ramekins to allow the dough to fit properly.
- Add Extra Sauce: Optionally, add an additional 2 tablespoons of pizza sauce over the toppings for extra sauciness.
- Top with Provolone: Place one slice of Provolone cheese atop each ramekin filling to create a melty cheese layer.
- Prepare Dough: Divide the pizza dough into four equal pieces. Stretch each piece into a circle that is 1 to 1 1/2 inches larger than the top diameter of the ramekin to ensure full coverage.
- Seal Pot Pies: Place each dough circle on top of the filled ramekins and gently press the dough around the edges to seal it.
- Bake: Place the baking sheet with ramekins into the preheated oven. Bake at 400°F for 15–25 minutes, or until the crust is golden brown and fully cooked.
- Invert to Serve: Remove ramekins from the oven and carefully invert each onto a serving plate. If necessary, run a knife around the dough edges to loosen the crust before removing the ramekin using tongs.
- Enjoy: Serve your delicious pizza pot pies warm and enjoy the cheesy, saucy filling with a perfectly crisp crust.
- Make the Dough (Optional): To make the dough, combine yeast, 1 teaspoon sugar, and warm water in a small bowl and let it foam (about 5-10 minutes). In a mixing bowl, combine flour, salt, and remaining teaspoon sugar. Once yeast is foamy, add oil and mix with flour mixture until dough is smooth and elastic (using stand mixer dough hook or by hand kneading). Let dough rise at least one hour before using. This dough can be refrigerated for up to 4 days.
Notes
- Use a yeast-based pizza dough for best texture and flavor.
- Ensure ramekins are oven-safe, such as Pyrex, to handle baking temperatures.
- If using raw meats like Italian sausage, cook and cool the meat before adding to the ramekins to prevent undercooking.
- Making homemade dough adds about 60 minutes to prep time due to rising.
- The nutritional information provided corresponds to the cheese-only version; nutrition will vary with different toppings.
Keywords: pizza pot pie, individual pot pies, homemade pizza, pizza dough recipe, easy dinner, oven-baked pot pie, Italian-American comfort food