Pine Cone Brownies with Chocapic Cereal and Powdered Sugar Recipe
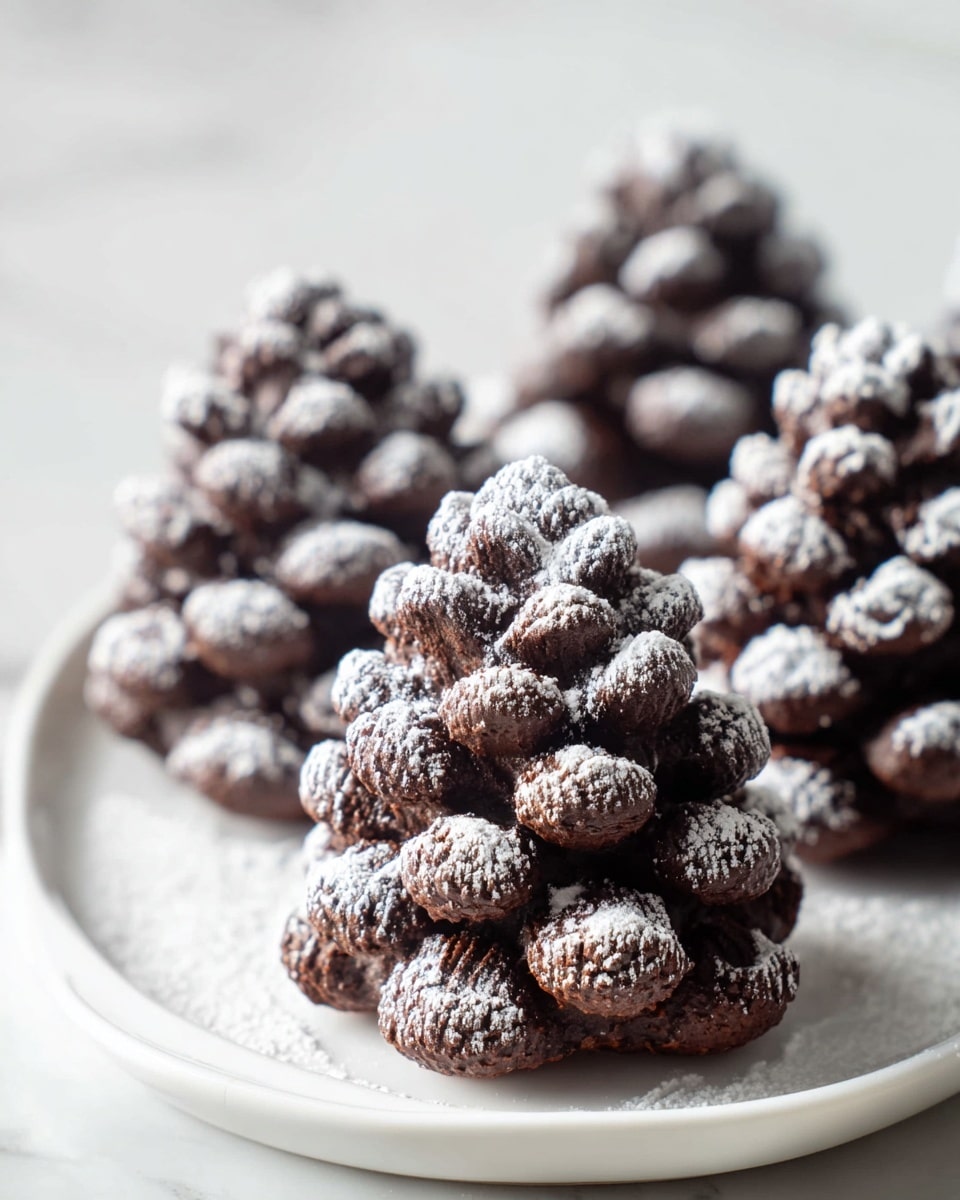
If you’re looking for a fun and delicious twist on traditional brownies, this Pine Cone Brownies with Chocapic Cereal and Powdered Sugar Recipe is exactly what you need. It’s not just about the rich, fudgy brownies, but how the crispy, chocolaty Chocapic cereal adds the perfect crunch and visual flair to resemble a pine cone. I remember making these for a holiday gathering, and everyone was fascinated by the texture and presentation—plus, who can say no to a brownie that doubles as a little work of art?
This recipe works perfectly when you want a dessert that’s both eye-catching and comforting. The powdered sugar dusting brings a gentle sweetness and snowy effect that makes these brownies feel extra special. Whether you’re baking for kids, hosting a cozy get-together, or just craving that chocolatey crunch, Pine Cone Brownies with Chocapic Cereal and Powdered Sugar Recipe is a guaranteed crowd-pleaser.
Ingredients You’ll Need
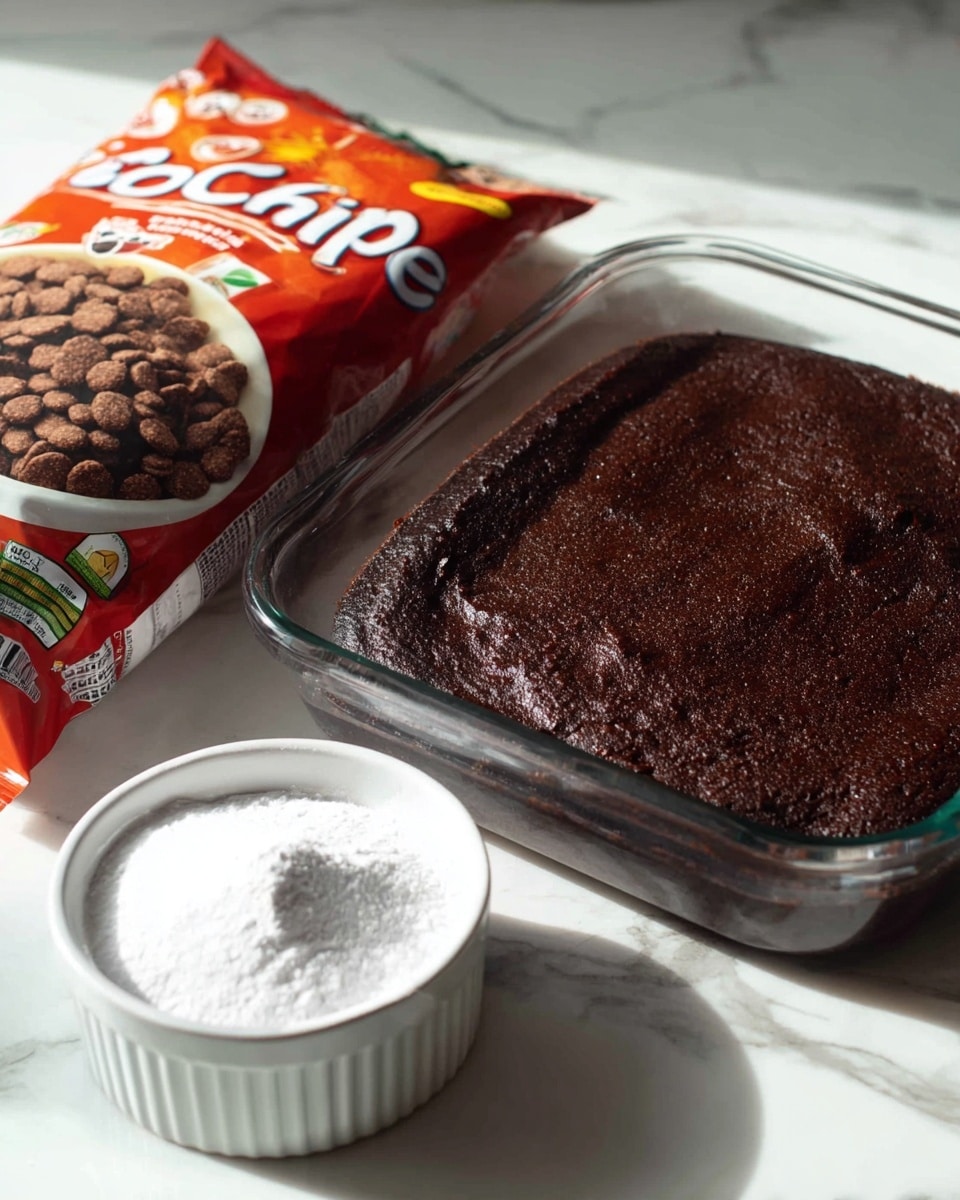
The magic here lies in keeping the ingredients simple but combining them to create eye-catching texture and flavor contrasts. You’ll want to make sure your brownies are freshly baked and still warm so the cereal sticks just right, and choosing Chocapic cereal is key for that perfect chocolaty crunch.
- Brownies: I like to use my favorite homemade or store-bought fudgy brownies, still warm from the oven for the best cereal adhesion.
- Chocapic Cereal: This is a must-have for creating that pine cone look with a chocolatey taste. If you can’t find it, another chocolate-flavored puffed cereal can work.
- Powdered Sugar: Acts like a snowy finishing touch, adding a little sweetness and making the pine cones look extra festive.
Variations
One of the things I love about this Pine Cone Brownies with Chocapic Cereal and Powdered Sugar Recipe is how easy it is to tweak. Sometimes I swap the cereal for nuts or add a drizzle of caramel for a flavor twist, but here are some variations that can inspire you to make it your own.
- Nutty Pine Cones: I often add chopped walnuts or pecans mixed with the cereal for extra crunch and nuttiness.
- White Chocolate Dusting: Instead of powdered sugar, try dusting with finely grated white chocolate for a creamy finish.
- Gluten-Free Option: Use gluten-free brownies and ensure your cereal is gluten-free; the recipe still works beautifully.
How to Make Pine Cone Brownies with Chocapic Cereal and Powdered Sugar Recipe
Step 1: Bake or Warm Your Brownies
Start by baking your favorite brownie recipe or heating up store-bought ones until they are just warm—not hot, so you don’t burn yourself later. I usually take them out of the oven 5 minutes before they’re fully cool so the cereal sticks easier without sliding off. If they’re too cold, the cereal won’t adhere as well, so timing is key here.
Step 2: Shape the Pine Cones
Next, break or cut your brownies into individual pieces if they aren’t already, then gently pat the top and sides with Chocapic cereal. I find pressing the cereal lightly into the warm brownie helps it stick perfectly and creates that natural pine cone texture. Don’t overload it—adding cereal in small clusters works better than covering every inch.
Step 3: Dust with Powdered Sugar
Once the cereal is firmly in place, dust the whole brownie lightly with powdered sugar using a fine sieve or shaker. This not only adds sweetness but makes your pine cones look snow-dusted and festive, perfect for winter gatherings or just a cozy treat. Be generous but gentle—too much sugar can overwhelm the cocoa flavor.
How to Serve Pine Cone Brownies with Chocapic Cereal and Powdered Sugar Recipe
Garnishes
I typically keep it simple with just powdered sugar, but sometimes I like sprinkling a few mini chocolate chips or a dash of cinnamon for a little extra flair. Fresh mint leaves can also add a lovely color contrast if you’re serving these at a party.
Side Dishes
Pair your Pine Cone Brownies with a scoop of vanilla ice cream or a drizzle of caramel sauce to balance the chocolate. A cup of strong coffee or spiced hot chocolate also complements them beautifully—perfect for cozy afternoons.
Creative Ways to Present
For holiday gatherings, I like arranging the pine cone brownies on a platter lined with pine needles or evergreen sprigs to boost the forest vibe. Wrapping individual brownies in parchment paper tied with twine makes cute edible gifts, and letting kids decorate their own with extra cereal adds fun to the process.
Make Ahead and Storage
Storing Leftovers
I usually store any leftover Pine Cone Brownies in an airtight container at room temperature for up to three days. Just make sure the container isn’t too tight on top so the cereal doesn’t get crushed. If you can, eating them within two days is best for freshness and crunch.
Freezing
Freezing these brownies works well if you want to prepare in advance. I wrap each brownie individually in plastic wrap, then place them in a zip-top freezer bag. When you’re ready, thaw them at room temperature; the cereal might lose a bit of its crispness but the chocolate flavor remains fantastic.
Reheating
To warm leftover brownies, I gently microwave them for about 10-15 seconds—just enough to bring back that soft, warm center and slightly meld the cereal without making it soggy. Avoid overheating, or the cereal can turn chewy and lose its crunch.
FAQs
-
Can I use any cereal instead of Chocapic in this Pine Cone Brownies with Chocapic Cereal and Powdered Sugar Recipe?
Absolutely! While Chocapic is the ideal choice for its shape and chocolate flavor, you can substitute with other puffed chocolate cereals or even nuts for crunch. Just keep in mind the texture might vary a bit, but the concept stays delicious.
-
Do I need to use warm brownies for this recipe?
Yes, using warm brownies really helps the cereal stick without falling off. The warmth creates a slight stickiness on the surface which secures the pine cone pattern. If you try this with cold brownies, the cereal tends to slide off easily.
-
Can I make these Pine Cone Brownies ahead of time?
You can prep the brownies in advance, but I’d add the cereal and powdered sugar just before serving to keep the pine cone look crisp and fresh. However, if you store them carefully, they still taste great a day or two later.
Final Thoughts
This Pine Cone Brownies with Chocapic Cereal and Powdered Sugar Recipe has become one of my go-to treats when I want to impress without fuss. It’s a perfect balance of creamy brownie goodness and crispy cereal crunch that somehow feels festive and homey all at once. Honestly, making these with friends or family really adds to the joy—so why not grab your brownies and cereal, and give this delightful recipe a try? You won’t be disappointed.
PrintPine Cone Brownies with Chocapic Cereal and Powdered Sugar Recipe

These Pine Cone Brownies are a delightful twist on a traditional brownie, featuring a crunchy cereal coating that resembles the texture and look of pine cones. Baked to perfection and slightly warm when served, they offer a delicious combination of fudgy chocolate goodness and a crisp exterior, dusted with powdered sugar for a touch of sweetness and visual appeal.
- Prep Time: 10 minutes
- Cook Time: 25 minutes
- Total Time: 35 minutes
- Yield: 12 brownies 1x
- Category: Dessert
- Method: Baking
- Cuisine: American
Ingredients
Brownies
- 12 homemade or store-bought brownies, baked and slightly cooled (still warm)
Cereal Coating
- 1–2 cups (60 g) Chocapic cereal
Topping
- Powdered sugar, for dusting
Instructions
- Prepare the Brownies: Bake your favorite brownie recipe in a pan and allow them to cool slightly, so they are warm but manageable for handling.
- Crush the Cereal: Lightly crush the Chocapic cereal to create small clusters that mimic the texture of pine cones without turning them into fine crumbs.
- Coat the Brownies: Press each warm brownie gently into the crushed cereal until evenly coated, ensuring the cereal sticks well to the surface to form a pine cone-like exterior.
- Set the Coating: Place the coated brownies on a tray to allow the cereal layer to settle and adhere properly.
- Dust with Powdered Sugar: Generously sprinkle powdered sugar over the coated brownies, enhancing the pine cone appearance and adding a subtle sweetness.
- Serve Warm: Enjoy these pine cone brownies while they are still slightly warm for the best texture and flavor experience.
Notes
- Use brownies that are still warm to help the cereal adhere better.
- Lightly crushing the cereal is key to achieving the pine cone effect without making the coating too fine.
- Powdered sugar adds a lovely snowy effect and subtle sweetness but can be adjusted based on preference.
- For a gluten-free option, use gluten-free brownie mix and cereal.
- Store leftover brownies in an airtight container to maintain crispness.
Keywords: brownies, pine cone brownies, chocolate cereal, dessert, baked treats, chocolate brownies, crunchy coating