Peeps Easter Bunny Sugar Cookies Recipe

If you’re looking for a whimsical treat to brighten up your Easter celebrations, you’ve got to try this Peeps Easter Bunny Sugar Cookies Recipe. There’s something just magical about combining classic sugar cookies with the playful charm of pastel sanding sugars and little bunny faces made from melted chocolate. I’ve found that these cookies aren’t just adorable—they’re the perfect way to bring some joy to an Easter brunch or a family gathering where everyone can get involved decorating.
What I love most about this Peeps Easter Bunny Sugar Cookies Recipe is how it turns a simple sugar cookie into a festive centerpiece without being too tricky to make. Whether you’re baking with kids or just want an easy but impressive dessert, these cookies strike that sweet spot. Plus, they’re a lot of fun to customize with different colors and designs, so you can really make them your own.
Ingredients You’ll Need
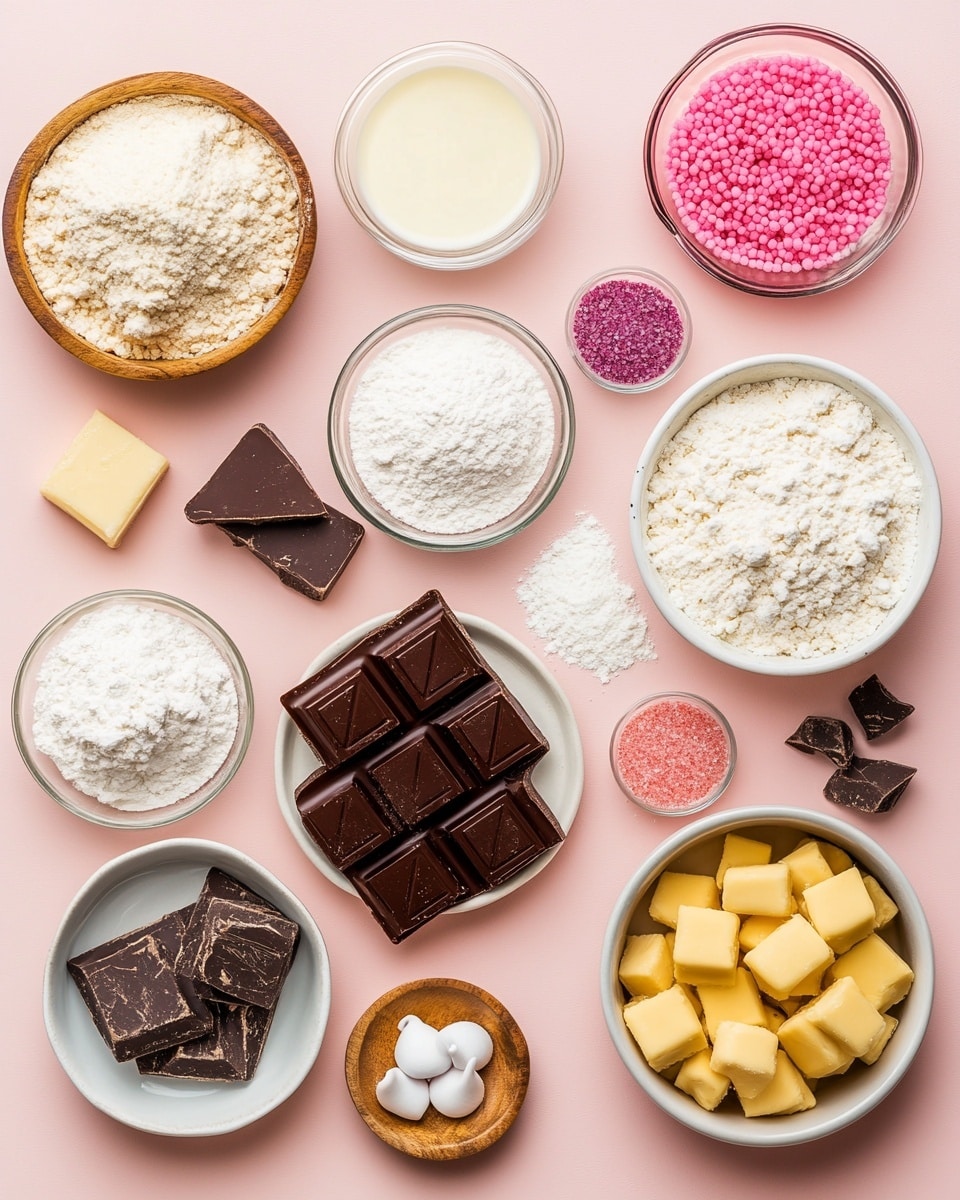
The beauty of this recipe lies in its straightforward ingredients that work harmoniously together to create those soft, flavorful cookies and colorful, shiny coatings. When picking out your ingredients, try to use good-quality vanilla extract and pure food colorings for the best flavor and vibrant colors.
- Sugar cookie dough: You’ll want a sturdy dough that holds its shape well for cutouts. I recommend prepping this in advance so it chills properly.
- All-purpose flour: For dusting, to keep your dough from sticking when rolling out.
- Royal icing: This icing dries hard which is perfect for outlining and flooding the cookies.
- Assorted food colorings: Use gel or paste colors for bright results without thinning the icing.
- Sanding sugar: Different pastel shades work wonderfully to give the cookies that signature Easter sparkle.
- Dark chocolate: For melting and piping cute little bunny eyes and noses—this adds a lovely contrast and flavor punch.
Variations
One of the best parts about making the Peeps Easter Bunny Sugar Cookies Recipe is how easy it is to mix things up and add your own twist. Here’s how I like to play around with it, but feel free to experiment based on what you have on hand or your dietary preferences.
- Gluten-free version: I’ve swapped the all-purpose flour for a gluten-free blend with excellent results—just make sure your blend includes xanthan gum for structure.
- Vegan adaptation: Using a vegan sugar cookie dough base and dairy-free chocolate can keep this recipe animal-friendly without sacrificing taste.
- Color pop: Sometimes I like to add a touch of edible glitter or mix sanding sugar colors for a multicolored bunny effect, which kids always find delightful.
How to Make Peeps Easter Bunny Sugar Cookies Recipe
Step 1: Chill and Prep Your Dough
Start by preparing your sugar cookie dough and forming it into a large disc. Wrapping it tightly in plastic wrap and refrigerating it for at least an hour is key—it helps the dough firm up, making it much easier to roll out and cut shapes without sticking or losing detail. Don’t rush this step; I’ve found that a well-chilled dough leads to crisp, clean bunny cutouts that bake evenly.
Step 2: Roll and Cut Your Bunny Shapes
Once chilled, lightly flour your workspace and roll the dough out to about a quarter-inch thickness. This thickness keeps the cookies soft and tender but sturdy enough for decorating. Use a bunny-shaped cookie cutter dipped in flour to prevent sticking, and press firmly to get proper shapes. Don’t worry if you have scraps leftover—just gather them, re-roll once, and cut again to maximize your yield.
Step 3: Chill Cookies Before Baking
Place your cutouts on parchment-lined baking sheets and pop them back into the fridge for 20 minutes. This little extra chill before baking minimizes spreading in the oven, so your bunnies keep their shape beautifully. I learned this chill step the hard way—trying to skip it led to misshapen cookies once or twice!
Step 4: Bake Just Right
Bake your cookies at 325°F for 8 to 10 minutes. They’ll look pale and will feel soft when they come out—that’s exactly what you want because the cookies will firm up as they cool. Let them rest for a minute on the pan, then transfer to wire racks to cool completely before decorating.
Step 5: Decorate with Royal Icing and Sanding Sugar
Prepare your royal icing to flood consistency, divide it, and color it with your preferred food colors. Using a piping bag fitted with a small round tip, outline and fill each cookie. Here’s my favorite fun part: while the icing is still wet, dip each bunny cookie into a shallow plate of sanding sugar. This adds that iconic sparkle and texture very reminiscent of Peeps candy.
Step 6: Add Bunny Faces with Melted Chocolate
Once your sugar-coated icing sets just a bit, melt dark chocolate and pipe tiny eyes and noses on each bunny with a fine-round tip. This step gives the cookies personality and a delightful chocolatey punch that balances the sweetness. Let everything dry thoroughly—usually about 3 hours at room temperature—before handling or packaging.
How to Serve Peeps Easter Bunny Sugar Cookies Recipe
Garnishes
I love pairing these cookies with fresh mint sprigs or edible flowers on the serving platter to add a touch of spring freshness. Sometimes I dust a little powdered sugar around the edges to mimic a fresh Easter morning vibe. The visual contrast really makes these cookies pop and adds to the festive mood.
Side Dishes
These cookies are a perfect sweet side for Easter brunch menus like fresh fruit salad, citrus-glazed ham, or even a creamy lemon cheesecake. I often serve them alongside colorful fruit juices or a lightly brewed herbal tea to balance their sweetness, especially for gatherings with kids and adults alike.
Creative Ways to Present
For a festive table centerpiece, I love arranging the Peeps Easter Bunny Sugar Cookies Recipe on a multi-tiered cake stand with pastel ribbons woven around. Another idea I tried was packaging individual cookies in clear bags tied with curly pastel ribbons—these make adorable Easter favors for guests or gifts for school parties!
Make Ahead and Storage
Storing Leftovers
Once the royal icing and chocolate have fully hardened, I store leftover cookies in an airtight container at room temperature. This keeps them fresh and crisp for about a week. If your kitchen tends to be humid, slipping some silica gel packets into the storage container can help prevent moisture buildup.
Freezing
I’ve also frozen these decorated cookies by placing them single layer on a baking sheet to flash-freeze and then transferring to airtight freezer bags. When sealed well, they keep perfectly for up to three months. Just be sure to thaw them fully before serving to avoid condensation spoiling the icing.
Reheating
Since these are sugary, decorated cookies, I don’t recommend reheating in the microwave as it can melt the decorations. If you want to warm them slightly, a few seconds in a warm, not hot, oven (around 250°F) wrapped in foil works well. This brings back a tender chew without ruining the icing.
FAQs
-
Can I make Peeps Easter Bunny Sugar Cookies Recipe ahead of time?
Absolutely! You can prepare the cookie dough and chill it up to 1 day in advance, and the cookies themselves can be baked and decorated several days before Easter. Just be sure to store decorated cookies airtight to keep them fresh.
-
What if I don’t have a bunny-shaped cutter?
No worries! You can use any Easter-themed cookie cutters like eggs or chicks, or even shape them freehand for a homemade touch. The decorating steps work just as well on different shapes.
-
Can I substitute royal icing with another frosting?
Royal icing is preferred here since it dries hard and supports the sanding sugar well, but if you’re in a pinch, a thick glaze or a firm buttercream can work. Just note it won’t have the same crisp finish or set time.
-
How do I keep the cookies soft?
Don’t overbake your cookies—they should come out pale and slightly soft when you pull them from the oven. Cooling them on a wire rack helps prevent sogginess. Storing them airtight also maintains that soft, tender texture.
Final Thoughts
Making the Peeps Easter Bunny Sugar Cookies Recipe has become a beloved tradition in my kitchen, especially because it brings out the kid in all of us with its playful colors and sweet flavor. I hope you’ll give this recipe a whirl—it’s such a fun way to celebrate the season, impress your guests, and enjoy a delicious treat that feels classic yet fresh. Plus, sharing these cookies always sparks happy smiles and great memories, making all the effort totally worth it!
PrintPeeps Easter Bunny Sugar Cookies Recipe

These Peeps Easter Bunny Sugar Cookies are a delightful and festive treat perfect for celebrating Easter. Made from classic sugar cookie dough, decorated with colorful royal icing, sanding sugar, and detailed with dark chocolate eyes and noses, these cookies are as fun to make as they are to eat. The cookies are soft and tender with a crisp edge, beautifully decorated to look like adorable Easter bunnies, making them ideal for springtime gatherings or holiday gifting.
- Prep Time: 1 hour 15 minutes (includes dough chilling and chilling cut-outs)
- Cook Time: 10 minutes
- Total Time: 1 hour 25 minutes + 3 hours setting time
- Yield: 20–24 cookies 1x
- Category: Dessert
- Method: Baking
- Cuisine: American
- Diet: Vegetarian
Ingredients
For the Sugar Cookies:
- 1 batch sugar cookie dough (enough for 20–24 cookies)
- 1/2 cup all-purpose flour, for dusting
For the Decorations:
- 1 batch royal icing
- Assorted food colorings
- 1 cup sanding sugar, assorted colors
- 1/2 cup coarsely chopped dark chocolate, melted
Instructions
- Prepare the Dough: Make one batch of sugar cookie dough. Shape the dough into a large disc, wrap it tightly in plastic wrap, and refrigerate for one hour to firm up.
- Preheat Oven: Set your oven to 325°F (163°C) to ensure it’s ready when the dough is chilled.
- Roll Out Dough: Lightly flour a flat work surface and remove the dough from the refrigerator. Using a rolling pin, roll out the dough evenly to about 1/4 inch thickness.
- Cut Shapes: Dip a bunny-shaped cookie cutter in flour, then cut out shapes from the dough. Collect scraps, re-roll once, and cut additional shapes. Discard any remaining excess dough.
- Chill Cut-Outs: Transfer the cut-out cookies onto two sheet pans lined with parchment paper or silicone mats. Place the pans in the refrigerator for 20 minutes to chill the dough and help the cookies keep their shape during baking.
- Bake Cookies: Remove the pans from the refrigerator and immediately bake the cookies for 8 to 10 minutes. The cookies should appear pale white and feel soft to the touch. After baking, let them sit on the pans for 1 minute before transferring to wire racks to cool completely.
- Prepare Royal Icing: Make one batch of royal icing and adjust it to flood consistency by adding water as needed. Divide and color the icing with your desired food colorings. Fill piping bags fitted with a #2 tip.
- Decorate with Icing and Sugar: Outline and flood each cooled cookie with the colored royal icing. Quickly dip the entire surface of each cookie into a bowl or plate of colored sanding sugar to create a festive sugar coating. Place cookies on a flat surface to set.
- Add Chocolate Details: Melt the dark chocolate and place in a piping bag fitted with a small round tip (#2 or #4). Pipe two eyes and a nose onto each bunny cookie, adding charming facial features.
- Set Decorations: Allow the decorated cookies to set at room temperature until the icing and chocolate harden completely, approximately 3 hours, before serving or packaging.
Notes
- For classic sugar cookies and royal icing recipes, Foodal’s tried-and-true recipes are highly recommended for best results.
- Using a well-chilled dough and cookie cut-outs helps maintain the bunny shapes during baking.
- Flood consistency royal icing is key for smooth, even decorating that adheres well to sanding sugar.
- Allow at least 3 hours for the icing and chocolate decorations to harden fully before handling.
- Store cookies in an airtight container at room temperature to maintain freshness for up to 5 days.
Keywords: Easter cookies, Bunny sugar cookies, Royal icing cookies, Holiday cookies, Festive baking