Pear Apple Cider Recipe
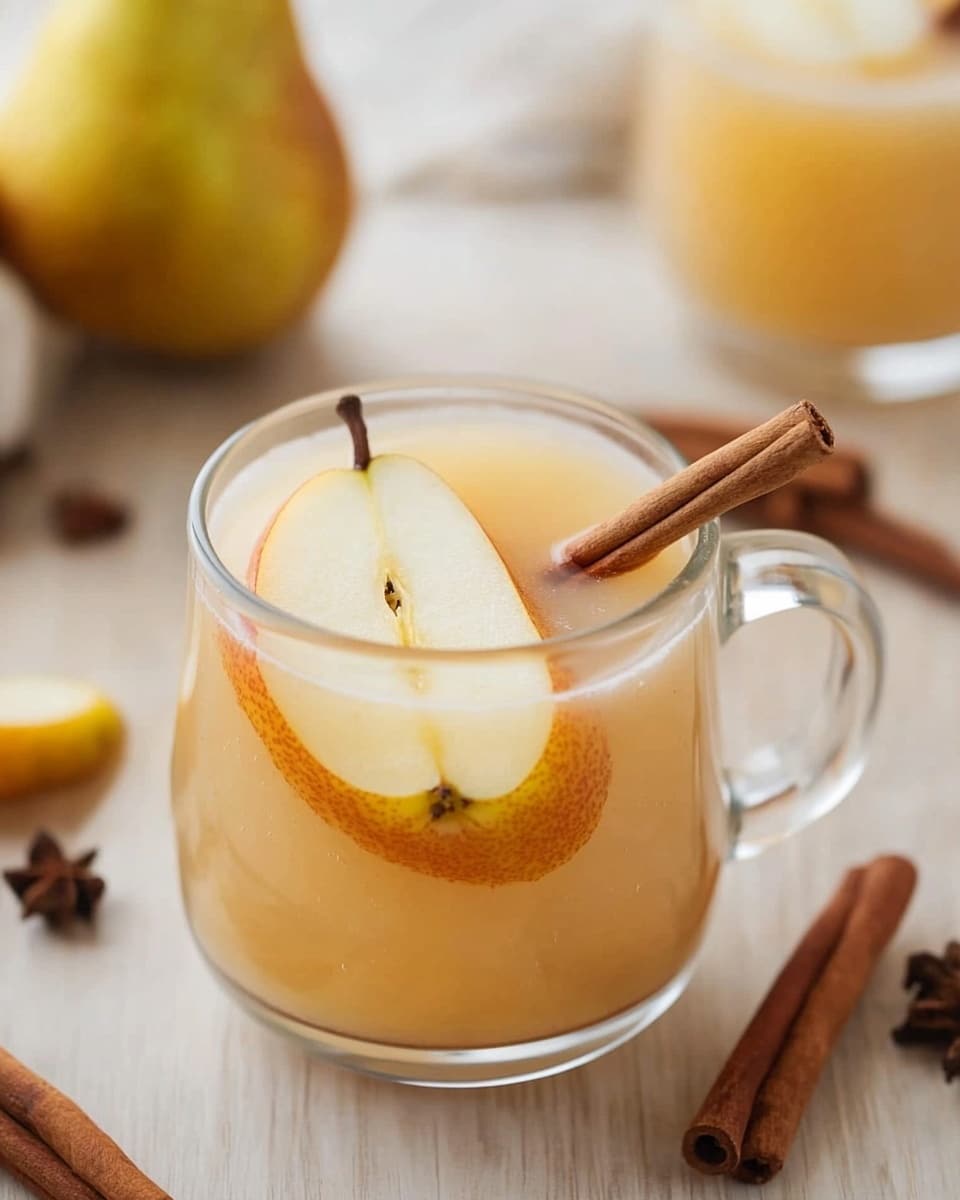
There’s something incredibly cozy about a warm mug of cider on a crisp fall day, and this Pear Apple Cider Recipe hits all the right notes for that comforting feeling. Combining ripe bartlett pears with crisp honeycrisp apples creates a beautifully balanced flavor—sweet, tart, and just a little bit spicy—making it the perfect drink to curl up with as the leaves change color. I always find myself reaching for this recipe when I want to spread some fall cheer without fussing over complicated ingredients.
What makes this Pear Apple Cider Recipe stand out for me is how simple it is, yet it tastes like you’ve simmered it for hours in a cozy cabin kitchen. The blend of pear and apple juices, a touch of brown sugar and maple syrup, hints of vanilla, and traditional spices like cinnamon and cloves give it that magical depth you just can’t get from store-bought mixes. Whether you’re making it for a weekend brunch, a holiday party, or just to warm up after a chilly walk, you’ll enjoy how inviting and versatile this cider really is.
Ingredients You’ll Need
Each ingredient in this Pear Apple Cider Recipe plays a special role in building richness and complexity while keeping the drink refreshingly bright. When shopping, aim for the freshest fruit and pure juices to make your cider shine.
- Bartlett pears: These pears are wonderfully juicy and sweet, breaking down easily to infuse the cider with a gentle pear aroma.
- Honeycrisp apples: Their crisp texture and balanced tartness brighten the cider, balancing out the sweetness from the pears.
- Pear juice: Look for 100% pure pear juice without added sugars to keep things natural.
- Honeycrisp apple juice: This juice pairs perfectly with the pear juice for a layered fruity base.
- Brown sugar: Adds warmth and depth without overpowering the fruit flavors.
- Maple syrup: A subtle hint of maple works beautifully here — think of it as a natural sweetener with a touch of earthiness.
- Lemon juice: Freshly squeezed is best; it adds a bright acidity that balances all the sweetness.
- Vanilla extract: Just a splash gives the cider a silky smooth finish that ties everything together.
- Cinnamon sticks: These warm spices are essential for that classic cider vibe.
- Whole cloves: A little goes a long way, offering an aromatic pop that rounds out the flavor profile.
Variations
I love playing around with this Pear Apple Cider Recipe, and honestly, you should too! Whether you want it spicier or sweeter, adding your own twist makes this recipe feel like it’s truly your own cozy creation.
- Spicy Variation: Sometimes I add a few slices of fresh ginger or a star anise for a little extra warmth that really wakes up the flavors—perfect if you crave some zing.
- Lower Sugar Option: Swap out brown sugar and maple syrup for a drizzle of honey or agave, adjusting to your taste, for a lighter sweet touch.
- Vegan-Friendly Version: This recipe is naturally vegan if you stick to maple syrup or plant-based sweeteners, which I prefer anyway.
- Alcoholic Twist: Once in a while, I add a splash of bourbon or spiced rum at the end to make an adult-friendly cider for chilly evenings.
How to Make Pear Apple Cider Recipe
Step 1: Prepare Your Fruit and Juices
Start by slicing your bartlett pears and honeycrisp apples. There’s no need to peel them; the skins add to the flavor and color. Place all the fruit in a large pot along with both pear and apple juices. Using fresh juices sets the stage for a bright and natural base, so I always recommend 100% pure options. This fresh fruit infusion makes all the difference compared to just heating store-bought cider.
Step 2: Add Sweeteners and Spices
Next up, stir in your brown sugar and maple syrup, then squeeze in the lemon juice. Add the cinnamon sticks and whole cloves—but be careful with cloves; a couple are enough since they pack a punch. The vanilla extract goes in last for that smooth vanilla undertone. I usually add it off the heat to keep that fresh aroma intact.
Step 3: Simmer and Infuse
Bring the mixture to a gentle simmer over medium heat, then reduce the heat low and let it infuse for about 30 to 40 minutes. This slow simmer allows the fruit flavors to meld beautifully with the spices and sweeteners. Stir occasionally and watch the pot—it’s tempting to let it boil, but a too-hot simmer can mute those fresh fruit notes you worked so hard to build.
Step 4: Strain and Serve
Once your cider smells heavenly and the fruit has softened, it’s time to strain. Use a fine mesh sieve or cheesecloth to remove the cloves, cinnamon sticks, and fruit slices (though I’ve been known to add back a few slices for a pretty garnish). Don’t forget to give it a taste and adjust the sweetness or spices if needed before serving.
How to Serve Pear Apple Cider Recipe
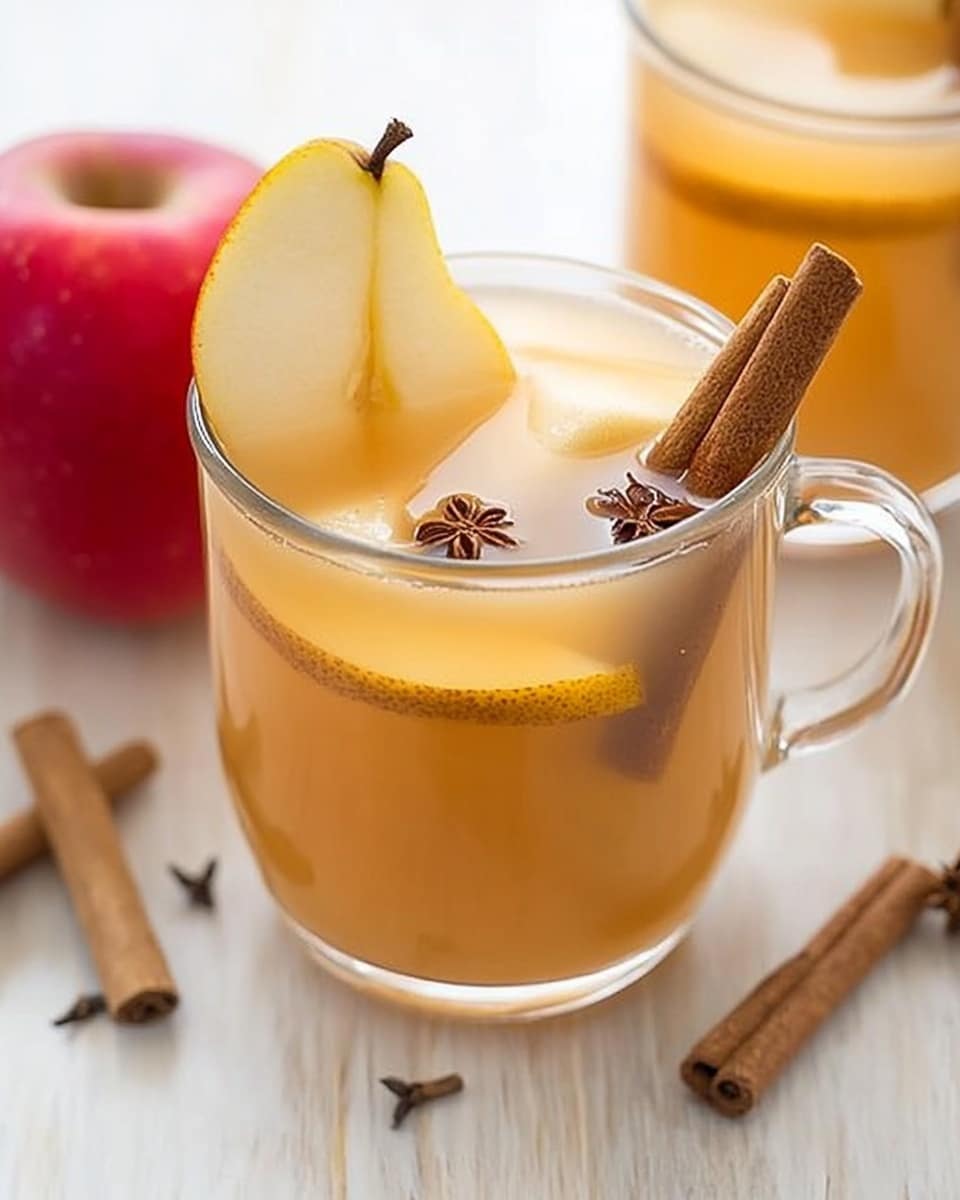
Garnishes
I like to keep my garnishes simple but charming. Thin apple or pear slices floating on top look inviting, and a cinnamon stick not only adds decor but lets guests stir in extra warmth if they want. Occasionally, I’ll add a star anise or a few dried cranberries for some color and an extra festive touch.
Side Dishes
When I serve this Pear Apple Cider Recipe, I love pairing it with hearty autumn treats like spiced pumpkin muffins, warm gingerbread cookies, or even a cheese board featuring sharp cheddar and brie. The cider’s sweetness balances beautifully with savory and spiced snacks, making it a hit at any casual get-together or quiet afternoon at home.
Creative Ways to Present
For special occasions, I’ve made a fun cider bar where guests can add their own mix-ins like a splash of rum, vanilla whipped cream, or different spices. Serving the cider in clear glass mugs or mason jars with twine and fresh herbs adds a cozy, rustic feel that everyone raves about. I even like floating edible flowers or star anise for visual flair when entertaining.
Make Ahead and Storage
Storing Leftovers
My go-to method for leftover Pear Apple Cider Recipe is to store it in an airtight container in the fridge. It keeps well for up to 4 days, and the flavors actually deepen, so you might find it tastes even better the next day. Just give it a good stir before reheating because the spices tend to settle at the bottom.
Freezing
I’ve had good success freezing this cider in portion-sized containers. Just be sure to leave a little room at the top because liquids expand as they freeze. To thaw, place it in the fridge overnight, then reheat gently on the stove. Freezing is great for bulk batches that you want to enjoy over a longer stretch of time.
Reheating
Reheating on the stovetop is my favorite way to revive leftover cider. Warm it slowly over low heat to keep the delicate fruit flavors bright and avoid cooking out your spices. Avoid the microwave if you can, as it tends to heat unevenly and dull the taste. If needed, just re-stir the cider after warming to redistribute the spices and sweetness.
FAQs
-
Can I use other types of pears or apples in this recipe?
Absolutely! Bartlett pears and Honeycrisp apples give great balance, but you can swap in varieties like Anjou, Fuji, or Gala depending on your preference or what’s in season. Just remember that sweeter pears will make the cider less tart, and more tart apples will need a touch more sweetener.
-
Do I need to peel the fruit before cooking?
No need to peel! The skins contribute extra flavor, color, and nutrients to your Pear Apple Cider Recipe. Just make sure to wash the fruit thoroughly before slicing.
- Can I make this Pear Apple Cider Recipe in a slow cooker?
Yep! Combine all ingredients in your slow cooker, set it on low, and let it simmer for about 2 to 3 hours. It’s a hands-off method that infuses flavor gradually. Just strain before serving.
- How long does pear apple cider last once made?
Stored in the refrigerator in a sealed container, it will last for about 4 days. For longer storage, freezing is your best bet.
- Can I make this cider without added sugars?
Yes! You can simply omit the brown sugar and maple syrup if your fruit juices are sweet enough, or substitute with natural sweeteners like honey or agave syrup. Taste as you go to get the perfect balance for you.
Final Thoughts
This Pear Apple Cider Recipe feels like a warm hug in a mug, and it’s one of those cozy pleasures I keep coming back to every fall and winter. Whether you make a big batch for a gathering or just a little for yourself, I promise each sip will bring a moment of comfort and joy. Give it a try, tweak it to your liking, and enjoy the simple magic of homemade cider—it’s a little tradition you’re going to love sharing.
PrintPear Apple Cider Recipe

This cozy Pear Apple Cider recipe is a warm, comforting blend of ripe pears, crisp apples, and fragrant spices, perfect for chilly days or festive gatherings. Combining fresh fruit with pear and apple juice, sweetened with brown sugar and maple syrup, and gently infused with cinnamon, cloves, lemon, and vanilla, this cider offers a delightful balance of sweetness and spice in every sip.
- Prep Time: 15 minutes
- Cook Time: 60 minutes
- Total Time: 1 hour 15 minutes
- Yield: 8 servings 1x
- Category: Beverage
- Method: Stovetop
- Cuisine: American
- Diet: Vegetarian
Ingredients
Fresh Fruits
- 3 ripe Bartlett pears, sliced
- 3 Honeycrisp apples, sliced
Juices & Sweeteners
- ½ gallon pear juice
- ½ gallon Honeycrisp apple juice
- ¼ cup brown sugar
- 3 tablespoons maple syrup
- 2 tablespoons lemon juice (about one small lemon)
Spices & Flavorings
- ½ teaspoon vanilla extract
- 2 cinnamon sticks
- 2 whole cloves
Instructions
- Prepare the Fruit: Begin by washing and slicing the ripe Bartlett pears and Honeycrisp apples into thin pieces to maximize flavor extraction during cooking.
- Combine Ingredients: In a large pot or slow cooker, pour the pear juice and Honeycrisp apple juice. Add the sliced pears and apples, then stir in the brown sugar, maple syrup, and lemon juice to balance the sweetness and acidity.
- Add Spices and Flavor: Place the cinnamon sticks, whole cloves, and vanilla extract into the mixture, ensuring the spices are fully submerged to infuse their aromatic qualities throughout the cider.
- Simmer the Cider: Heat the mixture over medium-low heat on the stovetop. Allow it to gently simmer for about 45 minutes to 1 hour, stirring occasionally to dissolve the sugars and concentrate the flavors without boiling vigorously.
- Strain and Serve: Once the cider is fragrant and infused, strain out the fruit slices and spices using a fine mesh sieve or cheesecloth. Serve the warm cider immediately in mugs, garnished with an optional cinnamon stick or apple slice for presentation.
Notes
- For a spicier cider, add more cinnamon sticks or a pinch of ground nutmeg.
- This cider can be made ahead and refrigerated for up to 3 days; reheat gently before serving.
- To serve cold, chill the cider and add ice cubes or serve over ice.
- For an adult version, consider adding a splash of bourbon or spiced rum when serving.
- Adjust sweetness by varying the amount of maple syrup and brown sugar according to taste.
Keywords: pear apple cider, warm cider recipe, fall beverage, spiced cider, homemade apple cider, holiday drinks