Kung Pao Shrimp Recipe

Oh, I’m so excited to share this Kung Pao Shrimp Recipe with you—it’s one of those dishes that feels fancy but is surprisingly simple to whip up on a weeknight. What I love about it is the perfect balance of savory, spicy, and slightly sweet flavors all packed into tender shrimp finished with crunchy peanuts. It’s like a party in your mouth, and honestly, it’s a guaranteed crowd-pleaser whether you’re cooking just for yourself or feeding friends around the dinner table.
What makes this Kung Pao Shrimp Recipe stand out is how versatile it is. You can have it prepped and on the table in under 30 minutes, making it great for busy evenings when you want to impress without spending hours in the kitchen. Plus, it works wonderfully if you’re trying to add a little more seafood to your rotation—shrimp cooks fast and absorbs all those bold flavors beautifully!
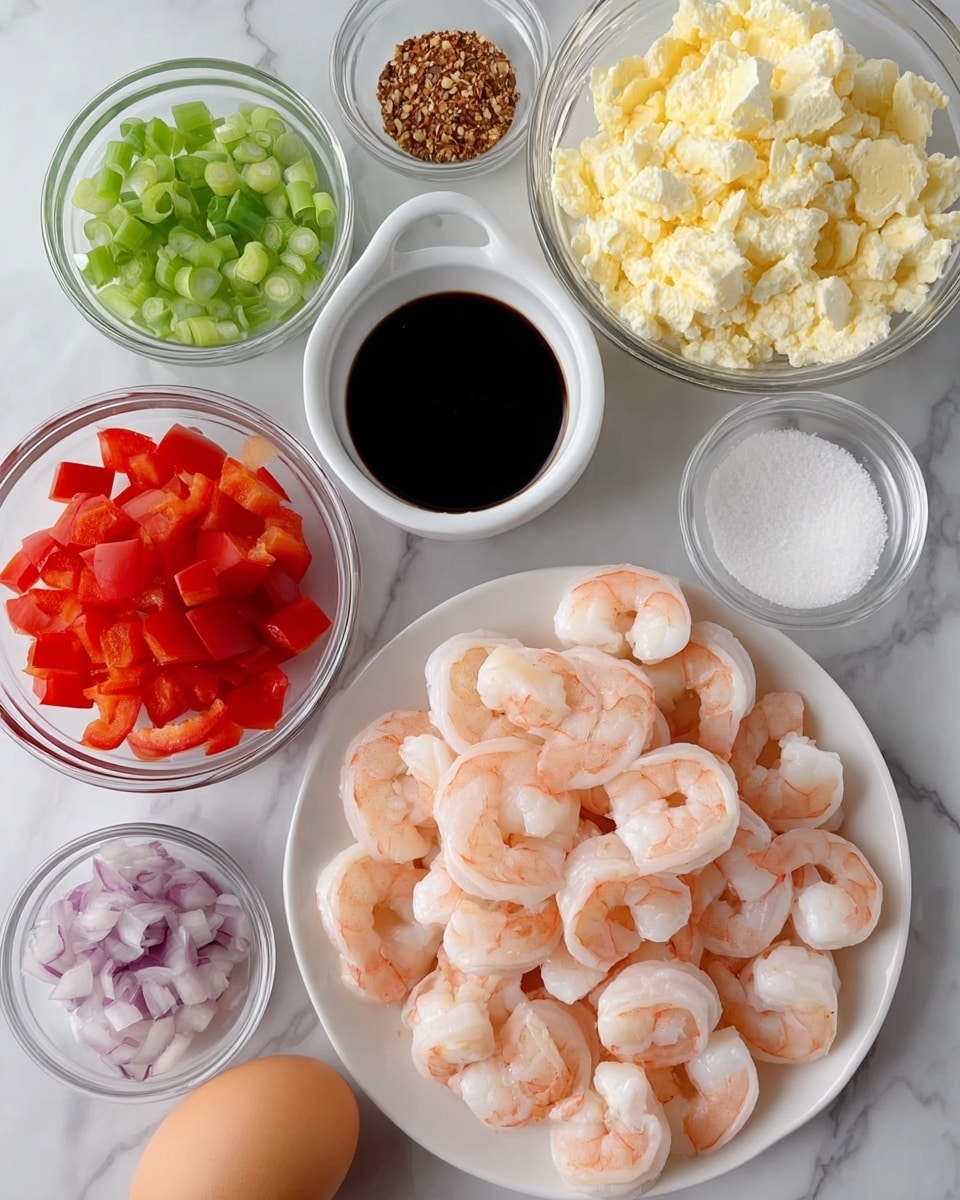
Ingredients You’ll Need
Each ingredient here plays a role in creating that authentic yet approachable Kung Pao flavor. The mix of fresh veggies, spices, and a homemade sauce sets this dish apart from anything you’d find in a jar—plus, knowing exactly what’s in your food is always a win. Here are the essentials with some tips to help you shop and prep:
- Soy sauce: Use a good-quality, naturally brewed soy sauce for the best depth of flavor. Low sodium is fine if you want more control over saltiness.
- Brown sugar: Adds that perfect hint of sweetness that balances the spice and tanginess of the dish.
- Water: Helps to thin out the sauce just enough so it coats everything perfectly without being too sticky.
- Rice vinegar: Brings a mild acidity that brightens all the flavors—don’t skip it!
- Cornstarch: Essential for thickening the sauce to cling to the shrimp and veggies.
- Sesame oil: Just a splash here adds a delightful toasted aroma and warm flavor.
- Olive oil: Used for stir-frying; you can swap for vegetable oil if you want a more neutral taste.
- Red onion: Adds a sweet sharpness that softens as it cooks down.
- Red and yellow bell peppers: Colorful, crunchy, and they help balance the heat with their natural sweetness.
- Garlic: Mince it fresh for the best punch.
- Ginger: Fresh grated ginger is key for that bright, slightly spicy zing.
- Dried red chilis: These bring the signature heat—adjust the amount depending on your spice tolerance.
- Jumbo shrimp: Peeled and deveined, they cook so quickly and soak up the sauce beautifully.
- Salt and black pepper: Simple seasonings that bring out the flavors.
- Roasted peanuts: For crunch and a nutty contrast—you can’t go wrong with salted peanuts here.
- Chopped green onions: A fresh, crisp garnish to finish it off.
Variations
I love playing around with this Kung Pao Shrimp Recipe depending on what’s in season or what I have on hand. It’s a super adaptable recipe, so feel free to make it your own and tailor the heat, texture, and ingredients to suit your taste.
- Protein Swap: Sometimes I substitute shrimp for chicken or tofu and it’s just as tasty—great for when I want a different texture or a vegetarian option.
- Spice Level: If you like it extra spicy, I double the dried chilies or add a splash of chili garlic sauce. For less heat, I reduce or remove the chilis completely.
- Veggie Boost: I occasionally toss in snap peas or zucchini for more crunch and nutrients.
- Nut Alternatives: Cashews or even almonds can replace peanuts if that’s what you have or prefer.
- Gluten-Free: Swap soy sauce for tamari or coconut aminos for a gluten-free version that still packs plenty of flavor.
How to Make Kung Pao Shrimp Recipe
Step 1: Whisk Together Your Kung Pao Sauce
This is where your flavor foundation starts. Mix the soy sauce, brown sugar, water, rice vinegar, cornstarch, and sesame oil in a small bowl until smooth. Setting it aside lets the ingredients meld into a perfectly balanced sauce—don’t skip this little rest!
Step 2: Cook the Veggies Until Tender and Aromatic
Heat your olive oil in a large skillet over medium heat, then add the diced red onion and bell peppers. Stir occasionally and cook for about 3-5 minutes until the onions soften and the peppers start to get tender but still have some crunch—that texture contrast is important.
Step 3: Add Garlic, Ginger, and Dried Red Chilis
Give the skillet a good stir, then add your minced garlic, grated ginger, and those dried chilis. Sauté everything for just about a minute until you can smell the fragrant aromas—but be careful not to burn the garlic; it turns bitter fast!
Step 4: Cook Your Shrimp
Time to add your peeled and deveined shrimp. Season them with salt and pepper, then toss them in the pan. Cook for 2-3 minutes, stirring occasionally, until the shrimp turn pink and opaque—watch closely so they don’t overcook and get rubbery.
Step 5: Combine Sauce and Peanuts, Then Simmer
Pour your pre-made sauce over the shrimp and veggies, then sprinkle in the roasted peanuts. Stir everything together and let it simmer gently for about 2 minutes until the sauce thickens and clings to each bite. This is the magic moment where all the flavors come alive.
Step 6: Garnish and Serve Immediately
Once your sauce is thick and glossy, remove the pan from heat and sprinkle chopped green onions over the top. Serve it hot, ideally over fluffy steamed rice to soak up every last bit of that delicious sauce.
How to Serve Kung Pao Shrimp Recipe
Garnishes
I always finish with chopped green onions because they add a fresh, mild bite and a lovely pop of color. Sometimes I sprinkle a few extra peanuts on top for crunch. If I’m feeling fancy, some toasted sesame seeds work beautifully too.
Side Dishes
Steamed jasmine or basmati rice pairs perfectly as it absorbs the sauce wonderfully. For a veggie side, I like quick stir-fried bok choy or sautéed snap peas—they add crunch and keep things light and vibrant.
Creative Ways to Present
For special dinners, I serve this Kung Pao Shrimp Recipe in individual shallow bowls with a side of citrus wedges to squeeze over the top. Making little lettuce cups for spooning the shrimp mixture makes it fun and interactive, especially if you’re hosting friends!
Make Ahead and Storage
Storing Leftovers
I store leftovers in an airtight container in the fridge, and I’ve found that this dish stays flavorful for up to 2 days. The sauce thickens more as it cools, so it’s important to stir it well when reheating.
Freezing
Though I don’t usually freeze Kung Pao Shrimp because shrimp texture can change when frozen, if you really want to save some for later, freeze just the sauce separately. That way you can cook fresh shrimp when you’re ready and reheat the sauce to combine.
Reheating
Microwave works fine for a quick reheat, but I prefer warming it gently on the stove in a non-stick pan with a splash of water or extra soy sauce to loosen the sauce. That way, the shrimp stay tender and the veggies don’t get mushy.
FAQs
-
Can I make this Kung Pao Shrimp Recipe less spicy?
Absolutely! The dried red chilis are the main source of heat here, so you can reduce their number or remove them entirely if you prefer a milder dish. You could also try deseeding the chilis before cooking to cut down on spiciness without losing that smoky flavor.
-
What can I use instead of peanuts if I have a nut allergy?
Good question. If you’re allergic to peanuts, try roasted pumpkin seeds or sunflower seeds for a similar crunch without the allergy risk. Just toast them lightly for extra flavor before adding.
-
Can this recipe be made gluten-free?
Yes! Simply swap the soy sauce for a gluten-free tamari or coconut aminos. This way, you maintain the umami flavor without gluten. Just make sure any other ingredients like the vinegar or spices don’t contain hidden gluten.
-
What’s the best way to avoid overcooking the shrimp?
Shrimp cook very quickly—usually 2-3 minutes until they’re pink and opaque. Keep your eye on them, stir gently, and remove them from heat as soon as they change color to maintain a tender, juicy texture.
-
Can I prepare any parts of this recipe ahead of time?
Definitely! Prep your veggies, mince garlic and ginger, and whisk together the sauce in advance. This pre-chopping saves time during cooking and helps the stir-fry come together quickly and smoothly.
Final Thoughts
This Kung Pao Shrimp Recipe has become one of my go-to dishes when I want something quick, flavorful, and just a little bit special. It’s the kind of meal that makes weeknights feel elevated without a ton of fuss. I hope you give it a try and have as much fun cooking and eating it as I do. Trust me, once you master this recipe, it’s going to become a favorite in your rotation too!
PrintKung Pao Shrimp Recipe
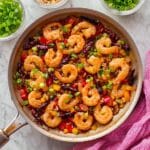
A flavorful and quick Kung Pao Shrimp recipe featuring tender jumbo shrimp stir-fried with colorful bell peppers, red onion, and dried red chilis, all coated in a savory-sweet soy-based sauce and topped with crunchy roasted peanuts and fresh green onions. Perfect for a weeknight dinner served over steamed rice.
- Prep Time: 15 minutes
- Cook Time: 15 minutes
- Total Time: 30 minutes
- Yield: 4 servings 1x
- Category: Main Course
- Method: Stovetop
- Cuisine: Chinese
Ingredients
Sauce
- ¼ cup soy sauce
- 2 tablespoons brown sugar
- 2 tablespoons water
- 1 tablespoon rice vinegar
- 2 teaspoons cornstarch
- 1 teaspoon sesame oil
Main Ingredients
- 1 tablespoon olive oil
- ½ medium red onion, cut into cubes
- ½ medium red bell pepper, cut into cubes
- ½ medium yellow bell pepper, cut into cubes
- 1 teaspoon garlic, minced
- 1 teaspoon ginger, grated
- 8–10 whole dried red chilis
- 1½ pounds jumbo shrimp, peeled and deveined
- ½ teaspoon salt
- ½ teaspoon ground black pepper
- ¼ cup roasted peanuts
- 2 tablespoons chopped green onions, to garnish
Instructions
- Prepare the sauce: In a small bowl, combine soy sauce, brown sugar, water, rice vinegar, cornstarch, and sesame oil. Whisk the ingredients together thoroughly and set aside to allow the flavors to meld.
- Sauté vegetables: Heat olive oil in a large skillet over medium heat. Add the diced red onion and bell peppers. Cook for 3-5 minutes, stirring occasionally, until the onion becomes soft and the peppers begin to tenderize.
- Add aromatics and shrimp: Stir in minced garlic, grated ginger, and dried red chilis. Sauté for about one minute until fragrant. Then add the peeled and deveined shrimp to the skillet. Season with salt and ground black pepper. Cook shrimp for 2-3 minutes, stirring occasionally, until they turn opaque and are just cooked through.
- Combine with sauce and peanuts: Pour the prepared sauce over the shrimp and vegetables, then add roasted peanuts. Stir well and allow the mixture to simmer for approximately 2 minutes, or until the sauce thickens and coats the ingredients nicely.
- Garnish and serve: Remove from heat, sprinkle chopped green onions over the top for freshness and color. Serve immediately while warm, ideally over a bed of steamed rice.
Notes
- Prep all ingredients beforehand since stir-fry recipes cook quickly to ensure smooth cooking.
- Use shrimp that are already peeled and deveined to save time and effort.
- If using frozen shrimp, thaw completely before starting to ensure even cooking.
- Avoid overcooking the shrimp to prevent them from becoming tough and chewy.
Keywords: Kung Pao Shrimp, shrimp stir-fry, Chinese shrimp recipe, spicy shrimp, quick dinner, easy stir-fry, seafood recipe