Halloween Dirt Cups Recipe
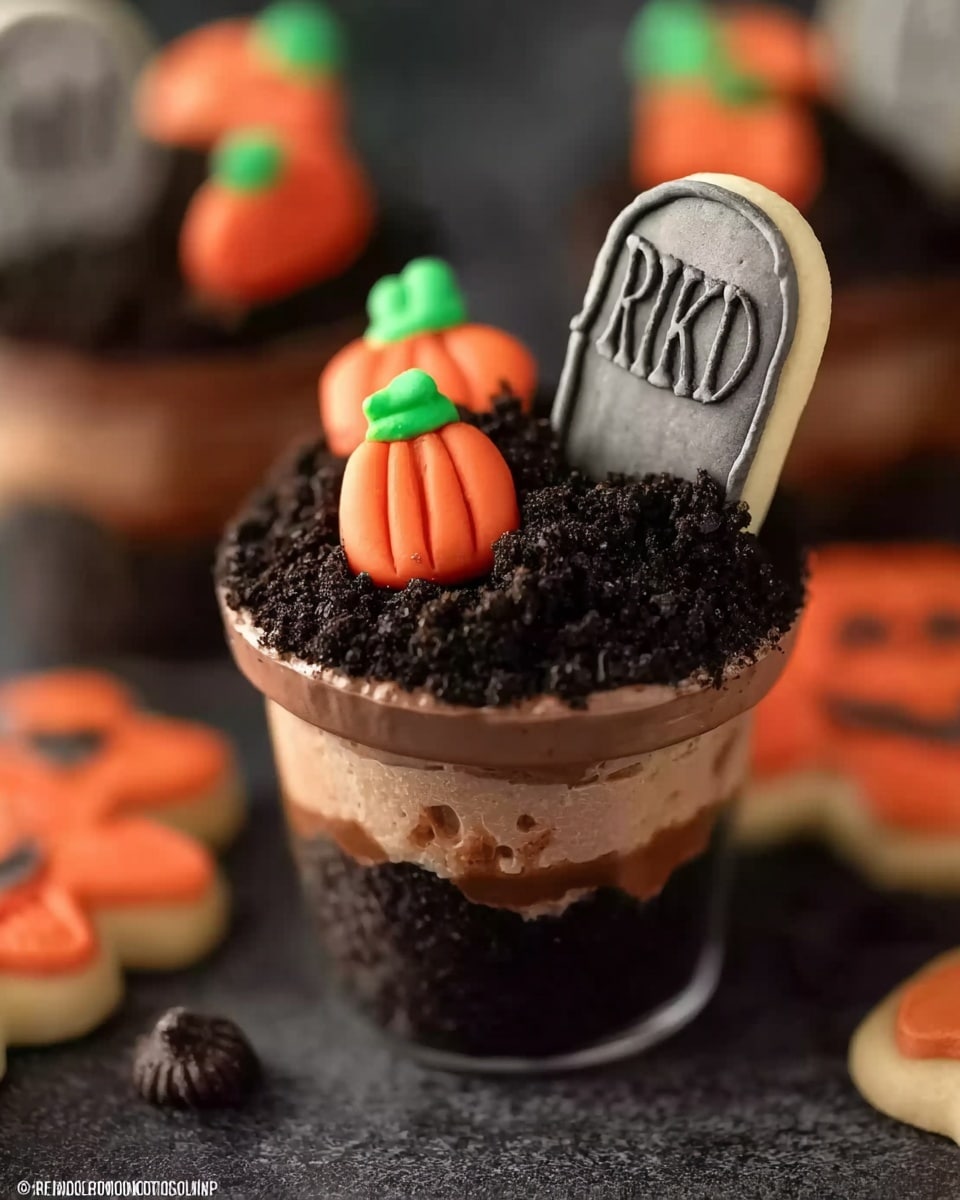
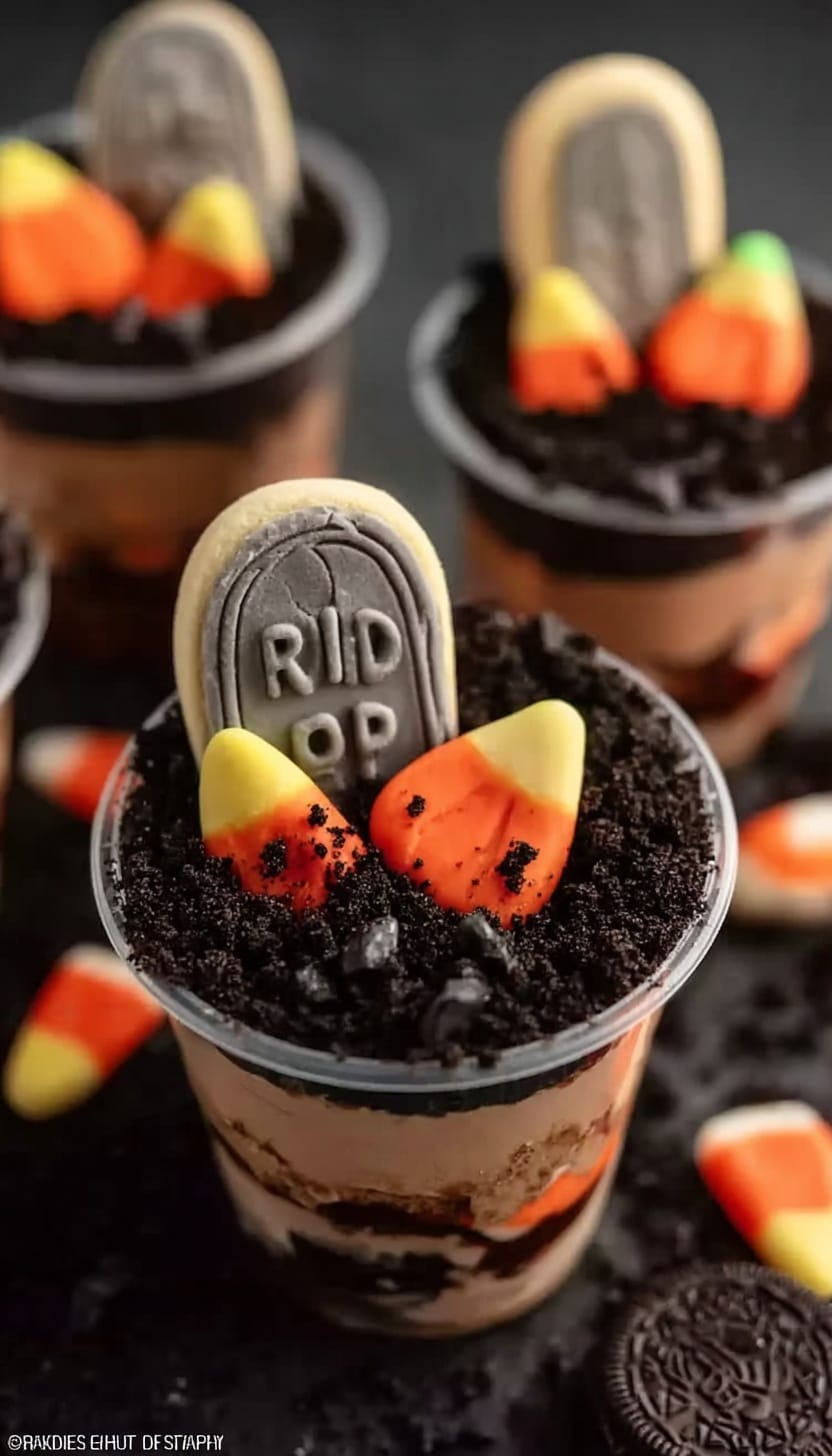
Halloween Dirt Cups Recipe is one of those delightfully creepy treats that’s super fun to make and even better to eat. Think rich chocolate pudding layered with crushed Oreos to look like soil, all topped off with gummy worms wriggling out—it’s as much fun to create as it is to enjoy. Whether you’re hosting a Halloween party or just want a spooky dessert to share with the kids, this recipe is a guaranteed crowd-pleaser.
I remember making these with my niece last year, and watching her excitement as we buried gummy worms in the “dirt” was priceless. Plus, the layers are simple enough that even the youngest helpers can get involved, making it a perfect recipe if you’re looking to blend some hands-on fun with delicious results. Trust me, once you try this Halloween Dirt Cups Recipe, it’ll become a seasonal favorite in your household too!
Ingredients You’ll Need
The magic of this Halloween Dirt Cups Recipe comes from using a few simple ingredients that work together to create both texture and fun visual appeal. When you’re shopping, aim for fresh pudding mix and crunchy cookies to keep that soil-look satisfying and rich.
- Oreo Cookies: These give you the perfect “dirt” once crushed. I like to crush them finely but leave a few chunks for texture.
- Cool Whip: Lightens up the chocolate pudding layer and adds a creamy, fluffy texture.
- Instant Chocolate Pudding Mix: The base flavor that brings the chocolate goodness to the dirt cups.
- Milk: Needed to prepare the pudding; whole milk gives a richer flavor, but any milk works.
- Milano Cookies: Use these to add a fancy crunch or as a stand-in shovel for your dirt cups (more on that later!).
- Gummy Worms and Candy Pumpkins (optional): These bring the Halloween vibe to life and make these cups irresistibly fun.
- Wilton Black Writing Icing: Great for adding finishing details or spooky faces on cookies if you want to decorate further.
Variations
I love how flexible the Halloween Dirt Cups Recipe can be. Over time, I’ve tweaked it a bit depending on the mood or what’s in the pantry, and I encourage you to play around too!
- Variation: Swap out gummy worms for other gummy critters like spiders or bats—my niece once insisted on gummy frogs for a swamp version, which was hilarious and delicious.
- Variation: For a dairy-free option, use coconut milk pudding mix and dairy-free cool whip, so everyone can enjoy the creepy fun.
- Variation: Add a layer of crushed peanut butter cups for an extra nutty twist that contrasts so well with the chocolate pudding.
- Variation: Use colored candy melts to drizzle “spider webs” on the cup rim, giving it an extra Halloween pop.
How to Make Halloween Dirt Cups Recipe
Step 1: Crush the Oreos to Make “Dirt”
Start by placing your Oreo cookies into a plastic bag and crush them with a rolling pin until you get mostly fine crumbs with some little chunks. It’s important not to pulverize them completely because those chunks add nice texture, making your dirt cups look more authentic. If you want, you can even pulse them a few times in a food processor.
Step 2: Prepare the Chocolate Pudding
Whisk together the instant chocolate pudding mix with milk according to package instructions—usually, it’s two cups of milk for a 3.3 oz box. Whisk about two minutes until it thickens wonderfully. Let it sit for at least five minutes to fully set, which makes layering easier.
Step 3: Mix Pudding with Cool Whip
Fold the Cool Whip into your thickened pudding gently to keep it light and fluffy. This step is key to getting that creamy middle layer that contrasts beautifully with the crunchy dirt on top and bottom. It also gives your dirt cups a lovely texture that feels indulgent but not heavy.
Step 4: Assemble the Dirt Cups
Grab your cups or small clear glasses and start with a layer of crushed Oreos on the bottom. Then spoon in the pudding-Cool Whip mixture, smoothing it out gently. Repeat to get a nice layered effect and finish with a generous sprinkle of Oreos on top. This layering not only looks great but makes each bite perfect.
Step 5: Add the Creepy Decorations
Now comes the fun part! Stick a few gummy worms into the top “dirt,” so it looks like they’re wriggling out of the soil. You can also nestle candy pumpkins around or add little faces with Wilton black writing icing on the Milano cookies to use as shovels or decorative elements on the side of the cups.
How to Serve Halloween Dirt Cups Recipe
Garnishes
I’m a big fan of garnishing with gummy worms for that classic dirt cup vibe, but I also like throwing on some mini chocolate chips or even edible glitter for a subtle sparkle in the “dirt.” If you’re feeling artsy, using the Wilton black icing to draw little spider webs on the cup rim is a neat touch that impresses guests.
Side Dishes
These dirt cups pair surprisingly well with savory snacks like popcorn or even a light vegetable platter if you want to balance the sweets. For parties, I like serving them alongside caramel apples or pumpkin-shaped sugar cookies to keep the Halloween theme consistent and festive.
Creative Ways to Present
One time, I served these dirt cups inside mini flower pots with plastic spoons stuck in to mimic garden shovels—and it was a total hit. You could also serve them in clear mason jars or layered dessert glasses to show off the Oreo and pudding swirl layers. For little ones, adding a plastic spider ring on the rim makes the presentation even more playful.
Make Ahead and Storage
Storing Leftovers
I usually store any leftover Halloween Dirt Cups Recipe in airtight containers in the fridge. They hold up well for 2-3 days, but the longer they sit, the more the crushed Oreos soften. To keep them crisp, I recommend adding the top Oreo crumb layer just before serving if possible.
Freezing
Freezing is tricky with these cups because the texture of the pudding and cool whip combo doesn’t freeze and thaw well—it can turn watery. If you’d like to try freezing, I suggest freezing only the pudding layer separately and assembling just before serving for the best experience.
Reheating
Since Halloween Dirt Cups Recipe is best served cold, you don’t want to reheat these. Instead, just take them out of the fridge a few minutes before serving to take the chill off a bit. This way, the flavors are at their freshest and textures perfect.
FAQs
-
Can I make Halloween Dirt Cups Recipe ahead of time?
Absolutely! You can prepare the pudding layer a few hours or a day ahead and keep it refrigerated. For the best texture, add the top layer of Oreo crumbs and gummy worms just before serving to keep everything looking fresh and crunchy.
-
What’s the best way to crush Oreos for Dirt Cups?
I recommend putting the Oreos in a sealed plastic bag and using a rolling pin to crush them. You want mostly fine crumbs with some small chunks to create a natural “dirt” texture. Avoid crushing too finely or using a blender for a total powder, which can get dusty.
-
Can I use homemade chocolate pudding for this recipe?
Definitely! Homemade chocolate pudding works well and tastes great, just make sure it’s thick enough to layer properly. If it’s a bit thinner, consider chilling it longer before assembling your Halloween Dirt Cups Recipe.
-
Are there any good non-candy toppings for kids with allergies?
Yes! You can use fresh berries like blackberries or blueberries to add some natural sweetness and color. Crushed pretzels or popcorn also make fun crunchy toppings without using candy that might contain allergens.
Final Thoughts
This Halloween Dirt Cups Recipe has become a staple in my fall dessert lineup because it hits that perfect spot between spooky and scrumptious without requiring hours in the kitchen. I love sharing this with friends and family because it invites playfulness and creativity, whether that’s decorating with gummy worms or making fun cookie shovels. Give it a go this season—you’ll have a blast making, serving, and of course, eating these fun little cups of dirt!
PrintHalloween Dirt Cups Recipe

Halloween Dirt Cups are a fun and festive dessert perfect for spooky celebrations. Layers of creamy instant chocolate pudding, crushed Oreo cookies, and Cool Whip create a deliciously rich and creamy treat. Topped with Milano cookies, gummy worms, candy pumpkins, and decorative black icing, these cups bring a playful Halloween vibe to any party or gathering.
- Prep Time: 15 minutes
- Cook Time: 0 minutes
- Total Time: 1 hour 15 minutes
- Yield: 6 servings 1x
- Category: Dessert
- Method: No-Cook
- Cuisine: American
Ingredients
Base and Filling
- 12 Oreo Cookies, crushed
- 16 oz Cool Whip
- 1 box Instant Chocolate Pudding Mix (3.3 oz)
- 2 cups Milk
Toppings
- 8 Milano Cookies
- Gummy Worms (optional)
- Candy Pumpkins (optional)
- Wilton Black Writing Icing
Instructions
- Prepare the pudding: In a mixing bowl, whisk together the instant chocolate pudding mix and 2 cups of milk for about 2 minutes until the mixture thickens. Let it set for 5 minutes to fully thicken.
- Crush Oreos: Place the 12 Oreo cookies into a plastic bag and crush them into small, dirt-like crumbs using a rolling pin or your hands. Set aside.
- Layer the cups: In serving cups or bowls, start by adding a layer of crushed Oreo crumbs to mimic dirt. Then, add a layer of chocolate pudding followed by a layer of Cool Whip. Repeat the layers to fill the cups, ending with a generous layer of crushed Oreos on top.
- Add toppings: Place 1 Milano cookie on top of each cup to resemble a stone or fence. Decorate with gummy worms and candy pumpkins for a fun Halloween effect. Use Wilton Black Writing Icing to add any desired spooky designs or messages on the Milano cookies or around the rim of the cups.
- Chill: Refrigerate the dirt cups for at least 1 hour before serving to allow the layers to set and flavors to meld together.
Notes
- You can substitute Cool Whip with homemade whipped cream for a fresher taste.
- For a dairy-free version, use dairy-free pudding mix and whipped topping alternatives.
- These cups can be assembled a day ahead and stored covered in the refrigerator.
- Adjust the number of gummy worms and candy pumpkins according to preference or omit for allergies.
Keywords: Halloween dessert, dirt cups, chocolate pudding dessert, no bake dessert, Oreo dessert, festive treats