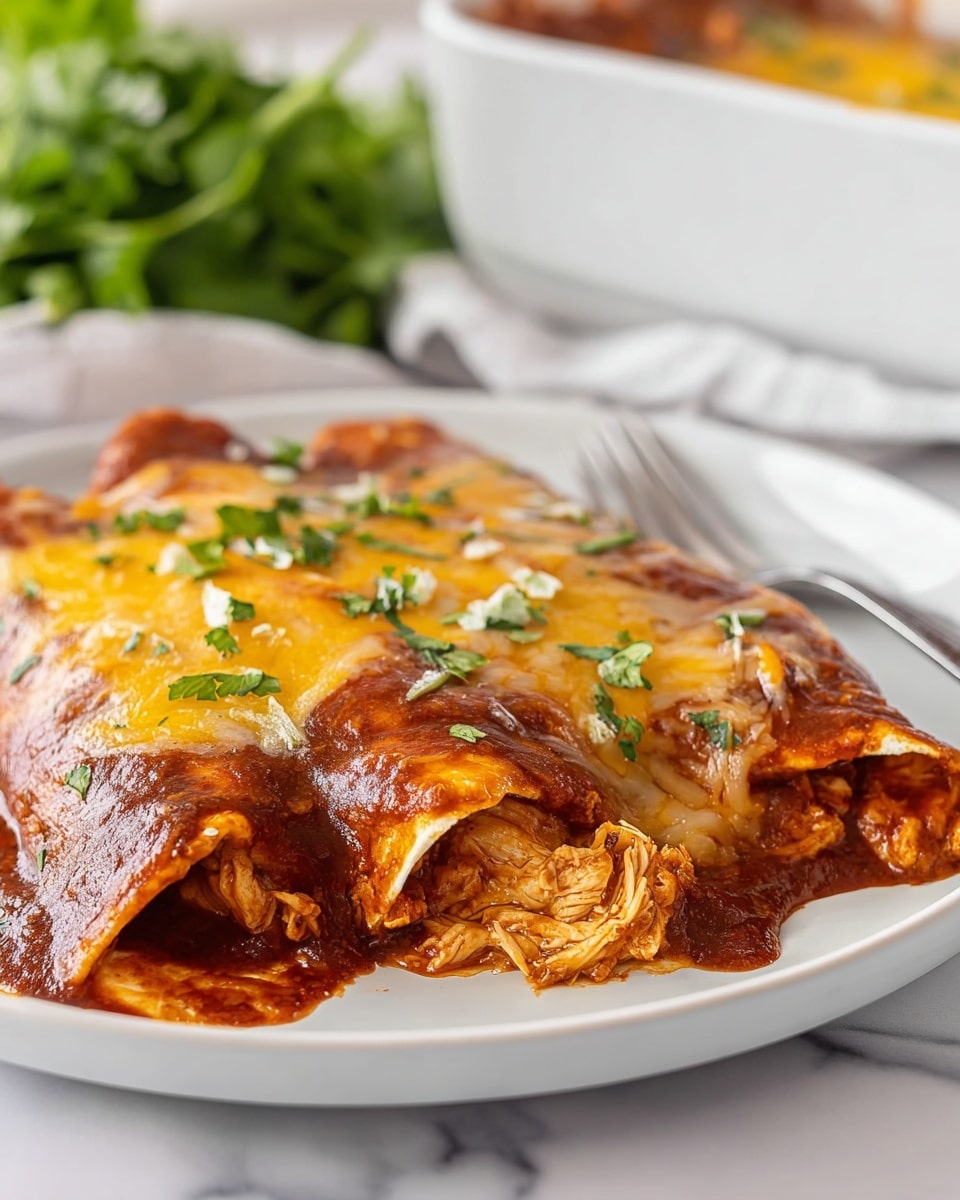
Freezer Chicken Enchiladas Recipe
Oh, let me tell you about this Freezer Chicken Enchiladas Recipe — it’s one of those lifesavers I turn to when I want a comforting meal without the last-minute scramble. The beauty here is that you prep these enchiladas ahead of time, toss them in the freezer, and then just pop them in the oven when hunger strikes. Trust me, having these ready to go means you can enjoy homemade Mexican food whenever you want with minimal effort!
What makes this recipe really special is the perfect blend of flavors and textures — juicy rotisserie chicken, creamy sour cream, mild green chilis, and melty Colby-Jack cheese all wrapped in soft flour tortillas. Plus, the step-by-step instructions ensure your freezer chicken enchiladas come out delicious every time. I’ve made these for busy weeknights, surprise guests, and even casual weekend parties, and they always impress.
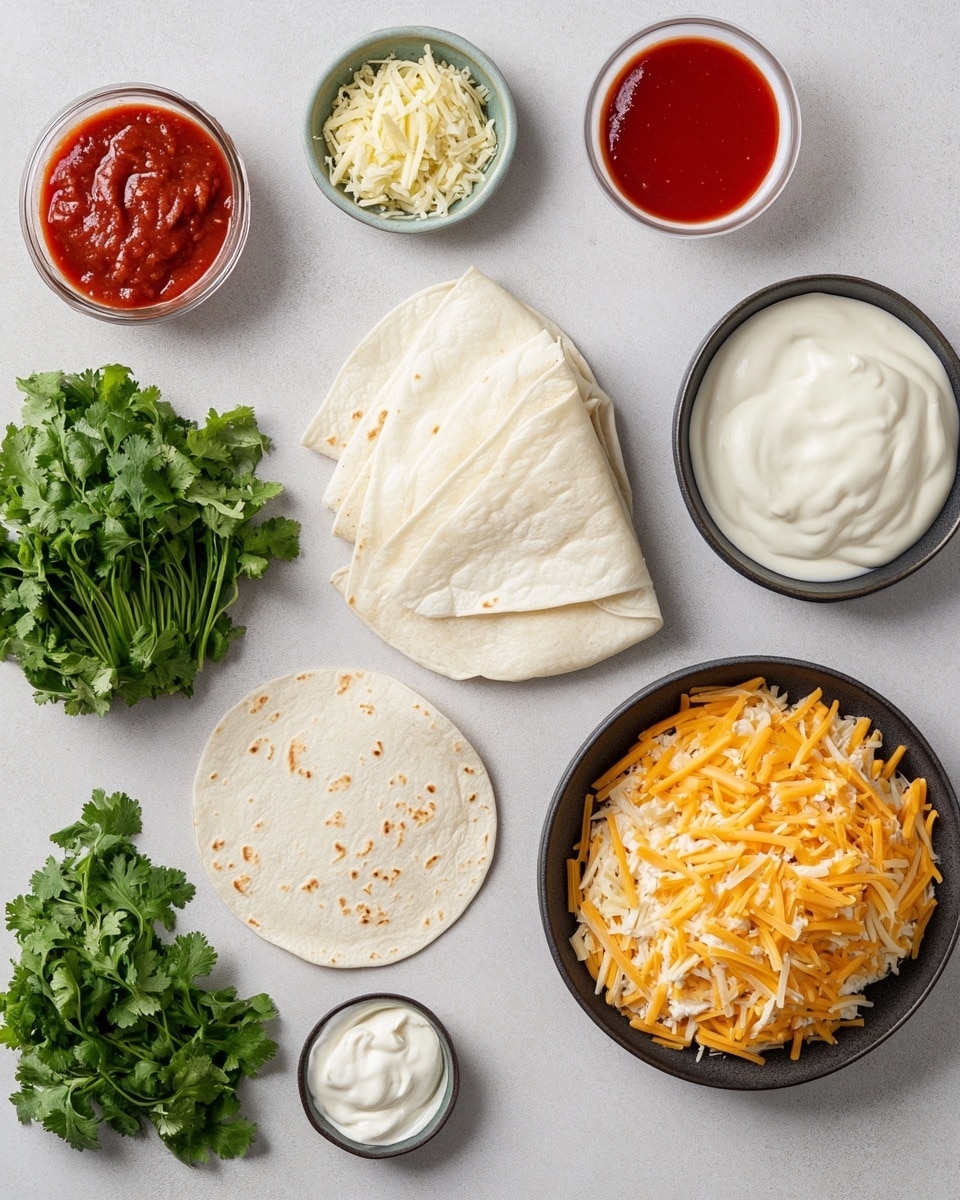
Ingredients You’ll Need
Every ingredient in this recipe works in harmony, giving you that classic enchilada vibe with a creamy, cheesy twist. When shopping, look for fresh onions and good-quality store-bought red enchilada sauce to keep things easy but flavorful.
- Unsalted butter: Helps soften the onions and garlic, adding depth without overpowering flavors.
- Sweet yellow onion (Vidalia if possible): Adds natural sweetness that balances the slight heat from the taco seasoning.
- Minced garlic: Brings that essential aroma that’ll fill your kitchen and make your mouth water.
- Diced mild green chilis (4 oz can): Gives a gentle, smoky kick without overpowering the dish.
- Taco seasoning packet: The secret boost of flavor, combining spices that make the chicken filling taste irresistible.
- Sour cream: Adds creamy tanginess that makes the filling irresistibly rich.
- Rotisserie chicken meat (white and dark, shredded): Using cooked chicken saves tons of time and keeps the meat juicy.
- Colby-Jack cheese, shredded: Melts beautifully, creating that gooey, cheesy goodness both inside and on top.
- Fajita-size flour tortillas (6 inch): The perfect size for rolling enchiladas without too much fuss.
- Red enchilada sauce (19 oz can): The star that ties everything together with rich, tangy notes.
- Fresh cilantro (optional): A fresh garnish that adds brightness and a pop of color.
Variations
This Freezer Chicken Enchiladas Recipe is super adaptable — I love making it my own based on what I have in the fridge or the mood I’m in. Feel free to tweak the filling or toppings to suit your taste!
- Spicy kick: I sometimes add chopped jalapeños or a splash of hot sauce to kick things up a notch — perfect if you love heat.
- Dairy-free: Swap sour cream for a plant-based alternative and use dairy-free cheese to make these friendly for lactose intolerance without losing flavor.
- Vegetarian version: Replace chicken with black beans and sautéed bell peppers for a hearty meatless meal.
- Different cheeses: Mixing Monterey Jack with cheddar or pepper jack can give new flavors and melty textures.
How to Make Freezer Chicken Enchiladas Recipe
Step 1: Sauté Your Aromatics
Start by melting the butter in a skillet over medium heat — I like to use a heavy-bottomed pan to avoid burning. Toss in the diced Vidalia onion and cook until it’s soft and translucent, about 5 minutes. Then add the minced garlic and sauté for just a minute more until fragrant. This base builds so much flavor, so don’t rush it!
Step 2: Mix the Filling
Next, stir in the diced mild green chilis and the taco seasoning packet, letting them toast for about a minute. Take the pan off the heat and fold in the sour cream, shredded rotisserie chicken, and 1 cup of Colby-Jack cheese. The warmth from the skillet melts the cheese just enough to help everything stick together but not get gluey — you want the filling creamy yet scoopable!
Step 3: Assemble the Enchiladas
Preheat your oven to 350°F (175°C). Pour about half a cup of enchilada sauce into the bottom of your baking dish to keep things moist and prevent sticking. Lay a tortilla flat and spoon roughly ¼ cup of the chicken filling down the center. Roll it up snugly and place it seam-side down in the dish. Repeat with remaining tortillas and filling.
Step 4: Add Sauce and Cheese Topping
Once all the enchiladas are lined up, pour the rest of the enchilada sauce evenly over the top — don’t be shy, this sauce is key. Then sprinkle the remaining shredded cheese over everything. This creates that dreamy, golden cheese crust once baked.
Step 5: Freeze or Bake
If you’re making ahead, cover the dish tightly with plastic wrap and foil, then freeze. To bake immediately, simply pop the dish into the oven and bake for 25–30 minutes, until bubbly and the cheese is melted and golden. If frozen, bake covered at 375°F (190°C) for about 60–70 minutes (remove the plastic first) until heated through.
How to Serve Freezer Chicken Enchiladas Recipe
Garnishes
I’m a sucker for freshly chopped cilantro sprinkled on top — it brightens the whole dish beautifully. A dollop of sour cream or a squeeze of lime juice really takes these enchiladas over the top. Sometimes I also add sliced avocado or a handful of crumbled queso fresco when I want to feel fancy.
Side Dishes
To round out the meal, I love serving these with simple Mexican rice or a fresh corn salad. Black beans or refried beans make a great protein-packed side, too. And of course, a crisp green salad with a light vinaigrette balances the richness of the enchiladas perfectly.
Creative Ways to Present
For parties, I sometimes build individual enchilada portions in small ramekins — everyone gets their own cheesy, saucy serving. Another fun trick is to top with extra cheese and broil just before serving for a bubbly, caramelized crust. It looks impressive and adds a touch of restaurant flair!
Make Ahead and Storage
Storing Leftovers
Once cooled, I store leftover enchiladas airtight in the fridge for up to 3 days. I find that wrapping tightly with plastic wrap then sliding into a glass container keeps everything super fresh and prevents the tortillas from drying out.
Freezing
Freezing is the real game-changer here. I always freeze the assembled but uncooked dish, tightly wrapped in plastic then foil to prevent freezer burn. From my experience, these enchiladas freeze beautifully for up to 3 months without losing flavor or texture, making them perfect for batch cooking.
Reheating
Reheating frozen enchiladas is easiest in the oven — keep the dish covered with foil at 375°F until warmed through, about an hour. For leftover portions, microwaving works if you’re short on time; just cover with a damp paper towel to keep moisture in and heat in 1–2 minute intervals.
FAQs
-
Can I make this Freezer Chicken Enchiladas Recipe vegetarian?
Absolutely! Replace the shredded rotisserie chicken with black beans, cooked lentils, or sautéed veggies like bell peppers and mushrooms. Add extra cheese or your favorite plant-based alternatives to keep it delicious and hearty.
-
Do I have to thaw the enchiladas before baking?
Nope! You can bake the freezer chicken enchiladas straight from frozen. Just remember to increase the baking time to around 60–70 minutes and keep them covered with foil to prevent drying out until fully heated.
-
What’s the best type of tortilla to use?
I recommend 6-inch flour tortillas — they’re the perfect size for rolling and soft enough to avoid cracking. Corn tortillas can work too if you prefer, but they’ll need to be warmed up well so they don’t break while rolling.
-
Can I use homemade enchilada sauce instead of canned?
Definitely! Homemade enchilada sauce can add an extra fresh, smoky flavor. If you have a good recipe on hand, it’s a fantastic way to personalize this freezer chicken enchiladas recipe even more.
-
How long will leftovers keep in the fridge?
Leftover cooked enchiladas typically stay fresh for 3 to 4 days in the refrigerator when stored tightly covered or in an airtight container.
Final Thoughts
I genuinely love this Freezer Chicken Enchiladas Recipe because it makes life so much easier without sacrificing flavor or comfort. Whether you’re cooking for a busy weeknight or prepping ahead for unexpected guests, these enchiladas always save the day. Give them a try—you’ll thank yourself later when dinner’s ready at the push of a button, and everyone’s asking for seconds!
PrintFreezer Chicken Enchiladas Recipe

These Freezer Chicken Enchiladas are a convenient, flavorful, and versatile meal made with shredded rotisserie chicken, a creamy seasoned filling, and topped with melted colby-jack cheese and enchilada sauce. Perfect for make-ahead dinners, the recipe allows you to assemble and freeze the enchiladas for quick baking whenever you’re ready to enjoy a delicious Mexican-inspired dish.
- Prep Time: 15 minutes
- Cook Time: 25 minutes
- Total Time: 40 minutes
- Yield: 12 enchiladas (approximately 6 servings, 2 enchiladas per serving) 1x
- Category: Main Dish
- Method: Baking
- Cuisine: Mexican
Ingredients
Filling Ingredients
- 1 tablespoon unsalted butter
- ¾ cup small diced sweet yellow Vidalia onion
- 1 tablespoon minced garlic
- 4 ounce can diced mild green chilis
- 1 ounce packet taco seasoning
- ¾ cup sour cream
- 3 cups shredded rotisserie chicken meat (white and dark meat from a 2 pound cooked, cooled rotisserie chicken)
- 1 cup shredded colby-jack cheese
Assembly Ingredients
- 12 (6 inch) fajita size flour tortillas
- 19 ounce can (approx. 2 cups) red enchilada sauce, divided
- 1 cup shredded colby-jack cheese (divided as ½ cup per pan for topping, total 2 cups)
- 2 tablespoons chopped fresh cilantro (optional garnish)
Instructions
- Prepare the Filling: In a skillet, melt the unsalted butter over medium heat. Add the diced Vidalia onion and sauté until tender and translucent, about 3-5 minutes. Stir in the minced garlic and cook for an additional 30 seconds until fragrant.
- Combine Ingredients: Add the diced mild green chilis and taco seasoning packet to the skillet, stirring to combine. Remove from heat, then mix in sour cream, shredded rotisserie chicken, and 1 cup of shredded colby-jack cheese until evenly incorporated.
- Assemble Enchiladas: Preheat oven to 350°F (175°C) if baking immediately. Lay out a 6-inch flour tortilla and spoon a generous amount of the chicken filling down the center. Roll the tortilla tightly and place seam-side down into a greased baking dish. Repeat with remaining tortillas and filling, dividing evenly to make two pans if desired.
- Add Sauce and Cheese: Pour ½ cup of red enchilada sauce evenly over each pan of assembled enchiladas. Sprinkle remaining shredded colby-jack cheese (about ½ cup per pan) on top of the sauce.
- Bake or Freeze: If baking now, cover each pan with foil and bake for 20-25 minutes until the cheese is melted and bubbly. To freeze, cover tightly with foil and store in the freezer for up to 3 months. When ready to bake frozen enchiladas, bake covered at 350°F for 40-50 minutes until heated through and cheese is melted.
- Garnish and Serve: Remove from oven and let cool slightly. Garnish with chopped fresh cilantro if desired before serving.
Notes
- Using rotisserie chicken saves time and adds great flavor.
- For a spicier version, substitute mild green chilis with hot or medium green chilis.
- Flour tortillas make for a softer enchilada but corn tortillas can be used for a gluten-free option (adjust cooking time).
- Freezing assembled enchiladas allows for easy meal prep, just be sure to thaw if possible before baking for best results.
- Can be made dairy-free by substituting sour cream and cheese with vegan alternatives.
Keywords: chicken enchiladas, freezer meal, Mexican dinner, rotisserie chicken recipe, easy enchiladas, make ahead dinner