Festive Christmas Brownie Shapes Recipe
Oh, you’re going to love this Festive Christmas Brownie Shapes Recipe! It’s such a fun twist on our favorite classic brownies and makes holiday baking feel extra special. Imagine fudgy, chewy brownies cut into charming Christmas shapes – stars, trees, hearts, whatever gets you in that festive spirit. This recipe is perfect for holiday parties, gift giving, or just sharing with loved ones after a cozy evening by the fire.
What makes these festive brownie shapes stand out is not just the taste, but the joy of decorating them. I like to bring out colorful buttercream frosting and sprinkle on all the festive extras like mini M&Ms and sprinkles. They’re a guaranteed crowd-pleaser, and honestly, making them is half the fun. Whether you’re a seasoned baker or just looking to try something new this Christmas, these brownies hit the sweet spot.
Ingredients You’ll Need
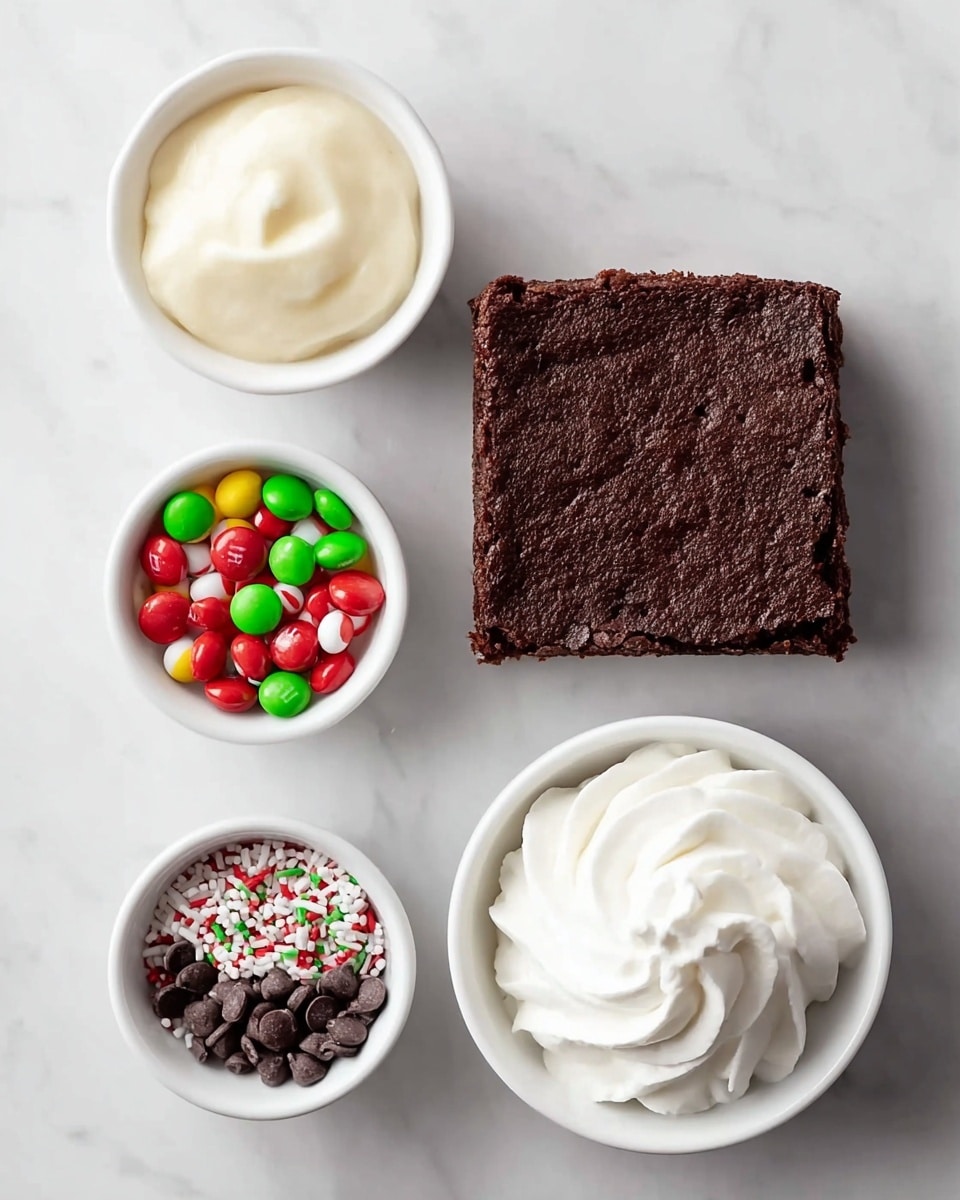
These ingredients come together beautifully to create rich, chewy brownies and creamy, colorful buttercream frosting. When picking your ingredients, quality matters — especially chocolate and butter — so choose the best you can find for that deep chocolatey goodness.
- Brownies: For chocolate intensity and fudgy texture, I always trust a tried-and-true chewy brownie recipe doubled here to fill a 9×13 pan.
- Parchment paper or aluminum foil: Essential for lining your baking pan so brownies don’t stick and lift out cleanly for cutting.
- Buttercream Frosting: Soft, spreadable, and perfect for decorating — you’ll want a full batch for plenty of coverage.
- Gel food coloring: Use this for vibrant colors that won’t run or water down your frosting.
- Sprinkles: Classic festive touch — pick a mix of shapes and colors that fit your holiday vibe.
- Mini M&Ms: Great for adding pops of color and chocolate crunch on top.
- Mini chocolate chips: Another texture boost that pairs perfectly with the chewy brownies.
- Other edible decorations: Think candy canes crushed, edible glitter, or little sugar snowflakes — whatever makes these your own.
Variations
I love personalizing this Festive Christmas Brownie Shapes Recipe depending on what ingredients I have handy or the occasion. Feel free to swap in flavors or add-ins to make it uniquely yours. It’s a flexible base for creativity!
- Nutty version: I sometimes fold chopped walnuts or pecans into the brownie batter for a nice crunch that balances the fudgy texture.
- Mint chocolate: Adding a teaspoon of peppermint extract to the buttercream frosting gives a festive mint makeover that pairs beautifully with the chocolate.
- Gluten-free: You can make this with a gluten-free flour blend — just make sure it suits fudgy brownies, and watch baking times.
- Vegan adaptation: Substitute with vegan butter and egg replacers to make these festive treats inclusive for everyone.
How to Make Festive Christmas Brownie Shapes Recipe
Step 1: Prepare the Brownie Batter
Start by doubling your best ever chewy brownie recipe (all ingredients doubled). Line a 9×13-inch metal baking pan generously with parchment paper or foil — this helps you lift the brownies out easily later. Mix your ingredients as usual, paying special attention not to overbeat; you want that dense, fudgy texture. Pour the batter into the pan and smooth the top with a spatula for even baking. I usually tap the pan lightly on the counter to release any air bubbles.
Step 2: Bake and Cool Completely
Bake your brownies at the temperature your base recipe suggests, checking for doneness with a toothpick — it should come out with a few moist crumbs, not wet batter. Once baked, it’s crucial to let the brownies cool completely, ideally at room temperature. I’ve learned the hard way that cutting too soon makes crumbly shapes. Patience here guarantees neat and sturdy pieces when you cut.
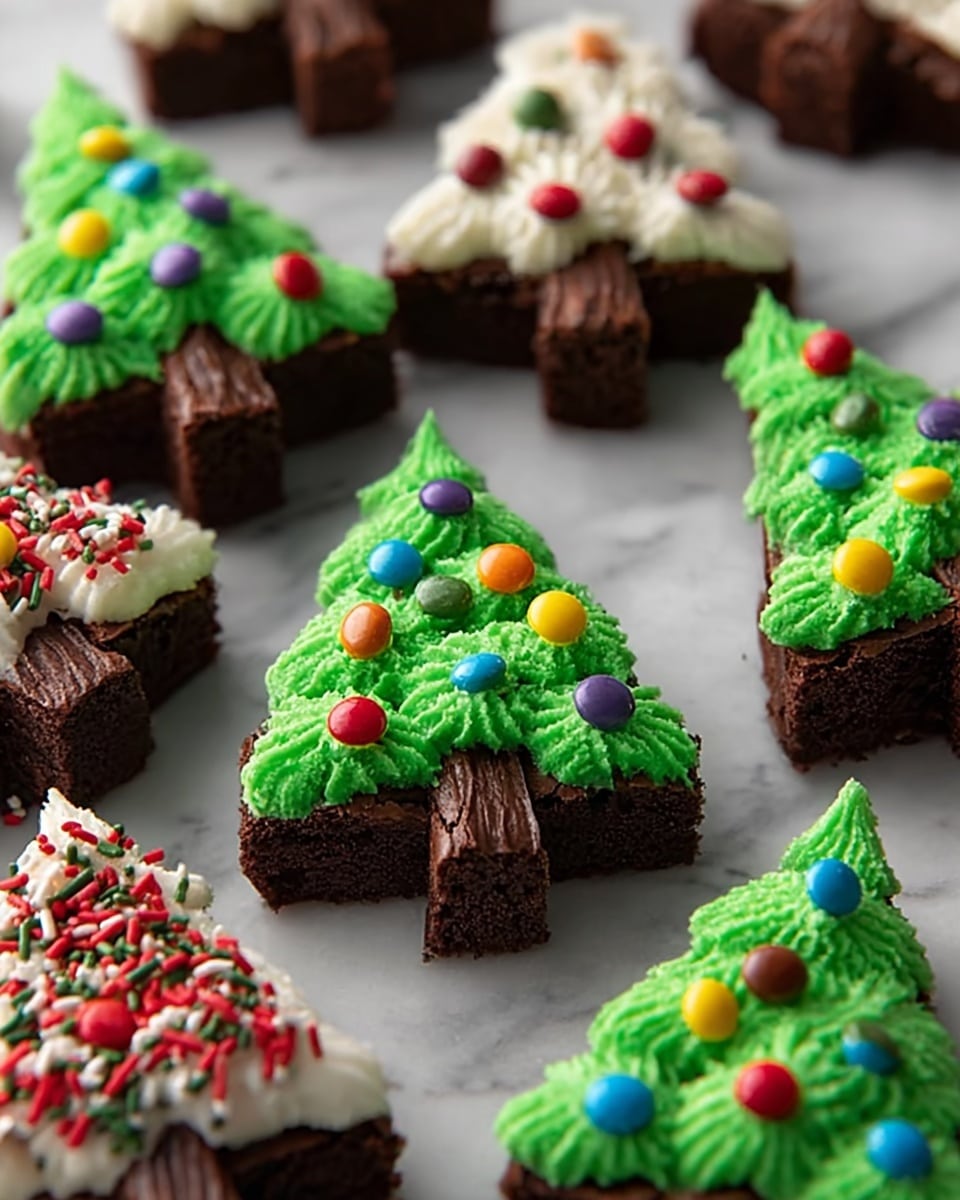
Step 3: Cut Into Festive Shapes
Once cooled, lift the brownie block out of the pan using the edges of the parchment or foil. Use cookie cutters in your favorite Christmas shapes — stars, trees, stockings — to punch out festive pieces. I find it helpful to dip the cookie cutters in hot water and dry before cutting; it makes cleaner cuts through the fudgy brownies. Save any scraps for snacking or layering in dessert parfaits!
Step 4: Prepare and Color the Buttercream Frosting
While the brownies chill, whip up your buttercream frosting. Divide it evenly into small bowls and add gel food coloring to create your desired palette — from classic Christmas red and green to soft pastel shades or glittery white for snow. I like to use vibrant tones so the shapes really pop.
Step 5: Decorate Your Brownie Shapes
Spread or pipe the colored buttercream onto each brownie shape, then get creative with your decorations. I love sprinkling mini M&Ms and bits of edible glitter for sparkle. Sometimes, when decorating with kids, we turn it into a mini party, experimenting with all the colors and toppings. Let the frosting set a little before packing them up to keep your designs intact.
How to Serve Festive Christmas Brownie Shapes Recipe
Garnishes
I like garnishing with simple edible glitter or a light dusting of powdered sugar to mimic snow. Fresh mint leaves can add a subtle green hue and freshness if you want a natural touch. Plus, adding little sugar pearls or candy cane shards on top gives a festive crunch that everyone enjoys.
Side Dishes
This recipe shines as a dessert on its own but pairs wonderfully with a scoop of vanilla ice cream or a warm mug of peppermint hot chocolate. At holiday gatherings, I often serve it alongside spiced mulled wine or eggnog, which makes the flavors feel extra cozy together.
Creative Ways to Present
For Christmas parties, I like arranging these brownie shapes on festive platters lined with colorful paper doilies. Wrapping several pieces in clear cellophane tied with ribbon makes adorable edible gifts. One year, I even made a brownie Christmas tree by stacking shapes and securing them with frosting — it was a total hit!
Make Ahead and Storage
Storing Leftovers
Store your decorated festive brownie shapes in an airtight container at room temperature. I place parchment or wax paper between layers to protect the frosting and decorations. They usually last well for 3-4 days, perfect for enjoying throughout the holiday weekend.
Freezing
If you’re making these ahead of time, you can freeze undecorated brownie shapes wrapped tightly in plastic wrap and stored in an airtight bag. Once you’re ready, thaw them overnight in the fridge, then decorate fresh. This way, the frosting stays bright and fresh without melting.
Reheating
I generally don’t reheat the brownies after they’re decorated to protect the frosting. But if you want that warm, melty brownie feeling, try heating an undecorated piece for 10–15 seconds in the microwave and then add a dollop of buttercream or ice cream right after.
FAQs
-
Can I use boxed brownie mix for this Festive Christmas Brownie Shapes Recipe?
Absolutely! If you’re short on time or prefer a shortcut, a high-quality boxed brownie mix works well. Just bake it in the 9×13 pan as directed, cool completely, then cut and decorate as described. The key to success is ensuring the brownies are fully cooled before cutting and frosting.
-
How do I prevent the brownies from sticking to the pan?
Lining your baking pan with parchment paper or aluminum foil is a must. Make sure the paper or foil extends beyond the edges of the pan so you can easily lift the brownies out once cooled. Lightly greasing the lining also helps prevent sticking.
-
What’s the best way to keep the frosting from coloring my hands while decorating?
Use disposable gloves or tiny offset spatulas for spreading. If you’re piping, clean your piping tips regularly, especially when switching colors. For little helpers, I recommend finger paints or edible pens for less mess.
-
Can I make these brownies vegan or gluten-free?
Yes! Swap in vegan butter and egg replacements like flax eggs for a vegan version, and use a gluten-free flour blend compatible with brownies for gluten-free. Just be mindful that texture and baking times may vary slightly.
-
What shapes work best for cutting brownies?
Simple shapes like stars, hearts, Christmas trees, or snowflakes cut cleanly and are easy to decorate. Cookie cutters with smooth edges work better for fudgy brownies than intricate lace-like designs.
Final Thoughts
This Festive Christmas Brownie Shapes Recipe is one of my go-to holiday baking traditions because it brings together rich chocolate, vibrant colors, and fun shapes that light up any gathering. I love how easy it is to customize and how it draws people into baking and decorating together, making memories beyond just eating the treats. I hope you enjoy making these as much as I do — they’re a sweet, joyful way to celebrate the season with family and friends.
PrintFestive Christmas Brownie Shapes Recipe

Celebrate the holiday season with these festive Christmas brownie shapes. Using a double batch of the best ever chewy brownies baked in a 9×13-inch pan, these treats are topped with colorful buttercream frosting and decorated with an assortment of sprinkles, mini M&Ms, mini chocolate chips, and other edible decorations. Perfect for holiday parties or as a fun family baking activity, these brownies are both visually delightful and deliciously chewy.
- Prep Time: 20 minutes
- Cook Time: 35 minutes
- Total Time: 55 minutes
- Yield: 24–30 brownie shapes depending on size 1x
- Category: Dessert
- Method: Baking
- Cuisine: American
Ingredients
Brownies
- Double batch of Best Ever Chewy Brownies (all ingredients doubled from original recipe)
- 9 by 13-inch metal baking pan lined with parchment paper or aluminum foil
Buttercream Frosting
- 1 batch of Best Ever Buttercream Frosting
- Gel food coloring (various colors as desired)
Decorations
- Sprinkles
- Mini M&Ms
- Mini chocolate chips
- Other edible decorations of choice
Instructions
- Prepare the Brownie Batter: Follow the original recipe for the Best Ever Chewy Brownies and double the quantities of each ingredient to make a double batch. Ensure all ingredients are properly mixed to achieve the chewy texture.
- Line the Baking Pan: Line a 9 by 13-inch metal baking pan with parchment paper or aluminum foil for easy removal and clean-up.
- Bake the Brownies: Pour the brownie batter evenly into the lined pan and bake at 350°F (177°C) for 30-35 minutes or until a toothpick inserted near the center comes out with moist crumbs but not wet batter. Let brownies cool completely in the pan.
- Prepare Buttercream Frosting: Make one batch of the Best Ever Buttercream Frosting. Divide into portions and tint each with gel food coloring as desired to create festive colors.
- Cut Brownies into Shapes: Once the brownies are completely cooled, remove them from the pan and cut into various Christmas-themed shapes using cookie cutters or a knife, such as stars, trees, or snowflakes.
- Decorate Brownies: Spread the colored buttercream frosting onto the brownie shapes using a small spatula or piping bag. Decorate with sprinkles, mini M&Ms, mini chocolate chips, and other edible decorations to create festive designs.
- Serve and Enjoy: Arrange the decorated brownies on a platter for your holiday guests and enjoy the chewy, fudgy, and colorful treats.
Notes
- Ensure brownies are fully cooled before frosting to prevent melting.
- Use gel food coloring for vibrant colors without thinning the frosting.
- Store decorated brownies in an airtight container at room temperature for up to 3 days or refrigerate for up to a week.
- Customize decorations based on your holiday theme or preferences.
- For easier cutting, chill the brownies slightly before cutting into shapes.
Keywords: Christmas brownies, holiday desserts, chewy brownies, buttercream frosting, festive treats, holiday baking, Christmas cookie cutters