Creme Brûlée Cheesecake Recipe
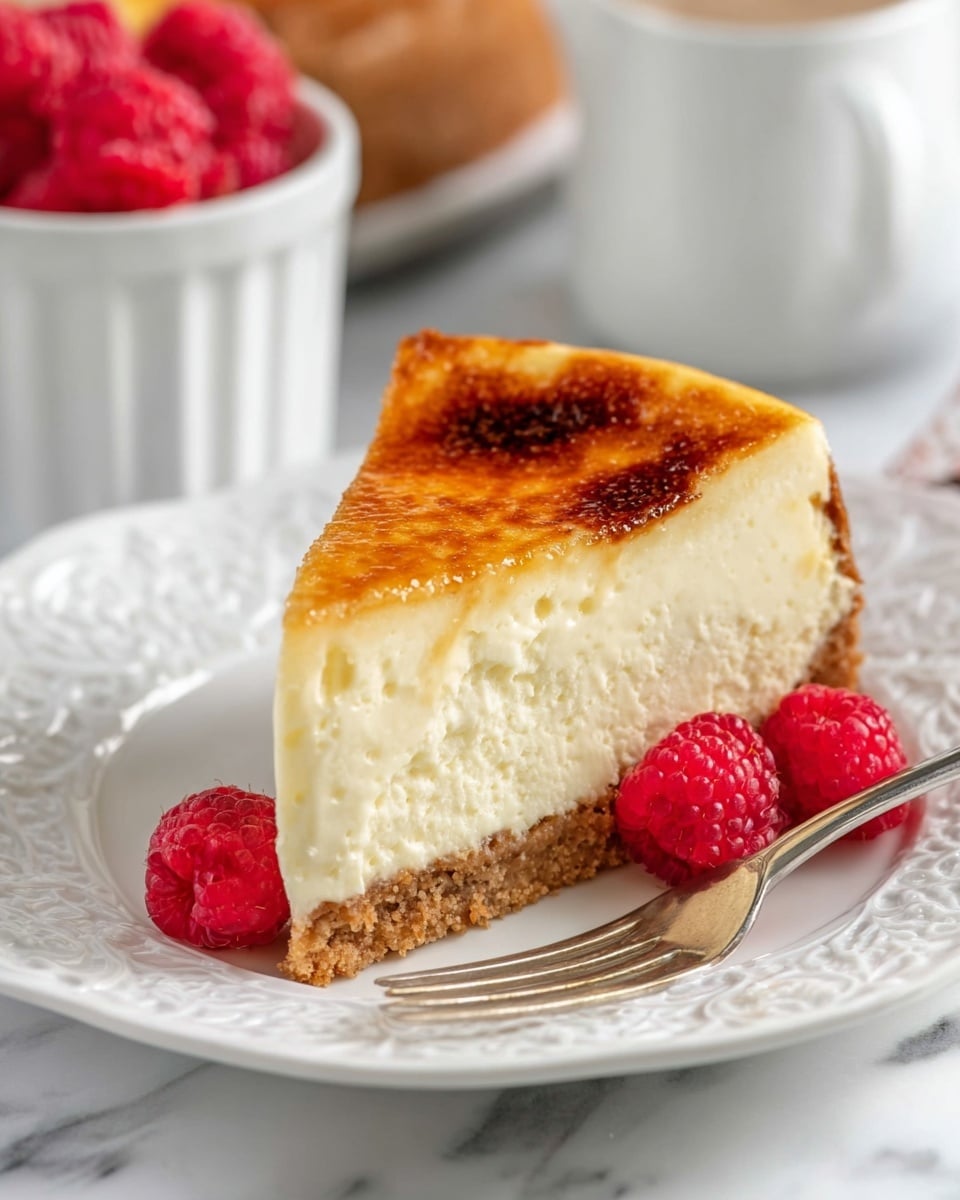
I’m so excited to share this Creme Brûlée Cheesecake Recipe with you because it truly combines the best of two worlds: the creamy richness of cheesecake and the caramelized, delicate top of classic crème brûlée. Every time I make this dessert, it’s like treating myself to a restaurant-quality finale that feels fancy but is surprisingly straightforward to pull off at home.
This dessert shines on special occasions, but honestly, it’s perfect whenever you want to impress without stress. Plus, the contrast between the crisp brûléed sugar topping and the smooth, velvety cheesecake underneath keeps everyone coming back for seconds. You’ll find yourself reaching for it after dinner, or even during your afternoon coffee break!
Ingredients You’ll Need
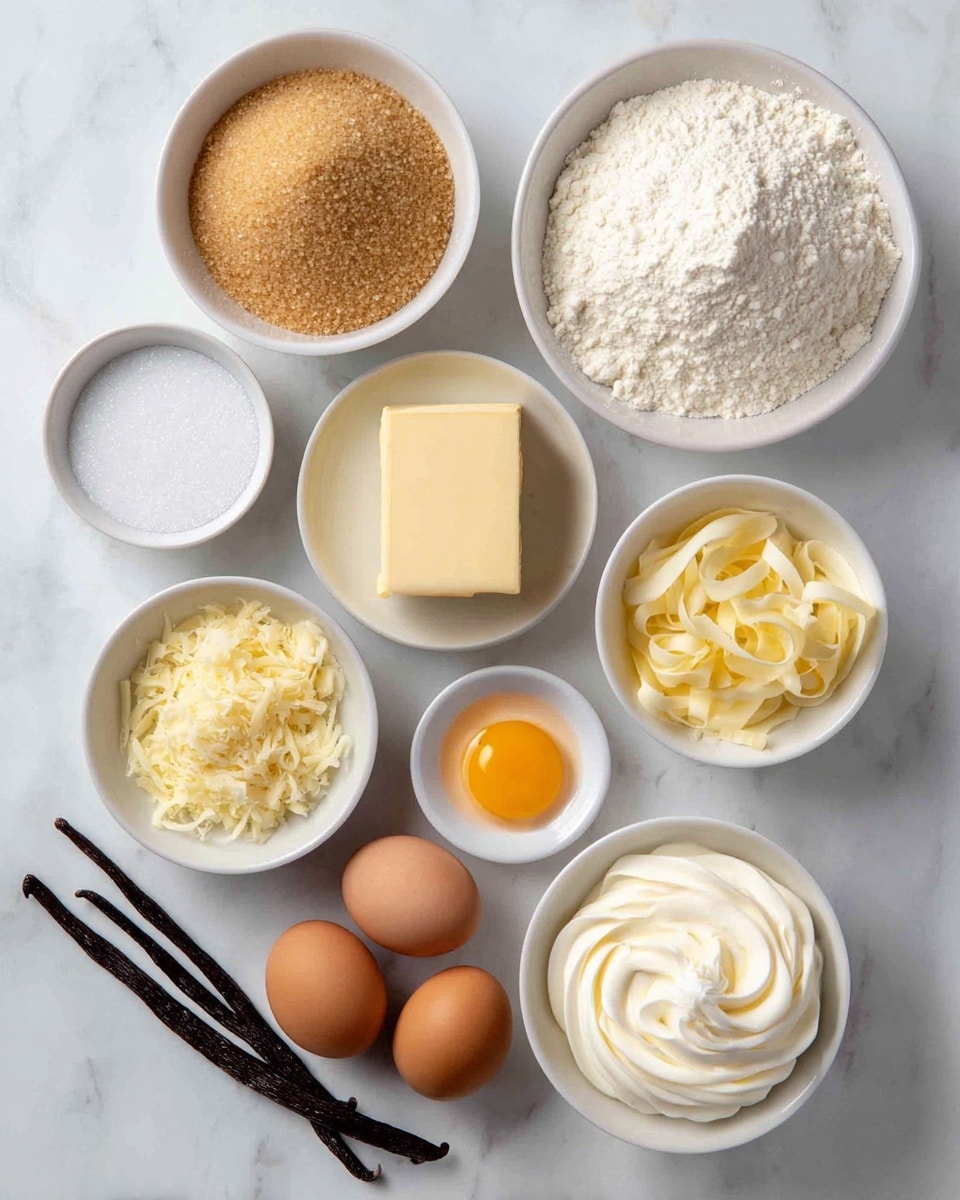
Getting your ingredients right is key here since this recipe balances textures and flavors from the crust all the way to the pastry cream and caramelized top. Each component supports the other, so take a moment to pick quality basics, especially cream cheese and vanilla.
- Vanilla wafer crumbs: Using vanilla wafers adds a subtle sweet and vanilla aroma in the crust that complements the cheesecake perfectly.
- Salted butter: Melted and combined with the crumbs, butter binds the crust and adds richness; salted butter gives a nice flavor balance.
- Brown sugar: Both in the crust and filling, it lends a warm molasses note enhancing the overall depth of sweetness.
- Cream cheese: Room temperature cream cheese is essential for a smooth, lump-free filling—don’t rush this part!
- All-purpose flour: Helps stabilize the cheesecake so it’s rich but holds together beautifully.
- Sour cream: Adds a lovely tang and moistness that lightens the texture without taking away richness.
- Vanilla extract: Always go for pure vanilla extract—it makes a noticeable difference in flavor.
- Large eggs: Room temperature eggs blend better and ensure a creamy texture in the filling.
- Egg yolks (for pastry cream): These create the smooth, custard element that layers inside and ties the crème brûlée vibe to your cheesecake.
- Cornstarch: Used in the pastry cream to thicken it up without making it heavy.
- Milk: Whole milk is best for creating that rich, velvety pastry cream.
- Sugar: You’ll use this both in the pastry cream and for the signature brûléed topping.
Variations
One of the best parts of this Creme Brûlée Cheesecake Recipe is how easy it is to make it your own. Whether you want to swap out some ingredients or add a little extra flavor kick, there are plenty of fun customizations to try.
- Use almond or chocolate wafer crumbs: I’ve sometimes swapped vanilla wafers for almond wafers to add a nutty twist, and it’s delicious in giving the crust a deeper flavor.
- Try a splash of bourbon or coffee in the filling: Adds a sophisticated touch—perfect if you’re making this for adult guests.
- Go gluten-free: Substitute gluten-free vanilla wafer crumbs for the crust, and use gluten-free flour for the filling; it tastes just as rich.
- Top with fresh berries before caramelizing: I sometimes layer raspberries on top before sprinkling sugar and torching it for a sweet and tangy topping.
How to Make Creme Brûlée Cheesecake Recipe
Step 1: Prepare the Crust
Start by mixing your vanilla wafer crumbs with the melted salted butter and brown sugar until it looks evenly moistened. Press this mixture firmly into the bottom of a springform pan—you want an even layer, about 1/2 inch thick. I like to use the bottom of a measuring cup to really pack it down so the crust holds together nicely after baking. Then, pop it in the oven at 350°F (175°C) for about 10 minutes to set the crust. This helps it stay crisp once the cheesecake filling goes in.
Step 2: Make the Pastry Cream
Whisk together egg yolks, sugar, and cornstarch in a bowl until smooth and pale. Heat milk in a saucepan just until it starts steaming but not boiling. Slowly pour the hot milk into the egg mixture while whisking constantly to temper the eggs. Return the custard to the pan and cook over medium heat, stirring constantly until it thickens—this usually takes about 3-5 minutes. Remove from heat, stir in butter and vanilla extract, then let it cool slightly. This creamy pastry cream adds that classic crème brûlée flavor within the cheesecake.
Step 3: Blend the Cheesecake Filling
Beat your room temperature cream cheese until super smooth—no lumps here! Add brown sugar and flour, mixing until just combined, then blend in sour cream and vanilla extract. One at a time, incorporate the eggs slowly, mixing gently to keep air bubbles minimal. Finally, fold in the slightly cooled pastry cream. This technique keeps the filling luscious and quieter, avoiding cracks as it bakes.
Step 4: Bake with Care
Pour the filling over your pre-baked crust and smooth the top. Bake at 325°F (160°C) for about 50-60 minutes, or until the edges are set but the center still jiggles a bit—that slow bake helps keep the texture creamy. I like to place a water bath under the springform to add moisture and prevent cracking, but if you’re short on time, you can skip the water bath just be mindful of your oven temperature.
Step 5: Chill and Brûlée
Once baked, cool the cheesecake completely, then refrigerate it for at least 4 hours or overnight. Just before serving, sprinkle 2–3 tablespoons of sugar evenly over the top and use a kitchen torch to caramelize the sugar until golden and crisp. I always move the torch in slow circles to avoid burning and get a perfectly smooth brûlée surface.
How to Serve Creme Brûlée Cheesecake Recipe
Garnishes
I love keeping it classic with just a few raspberries or a sprig of fresh mint on top. The freshness cuts through the richness beautifully. Sometimes I dust a little cocoa powder or even add thinly sliced toasted almonds for some crunch—it’s all about that textural contrast that makes every bite exciting.
Side Dishes
This cheesecake stands on its own, but if you want to pair it, consider a cup of strong espresso or a light dessert wine like Moscato. For a fun brunch twist, it goes surprisingly well alongside fresh fruit salads or a simple lemon sorbet to brighten the palate.
Creative Ways to Present
One of my favorite presentation tricks is serving individual portions in ramekins with the crème brûlée topping torch-seared right before guests dig in. It adds a bit of theater and makes each person feel extra special. You can also drizzle a salted caramel sauce around the slices for a restaurant-worthy plate.
Make Ahead and Storage
Storing Leftovers
After you torch the sugar top, it’s best to serve the cheesecake the same day for that perfect crunch. However, you can wrap any leftover cheesecake tightly with plastic wrap and keep refrigerated for up to 4 days. Before storing, I usually cover the surface with plastic wrap to prevent it from drying out and ensure the cheesecake stays creamy.
Freezing
If you want to freeze this recipe, I recommend freezing the cheesecake before torching the sugar. Wrap it tightly in plastic wrap and then aluminum foil to avoid freezer burn. When ready, thaw overnight in the refrigerator, then brûlée the top fresh just before serving. This way, the texture stays perfect and you get that satisfying crack of the caramelized sugar.
Reheating
This cheesecake is best served chilled, so you won’t want to reheat it. If you decide to torch some extra sugar topping later, just sprinkle sugar over the cold slice and use the kitchen torch to re-caramelize. Avoid using an oven or microwave as it can affect the texture and melting point of the cream cheese filling.
FAQs
-
Can I make this Creme Brûlée Cheesecake Recipe without a kitchen torch?
While a kitchen torch is ideal for creating that perfect brûlée topping, you can use your oven’s broiler as a substitute. Place the cheesecake under a preheated broiler on high and watch carefully—it can caramelize quickly. Be sure to keep a close eye to prevent burning, and use a heatproof pan underneath to catch any drips.
-
Why did my cheesecake crack on top?
Cracks usually happen due to overbaking or sudden temperature changes. To avoid this, bake at a lower temperature and don’t open the oven door mid-bake. Also, cooling the cheesecake gradually by leaving it inside the turned-off oven with the door slightly open can help prevent cracks.
-
Can I prepare the pastry cream a day ahead?
Absolutely! Making the pastry cream a day ahead lets the flavors deepen. Just cover it tightly with plastic wrap pressed onto the surface to prevent a skin from forming, and refrigerate until ready to use.
-
How do I get a crunchy brûlée sugar topping?
The secret is to use the right amount of sugar (2–3 tablespoons) and to evenly sprinkle it across the surface. Using a kitchen torch, move it slowly to melt then caramelize the sugar evenly without burning one spot.
Final Thoughts
This Creme Brûlée Cheesecake Recipe holds a special place in my kitchen because it lets me serve a dessert that’s both elegant and comforting—like a big, warm hug with a crisp sugar crown. I hope you’ll give it a try soon and enjoy how the layers come together in such a dreamy way. Trust me, once you do, this is going to be one of those recipes you pull out to wow your friends and family every time.
PrintCreme Brûlée Cheesecake Recipe
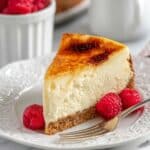
This Creme Brûlée Cheesecake is a decadent dessert combining the creamy richness of classic cheesecake with the indulgent, caramelized sugar topping of creme brûlée. Featuring a crunchy vanilla wafer crust, a smooth and tangy cheesecake filling enhanced with sour cream and brown sugar, and a luscious pastry cream layer, this dessert delivers a perfect balance of textures and flavors, finished with a crisp brûléed sugar top for a delightful contrast.
- Prep Time: 30 minutes
- Cook Time: 1 hour 15 minutes
- Total Time: 5 hours 45 minutes
- Yield: 12 servings 1x
- Category: Dessert
- Method: Baking
- Cuisine: American
Ingredients
Crust
- 2 1/4 cups (302g) vanilla wafer crumbs
- 1/2 cup (112g) salted butter, melted
- 3 tbsp (39g) brown sugar
Cheesecake Filling
- 24 ounces (678g) cream cheese, room temperature
- 1 cup (225g) packed light brown sugar
- 3 tbsp (24g) all-purpose flour
- 1 cup (230g) sour cream
- 1 1/2 tbsp vanilla extract
- 4 large eggs, room temperature
Pastry Cream
- 2 egg yolks
- 6 tbsp (78g) sugar
- 1 1/2 tbsp cornstarch
- 1 cup (240ml) milk
- 1 tbsp (14g) salted butter
- 1 tsp vanilla extract
Additional
- 2–3 tbsp sugar (for caramelizing)
Instructions
- Prepare the Crust: Preheat your oven to 325°F (163°C). In a medium bowl, combine the vanilla wafer crumbs, melted butter, and brown sugar. Mix until all crumbs are evenly moistened. Press the mixture firmly into the bottom of a 9-inch springform pan to form an even crust layer. Bake for 10 minutes until set, then remove from oven and allow to cool slightly.
- Make the Pastry Cream: In a saucepan, whisk together the egg yolks, sugar, and cornstarch until smooth. Gradually add the milk, whisking constantly to combine without lumps. Place the saucepan over medium heat and cook, stirring continuously, until the mixture thickens and begins to bubble. Remove from heat and stir in the butter and vanilla extract. Transfer to a bowl, cover with plastic wrap touching the surface to prevent a skin from forming, and chill until completely cool.
- Prepare the Cheesecake Filling: In a large mixing bowl, beat the cream cheese until smooth and creamy. Gradually add the brown sugar and flour, mixing well. Incorporate the sour cream and vanilla extract, followed by the eggs one at a time, beating just until combined after each addition. Avoid overmixing to prevent cracks during baking.
- Assemble the Cheesecake: Spread a thin layer of the chilled pastry cream over the cooled crust. Pour the cheesecake filling on top of the pastry cream layer, smoothing the surface with a spatula.
- Bake the Cheesecake: Place the springform pan into a larger roasting pan and add hot water to the roasting pan to come about halfway up the sides of the springform pan, creating a water bath. Bake at 325°F (163°C) for 55-65 minutes, or until the edges are set but the center jiggles slightly. Turn off the oven and leave the cheesecake inside with the door slightly ajar for 30 minutes to prevent cracking. Remove from the water bath and cool at room temperature before refrigerating for at least 4 hours, preferably overnight.
- Caramelize the Sugar Topping: Just before serving, sprinkle 2-3 tablespoons of sugar evenly over the top of the chilled cheesecake. Using a kitchen torch, carefully caramelize the sugar until golden brown and crispy. Allow the sugar to harden for a few minutes before slicing and serving.
Notes
- Use room temperature ingredients for a smooth, lump-free cheesecake batter.
- Be careful not to overbake the cheesecake; slight jiggle in the center ensures creamy texture.
- If you don’t have a kitchen torch, place the sugared cheesecake under a broiler for 1-2 minutes, watching closely to avoid burning.
- Allow the cheesecake to chill thoroughly for the best flavor and texture.
- Vanilla wafer crumbs can be substituted with graham cracker crumbs if desired.
Keywords: creme brûlée cheesecake, cheesecake recipe, caramelized sugar topping, vanilla wafer crust, pastry cream cheesecake, baked cheesecake