Creamy Chicken Alfredo Pasta Recipe
Let me tell you, this Creamy Chicken Alfredo Pasta Recipe is one of my absolute favorites when I want something that feels indulgent but comes together quickly. There’s something so satisfying about the rich, velvety Alfredo sauce coating every strand of pasta and tender chicken—comfort food at its finest. Whether you’re cooking for a cozy weeknight dinner or impressing friends on a casual weekend, this dish never disappoints.
What I love most about this Creamy Chicken Alfredo Pasta Recipe is how approachable it is. You don’t need to be a gourmet chef to nail the creamy texture or the perfect balance of flavors. Plus, it’s super versatile, making it a great option if you want to switch things up or add your own flair. Trust me, once you try this, it’ll quickly become a go-to for you too!
Ingredients You’ll Need
The ingredients for this Creamy Chicken Alfredo Pasta Recipe come together so well that each one really shines. It’s mostly pantry staples with a few fresh touches, making shopping a breeze. Keep an eye out for good-quality Parmesan cheese—that really makes a difference in your sauce’s flavor.
- Chicken breasts: I like to use boneless, skinless ones for quick cooking and easy slicing.
- Heavy cream: This is the star of the creamy sauce. Don’t substitute unless you want a different texture.
- Butter: Adds richness and helps create that silky mouthfeel.
- Garlic: Fresh minced garlic gives the sauce a lovely aromatic lift.
- Parmesan cheese: Grate it fresh if you can—the taste difference is worth it.
- Fettuccine pasta: Classic choice, but feel free to swap with linguine or even penne so it holds more sauce.
- Salt and pepper: Essential for seasoning at every step to build layers of flavor.
- Olive oil: For cooking the chicken, helps in getting a golden sear.
Variations
I’ve played around with this Creamy Chicken Alfredo Pasta Recipe a lot, and one of the best parts is how forgiving it is. You can easily adjust it based on what you have or your dietary needs—personalizing it makes the dish feel even more cozy.
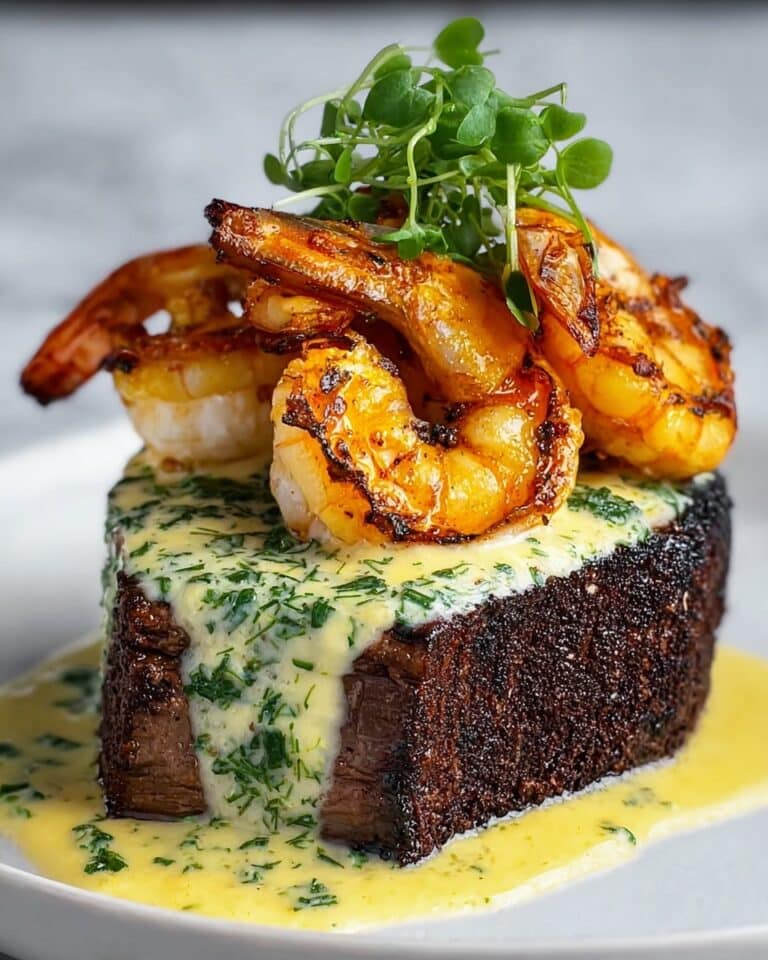
- Shrimp Alfredo: Swapping chicken for shrimp gave me a lighter but still indulgent dinner that my whole family enjoyed.
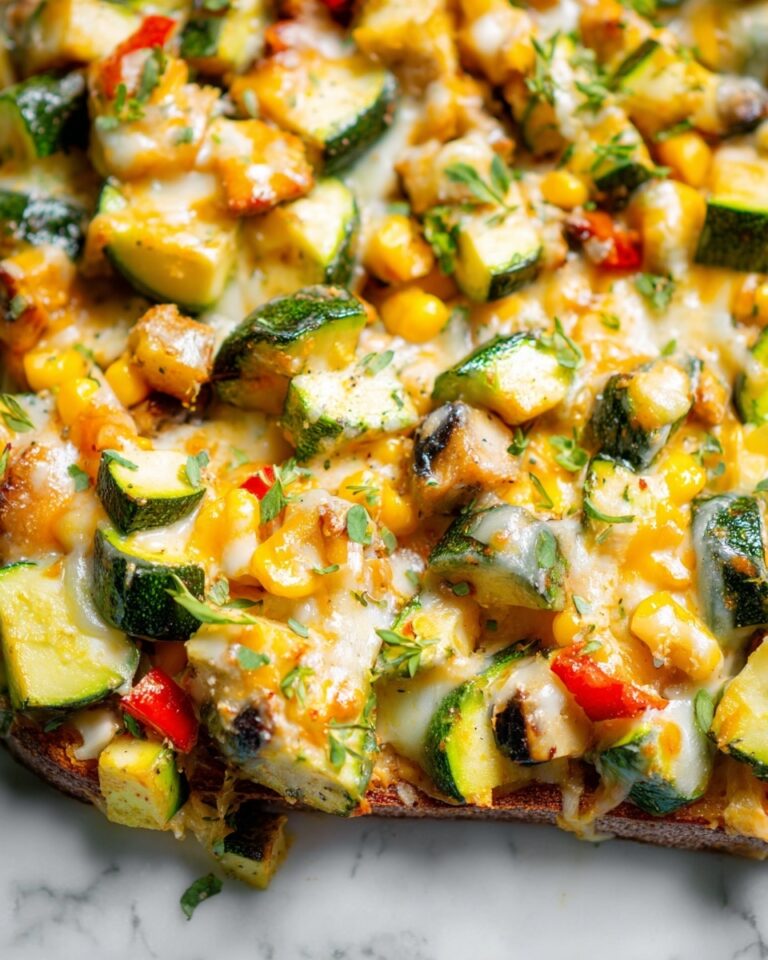
- Vegetarian version: Try adding sautéed mushrooms and spinach instead of chicken for a veggie-packed creamy delight.
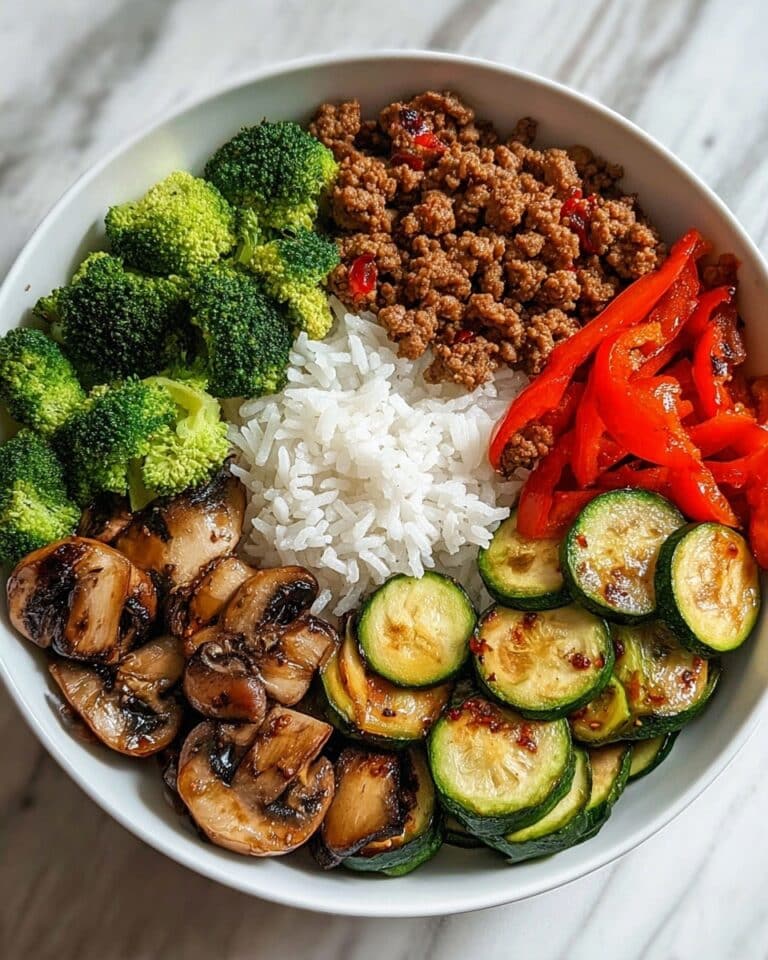
- Low-carb twist: I once used spiralized zucchini instead of pasta and loved the freshness it added without compromising the creamy sauce.
- Spicy kick: Adding red pepper flakes gives a nice heat balance that wakes up the rich sauce—my boyfriend swears by this version!
How to Make Creamy Chicken Alfredo Pasta Recipe
Step 1: Prepare and Cook the Chicken
Start by seasoning your chicken breasts generously with salt and pepper. Heat olive oil in a skillet over medium-high heat, then cook the chicken until golden brown and cooked through, about 5-7 minutes each side. A trick I use is to not overcrowd the pan—this helps the chicken get that beautiful sear instead of steaming. Once done, let the chicken rest for a few minutes before slicing it thinly to keep it juicy.
Step 2: Cook the Pasta
While the chicken is cooking, boil your pasta in salted water according to the package instructions until al dente. I always reserve about half a cup of pasta water before draining—you’ll use this starchy water if your sauce needs loosening later. This little tip makes the sauce cling beautifully to the noodles.
Step 3: Make the Alfredo Sauce
In the same skillet you cooked the chicken (no need to dirty another pan!), melt butter over medium heat and add minced garlic. Let it cook until fragrant, about 1 minute, but don’t let it brown or burn. Next, pour in the heavy cream and bring it to a gentle simmer. Stir in the freshly grated Parmesan cheese and season with salt and pepper to taste. Stir constantly until the sauce thickens slightly — it should coat the back of a spoon.
Step 4: Combine Everything
Add the sliced chicken and cooked pasta into the sauce. Toss everything gently to coat evenly. If the sauce feels too thick, add a splash of the reserved pasta water until you reach your preferred consistency. Taste and adjust seasoning one last time.
How to Serve Creamy Chicken Alfredo Pasta Recipe

Garnishes
I love topping this dish with a sprinkle of freshly chopped parsley for some color and freshness. Extra Parmesan on the side is a must—people always want to add a little more! Sometimes, I toss in a few cracked black peppercorns for that lovely bite on top.
Side Dishes
This Creamy Chicken Alfredo Pasta pairs beautifully with a crisp green salad dressed in lemon vinaigrette, or some garlic roasted broccoli to add a little texture and color to the plate. For a heartier meal, warm up some crusty bread to mop up every last bit of sauce.
Creative Ways to Present
For special occasions, I like serving this pasta in individual shallow bowls, drizzled with a touch of truffle oil or a sprinkle of toasted pine nuts for a fancy touch. It’s also great plated with a twist of lemon zest on top to brighten the flavors and add elegance.
Make Ahead and Storage
Storing Leftovers
After dinner, I usually store leftovers in an airtight container in the refrigerator for up to 3 days. The sauce thickens when chilled, so don’t worry if it looks a bit clumped—that’s totally normal and easy to fix when reheating.
Freezing
I’ve frozen this Creamy Chicken Alfredo Pasta Recipe for busy nights, but I’d recommend freezing before tossing the pasta with sauce to keep texture intact. Freeze the cooked chicken and sauce separately if possible, then thaw overnight in the fridge before reheating.
Reheating
When I reheat, I warm the leftovers gently on the stove over low heat, adding a splash of milk or cream to loosen the sauce. Microwave works in a pinch too—just go low power and stir often so the sauce stays creamy and doesn’t curdle.
FAQs
-
Can I use other types of pasta for this Creamy Chicken Alfredo Pasta Recipe?
Absolutely! While fettuccine is traditional, feel free to use linguine, penne, or even tagliatelle. Just make sure you cook the pasta al dente so it holds the rich sauce well and doesn’t get mushy when tossed.
-
Is it okay to substitute cream with milk to make the sauce lighter?
You can use milk, but the sauce won’t be as thick or rich. To get closer to that creamy texture, try using half-and-half or add a little flour or cornstarch to help thicken the milk-based sauce. Just keep an eye on the cooking time to avoid it becoming too thin.
-
How do I make sure the chicken stays juicy?
Seasoning well, not overcrowding the pan, and avoiding overcooking are key. Let the chicken rest after cooking to retain juices before slicing. Thin slices help incorporate it smoothly into the pasta.
-
Can I prepare the sauce ahead of time?
Yes, you can prepare the Alfredo sauce a day in advance and gently reheat it on the stove. If it thickens too much, stirring in a splash of cream or milk will help bring it back to the perfect consistency.
-
What cheese works best in this recipe?
Freshly grated Parmesan is the classic and hands-down best choice for authentic flavor and creamy texture. Avoid pre-grated cheese if possible since it often contains anti-caking agents that can affect melting.
Final Thoughts
This Creamy Chicken Alfredo Pasta Recipe holds a special spot on my dinner rotation because it’s reliable, comforting, and always hits the spot. Sharing this with you feels like passing along a little bit of that kitchen happiness I get from making it. I’m confident it’ll become a favorite for you, too—perfectly creamy, deliciously satisfying, and ready to make any mealtime feel like a small celebration. So go ahead, give it a try, and enjoy that cozy, cheesy goodness at home!
PrintCreamy Chicken Alfredo Pasta Recipe

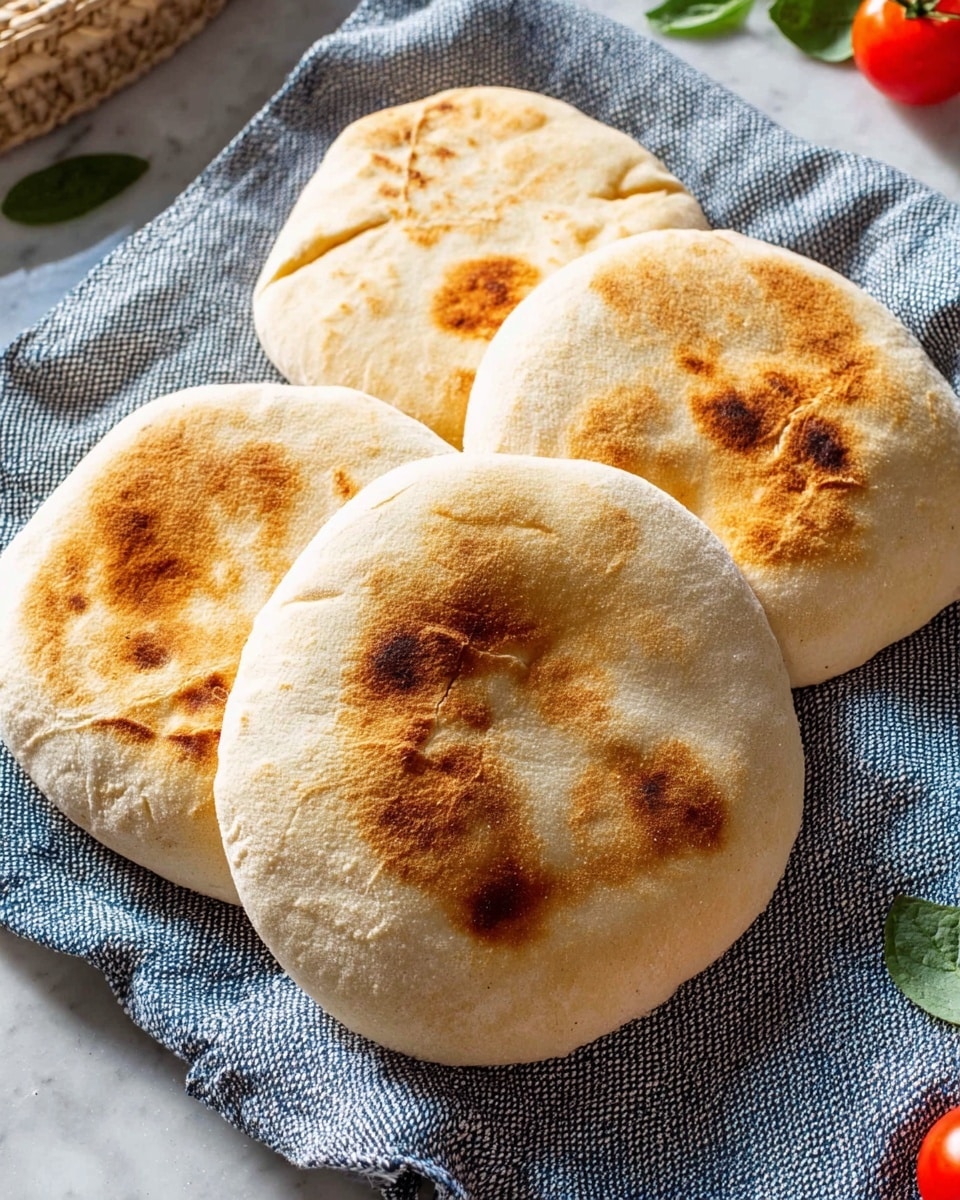
This classic pita bread recipe yields soft, fluffy, and pocketed flatbreads perfect for sandwiches, dips, and Mediterranean dishes. Made with simple ingredients including flour, yeast, and olive oil, this stovetop-cooked version is quick and easy, producing authentic Middle Eastern-style pita that you can enjoy fresh at home.
- Prep Time: 15 minutes
- Cook Time: 16 minutes
- Total Time: 1 hour 30 minutes
- Yield: 8 pita breads 1x
- Category: Bread
- Method: Stovetop
- Cuisine: Middle Eastern
- Diet: Vegetarian
Ingredients
Dough Ingredients
- 3⅓ cups all-purpose flour
- 1¼ cups lukewarm water
- 2 teaspoons active dry yeast or instant dry yeast
- 2 teaspoons sugar
- 2 teaspoons salt
- 2 tablespoons olive oil
Instructions
- Activate the Yeast: In a small bowl, combine the lukewarm water with sugar and yeast. Stir gently and let it sit for about 5-10 minutes until the mixture becomes frothy, indicating the yeast is active.
- Mix the Dough: In a large bowl, combine the flour and salt. Make a well in the center and pour in the activated yeast mixture along with the olive oil. Mix together until a shaggy dough forms.
- Knead the Dough: Transfer the dough to a lightly floured surface and knead for about 8-10 minutes until it becomes smooth, elastic, and slightly tacky. Alternatively, use a stand mixer with a dough hook for 6-7 minutes.
- First Rise: Place the dough in a lightly oiled bowl, cover with a damp cloth or plastic wrap, and let it rise in a warm place for about 1 to 1.5 hours until it doubles in size.
- Divide and Shape: Punch down the risen dough and divide it into 8 equal pieces. Shape each piece into a smooth ball and let them rest for 10 minutes, covered with a cloth to prevent drying.
- Roll Out Pitas: On a lightly floured surface, roll each ball into a 6-7 inch diameter circle with an even thickness of about 1/8 inch. Avoid rolling too thin as the pita needs to puff up.
- Cook Pita Bread: Heat a heavy-bottomed skillet or cast-iron pan over medium-high heat until very hot. Place one rolled-out dough circle onto the dry skillet. Cook for about 1-2 minutes until bubbles form and the bottom develops golden brown spots, then flip and cook the other side for another 1-2 minutes. The pita should puff up, forming a pocket.
- Keep Warm and Serve: Remove the cooked pita and cover with a clean kitchen towel to keep warm and soft. Repeat the cooking process with the remaining dough circles. Serve warm with your favorite fillings or dips.
Notes
- Use lukewarm (not hot) water to activate yeast without killing it.
- Resting the shaped dough balls helps them relax and makes rolling easier.
- The pocket forms when the high heat causes steam to build up inside the dough during cooking.
- Store leftover pita breads in an airtight container to keep them soft, or freeze for longer storage.
- For a fluffier texture, you can brush the dough lightly with water before cooking.
Keywords: pita bread, flatbread, Middle Eastern bread, homemade pita, stovetop bread