Colorful Christmas Fudge Recipe
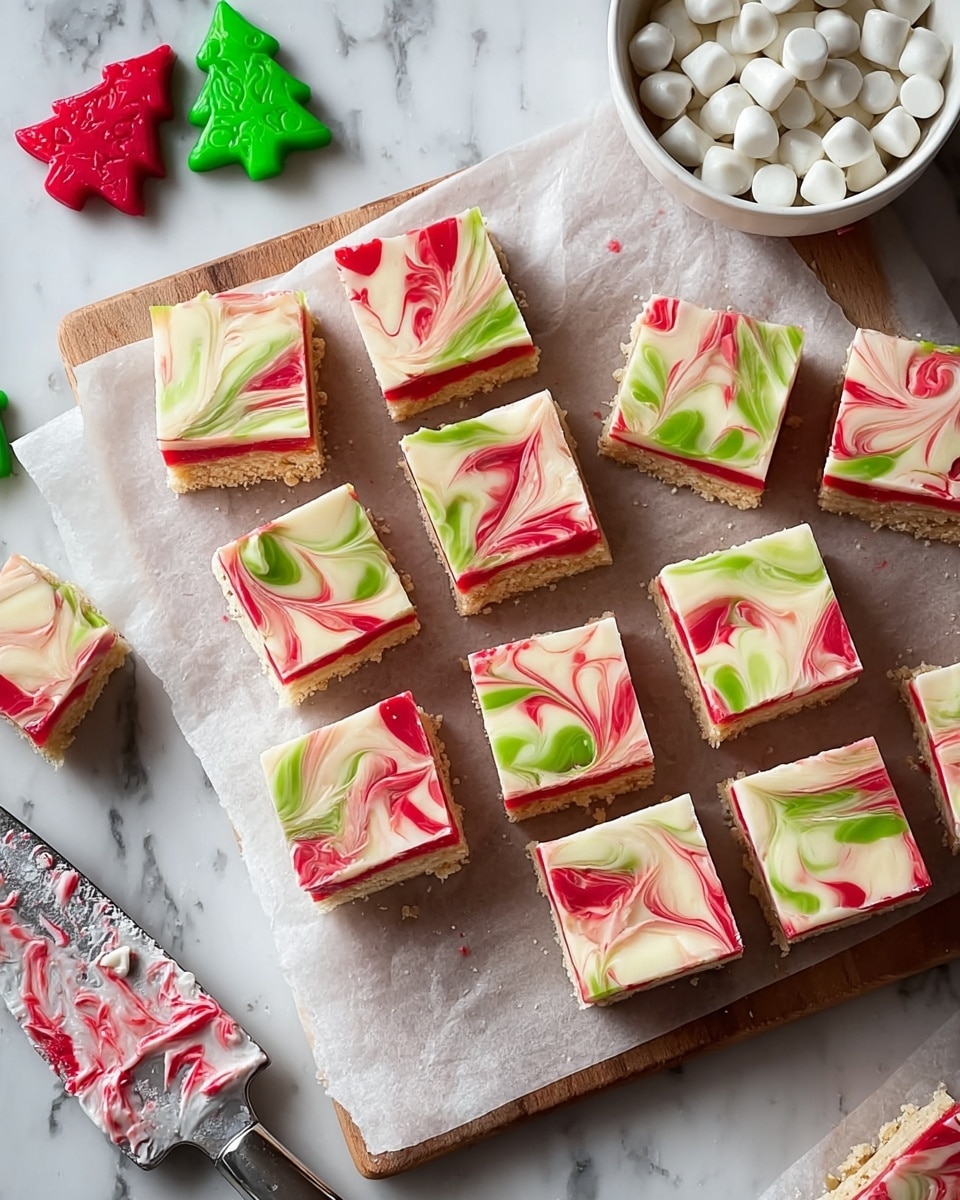
I’m so excited to share this Colorful Christmas Fudge Recipe with you—it’s truly a holiday staple in my kitchen. What makes this fudge special isn’t just the rich, creamy sweetness but also the fun pops of red and green that instantly bring festive cheer. Whether you’re gifting it to neighbors or bringing it to a Christmas party, this fudge is always a crowd-pleaser that feels homemade and heartfelt.
Plus, it’s remarkably simple to whip up with just a handful of ingredients you probably already have or can easily find. I love how this recipe adds a splash of color to your holiday treats without extra fuss, and honestly, it’s perfect for when you want to impress without spending hours in the kitchen. By the end of this, you’ll have delicious, vibrant fudge that looks as delightful as it tastes.
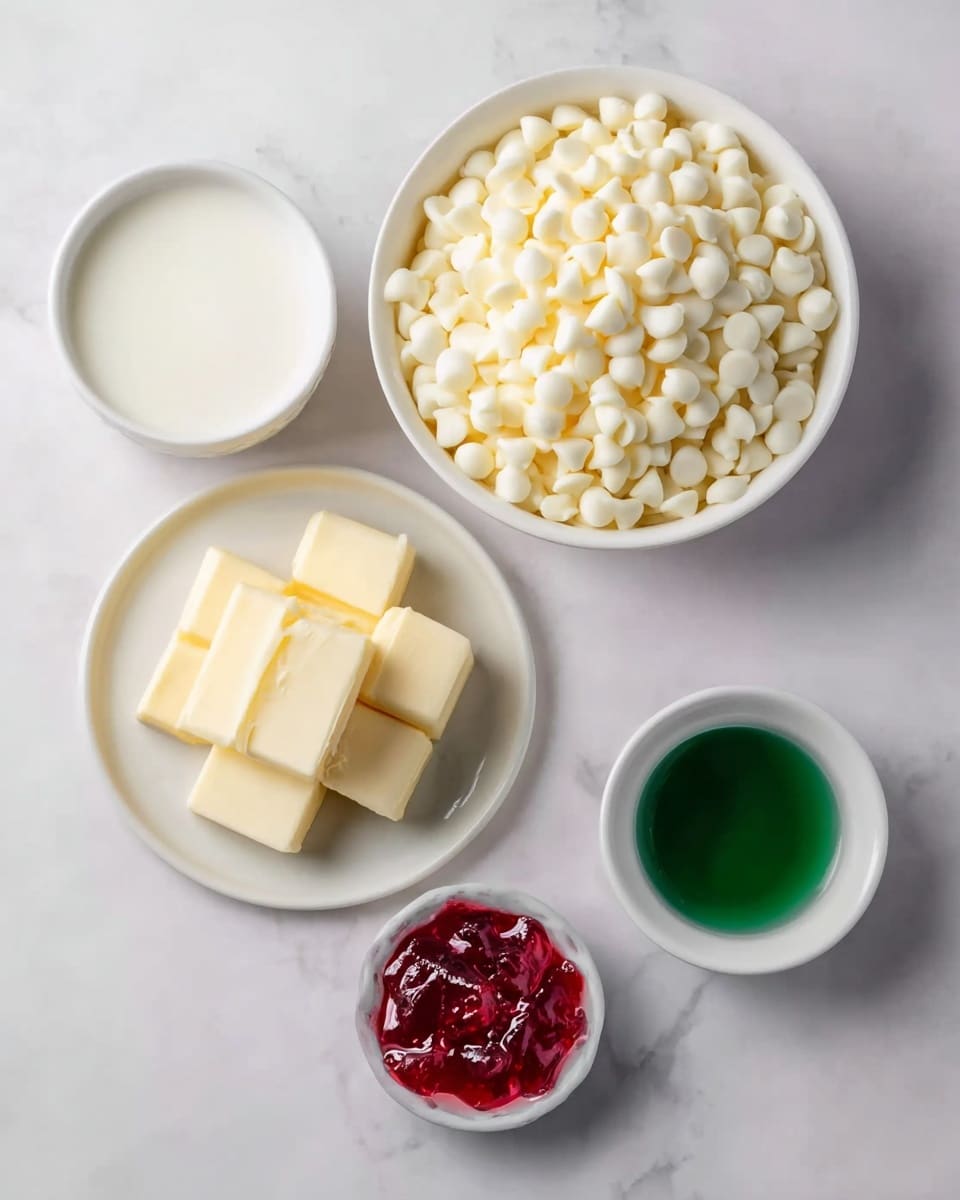
Ingredients You’ll Need
The ingredients for this Colorful Christmas Fudge Recipe are straightforward and play perfectly together. Each one contributes to that creamy texture and festive look, making it easy to find quality versions at your local store.
- White chocolate chips: I swear by Ghirardelli for a smooth, shiny finish and deep flavor. It melts evenly, which is key to perfect fudge texture.
- Sweetened condensed milk: Helps create that creamy sweetness and makes sure the fudge is silky, not grainy.
- Unsalted butter: Cold and cubed, this adds richness and balances the sweetness without overpowering the chocolate.
- Red gel food coloring: I recommend Americolor; a little goes a long way, so start small and add as needed to get that perfect holiday red.
- Green gel food coloring: Same brand as the red—bright, festive, and doesn’t mess with the fudge’s texture or taste.
Variations
I love tweaking this Colorful Christmas Fudge Recipe depending on the mood or who’s coming over. Feel free to personalize it with your own spin—it’s a forgiving recipe that welcomes creativity.
- Nutty Twist: I sometimes add chopped toasted pecans or walnuts for an extra crunch. It gives the fudge a delightful texture contrast that’s been a hit at family gatherings.
- Chocolate Swirl: Swapping half the chips for semi-sweet chocolate adds a lovely bittersweet touch if you prefer less sweetness.
- Vanilla Bean: Stir in some real vanilla bean seeds for a fragrant, cozy aroma that blends beautifully with the festive colors.
- Vegan Version: I’ve tried using dairy-free white chocolate and coconut condensed milk substitutes. The texture is slightly different, but still a yummy treat for vegan friends.
How to Make Colorful Christmas Fudge Recipe
Step 1: Melt and Mix with Care
Start by placing your white chocolate chips, sweetened condensed milk, and cold cubed butter into a medium heatproof bowl. Pop this over simmering water—or use a double boiler if you have one—to gently melt everything together. Stir with a silicone spatula slowly and steadily. This part takes patience because rushing could cause the chocolate to seize. Watch for a smooth, glossy mixture—if your butter isn’t fully melted or lumps remain, keep stirring but avoid overheating.
Step 2: Divide and Color
Once your base fudge mixture is silky and fully melted, remove it from heat and divide it evenly into two bowls. Now comes the really fun part—adding your gel food coloring. Start with just ¼ teaspoon in each bowl; red in one, green in the other. Stir well and add more coloring little by little until you get that perfect vibrant hue. I like to keep colors bright but not too intense, so it looks cheerful but still tastes like a treat.
Step 3: Set and Chill
Line a small square pan with parchment paper or lightly grease it. Pour the red fudge mixture on one side and the green on the other, or swirl them gently with a knife if you want a marbled effect. This step is where you make your fudge uniquely yours! Pop it into the fridge for at least 3 hours, preferably overnight, to let it fully set. You’ll know it’s ready when the surface feels firm but still a bit soft to the touch.
How to Serve Colorful Christmas Fudge Recipe
Garnishes
For me, simple garnishes work best. A sprinkle of crushed peppermint candy or a few festive sprinkles on top right before chilling adds a charming touch and an extra layer of holiday flavor. Sometimes, I dust with a tiny bit of edible glitter to give that magical sparkle—it’s always a hit with guests, especially kids.
Side Dishes
This fudge pairs wonderfully with a warm cup of homemade hot cocoa or a spiced apple cider. I like serving them together for a cozy winter afternoon snack. If you’re planning a holiday dessert board, add some roasted nuts and dried cranberries on the side to complement the fudge’s sweetness with tartness and texture.
Creative Ways to Present
For gift-giving, I love cutting the fudge into bite-sized squares and wrapping them individually in clear cellophane tied with a red or green ribbon. Another fun idea is arranging your fudge pieces layered with different colors in a clear glass jar—instant holiday centerpiece that’s edible! Last year, I even placed the fudge on festive holiday-themed platters for parties, and they disappeared within minutes.
Make Ahead and Storage
Storing Leftovers
After enjoying some fresh fudge, store any leftovers in an airtight container at room temperature if your kitchen is cool, or in the fridge if it’s warmer. I usually keep mine for about one week, and the fudge stays creamy and delicious without drying out. Just avoid leaving it near strong-smelling foods as fudge can absorb odors easily.
Freezing
I’ve frozen this fudge successfully several times by wrapping it tightly in plastic wrap then placing it in a freezer-safe container. When I thaw it slowly in the fridge overnight, the texture stays pretty much intact. It’s a great way to prep for holiday parties early or save extra batches for later munching!
Reheating
If you want to soften up your fudge a bit after it’s chilled or frozen, I recommend letting it come to room temperature naturally rather than microwaving. This prevents any waxy texture changes. But if you’re in a hurry, just a few seconds at low power in the microwave does the trick—just be careful not to melt it completely.
FAQs
-
Can I use regular liquid food coloring instead of gel for this fudge?
You can, but gel food coloring is definitely better for this recipe because it adds a vibrant color without thinning the fudge mixture. Liquid food coloring can make the fudge softer and might affect the texture, so if you only have liquid, use sparingly.
-
How long does the Colorful Christmas Fudge Recipe take to set?
Typically, it takes about 3 hours in the fridge to set firm, but I usually recommend chilling it overnight for the best sliceable consistency. If your fridge is very cold, you might check at 2 hours to avoid over-hardening.
-
Can I make this fudge ahead of time for holiday parties?
Absolutely! This fudge holds up well for a week at room temperature or longer if refrigerated. You can also freeze it and thaw before your event, so it’s a perfect make-ahead treat.
-
What’s the best way to cut this fudge without it crumbling?
Use a sharp knife warmed slightly under hot water and wiped dry. The warm blade glides through the fudge smoothly, giving you clean edges without crumbs.
-
Can I add other colors besides red and green?
Definitely! Feel free to experiment with other gel colors like gold, silver, or even blue if you want to mix up your holiday palette. Just remember to use food-grade gel coloring for best results and avoid over-coloring.
Final Thoughts
This Colorful Christmas Fudge Recipe holds a special place on my holiday table because it perfectly blends simplicity, festive charm, and that timeless rich fudge flavor everyone loves. If you’re like me and enjoy little kitchen traditions that bring smiles, this is a recipe you’ll want to keep coming back to year after year. Trust me, once you try it, you’ll find that colorful, creamy fudge becoming your go-to gift or holiday treat—you’ll love sharing this bit of sweetness with friends and family!
PrintColorful Christmas Fudge Recipe

Celebrate the holiday season with this vibrant and creamy Colorful Christmas Fudge recipe. Made with smooth white chocolate, sweetened condensed milk, and buttery goodness, this fudge is enhanced with festive red and green gel food coloring to bring a joyful pop of color to your holiday treats. Perfect for gifting or sharing at Christmas gatherings, this fudge recipe is simple to make and delightfully rich.
- Prep Time: 15 minutes
- Cook Time: 5 minutes
- Total Time: 2 hours 20 minutes
- Yield: 36 small squares 1x
- Category: Dessert
- Method: No-Cook
- Cuisine: American
Ingredients
Fudge Base
- 22 oz (2 11-oz bags) white chocolate chips (Ghirardelli recommended)
- 14 oz can sweetened condensed milk
- 4 tablespoons unsalted butter, cold and cut into small cubes
Coloring
- ¼–½ teaspoon red gel food coloring (Americolor brand suggested)
- ¼–½ teaspoon green gel food coloring (Americolor brand suggested)
Instructions
- Prepare the base: In a microwave-safe bowl, combine the white chocolate chips and sweetened condensed milk. Microwave in 30-second increments, stirring well after each, until the mixture is completely melted and smooth.
- Add the butter: Stir the cold, cubed unsalted butter into the melted chocolate mixture until fully incorporated and glossy.
- Divide and color: Split the fudge base evenly into three separate bowls. Add red gel food coloring to one bowl and green gel food coloring to another, stirring each until colors are vibrant. Leave the third bowl uncolored for classic white fudge.
- Layer the fudge: Pour the different colored fudge mixtures into a lined baking pan in layers or swirls, using a knife or toothpick to create festive patterns as desired.
- Set the fudge: Refrigerate the fudge for at least 2 hours or until firm to the touch.
- Cut and serve: Once set, remove the fudge from the pan, cut into small squares, and serve or package for gifting.
Notes
- Use gel food coloring instead of liquid to avoid changing the fudge’s consistency.
- Allow the butter to be cold helps to add richness and shiny texture once melted.
- For cleaner layers or swirls, chill the fudge slightly between pouring each color.
- Store fudge in an airtight container in the refrigerator for up to 2 weeks.
- Let the fudge sit at room temperature a few minutes before serving for softer texture.
Keywords: Christmas fudge, holiday dessert, white chocolate fudge, festive candy, colorful fudge