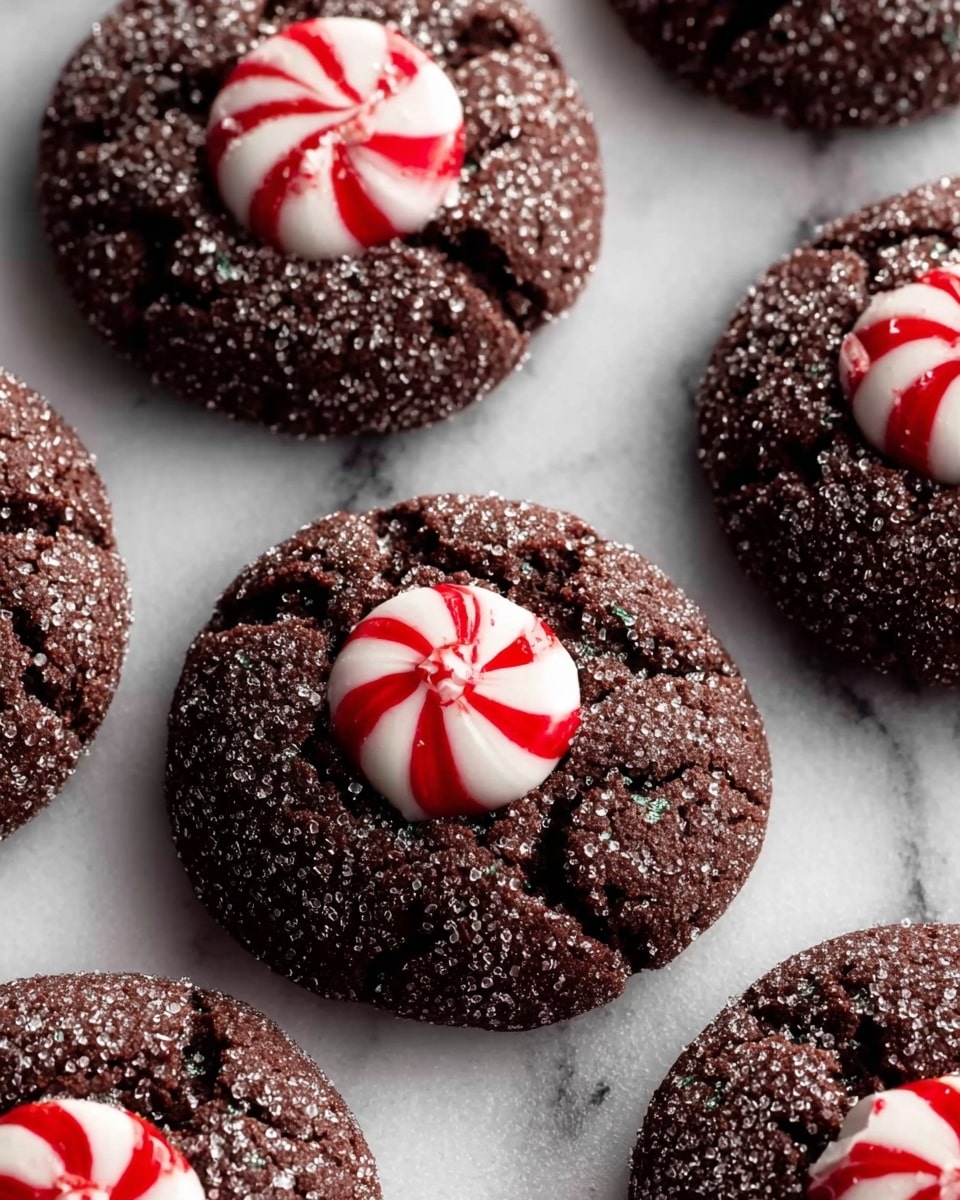
Chocolate Peppermint Kiss Cookies Recipe
If you love the festive flavors of chocolate and peppermint mingling in every bite, then this Chocolate Peppermint Kiss Cookies Recipe is going to be your new holiday obsession. I first made these last year when I was looking for something to impress guests at a Christmas party, and honestly, the combination of rich cocoa dough rolled in sugar with a peppermint Kiss nestled right in the center blew everyone away. They’re soft, a little chewy, with that perfect cool peppermint twist that just dances on your tongue.
What makes this Chocolate Peppermint Kiss Cookies Recipe truly special is how easy it is to pull together yet how fancy they taste. You don’t need to be a pro baker to get these right—the secret is in chilling the Kisses and rolling the dough balls good and tight. These cookies work beautifully for holiday gifts, cookie swaps, or when you just want to feel extra cozy during winter evenings with a glass of milk or hot cocoa.
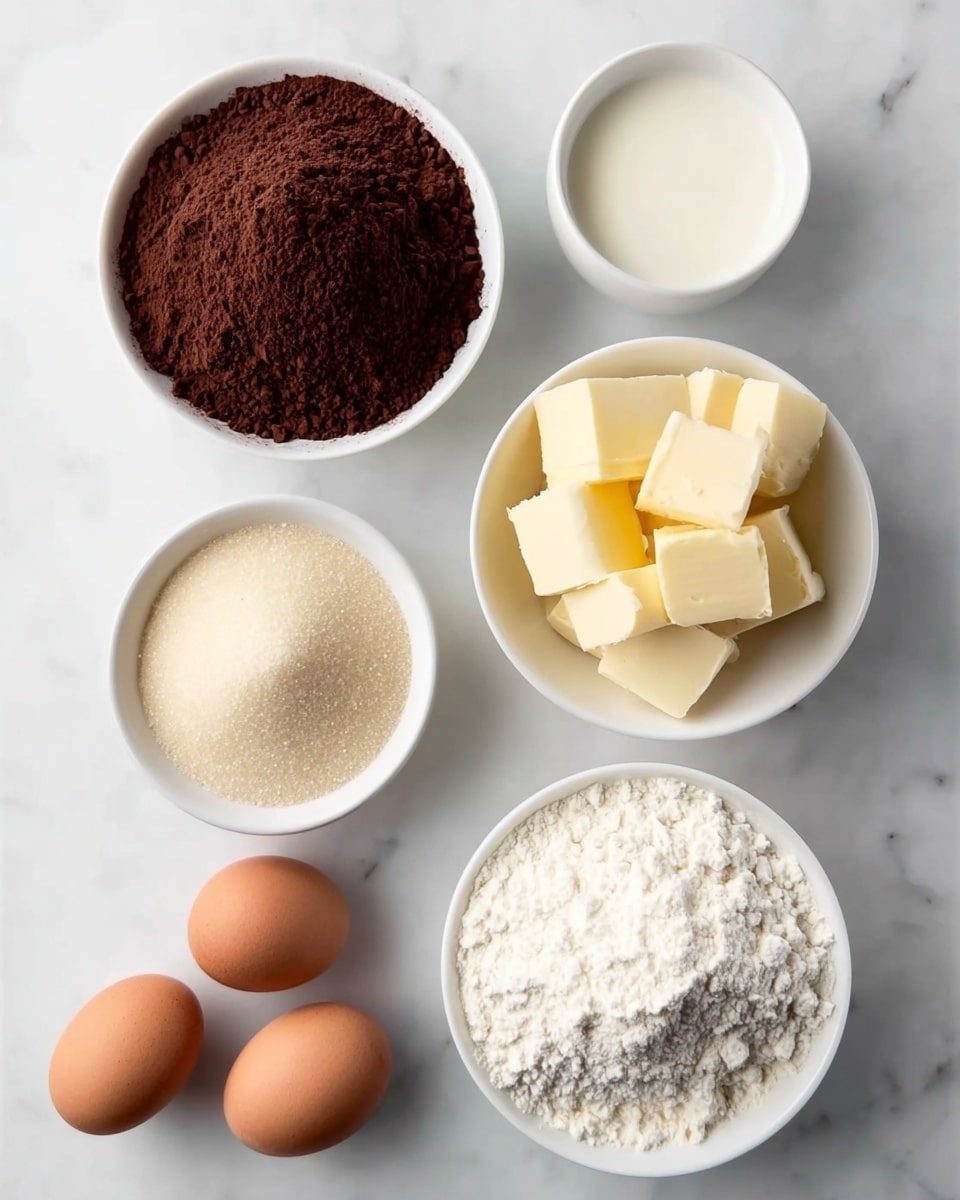
Ingredients You’ll Need
Every ingredient in this Chocolate Peppermint Kiss Cookies Recipe plays a key role, combining for that tender texture and peppermint punch you’ll crave. When shopping, look for good-quality Dutch process cocoa powder—it makes a noticeable difference in flavor richness!
- All-purpose flour: Spoon and level it for accuracy so your cookies stay perfectly soft, not dense.
- Dutch process cocoa powder: Adds a deep chocolate flavor and enhances the cookie’s color beautifully.
- Baking powder: Helps the cookie rise just enough to keep them tender and light.
- Baking soda: Works with the brown sugar for a lovely subtle chewiness.
- Salt: Balances and brightens the sweetness.
- Unsalted butter: Softened but not melted, this gives the dough a creamy texture and flavor.
- Light brown sugar: Packed, for that rich caramel undertone and moist crumb.
- Granulated sugar: Part in the dough and part for rolling—gives a crisp sugar coating that sparkles.
- Egg yolks: At room temperature for better mixing and richness.
- Vanilla extract: Just a touch to amplify all those lovely flavors.
- Candy Cane Hershey Kisses: Frozen before use so they don’t melt into the dough while baking.
Variations
I love to make this Chocolate Peppermint Kiss Cookies Recipe my own by swapping out a few ingredients or adding little touches. It’s one of those recipes where you can really have fun experimenting!
- Use dark chocolate Kisses: I tried this last year to make a slightly less sweet version, and it was fantastic for those who prefer intense chocolate.
- Gluten-free flour blend: For friends with sensitivities, I replaced the flour once with a 1:1 gluten-free flour mix and still got great results.
- Crushed candy canes topping: Sprinkling crushed peppermint on top before baking adds an extra festive crunch I adore.
- Adding espresso powder: A pinch enhances the chocolate flavor without making it taste like coffee—trust me on this one!
How to Make Chocolate Peppermint Kiss Cookies Recipe
Step 1: Prep Your Dry Ingredients
Start by whisking together the all-purpose flour, Dutch process cocoa powder, baking powder, baking soda, and salt in a medium bowl. I always sift the cocoa powder first to avoid clumps—it makes mixing easier and ensures every bite is smooth chocolate goodness. Set this aside for later while you work on the wet ingredients.
Step 2: Cream Butter and Sugars
In a large bowl, beat the softened unsalted butter, light brown sugar, and granulated sugar until creamy and light. This usually takes about 3-4 minutes with an electric mixer on medium speed. I find taking the time here helps ensure your cookies have that perfect tender texture—plus it’s fun to watch the mixture fluff up.
Step 3: Add Egg Yolks and Vanilla
Add the egg yolks one at a time, mixing well after each addition. Then pour in the vanilla extract and beat until fully incorporated. Using only yolks (instead of whole eggs) is a trick I learned from my favorite cookie recipe; it keeps these cookies soft and slightly chewy, exactly how we want them.
Step 4: Combine Dry and Wet Ingredients
Gradually add the dry ingredients to your wet mixture, mixing on low speed or folding gently with a spatula until just combined. Overmixing can make cookies tough, so once you don’t see flour streaks, stop. At this point, your dough should be rich, dark, and soft.
Step 5: Form and Roll Dough Balls
Heat your oven to 350°F (175°C). Pour 1/4 cup of granulated sugar into a small bowl. Using a cookie scoop or spoon, scoop about 1.5 tablespoons of dough, roll it into a ball, then roll it in the sugar until fully coated. The sugar coating gives these cookies a beautiful sparkle and a slight crunch on the outside, which contrasts nicely with their soft insides.
Step 6: Bake Around Frozen Kisses
Place the sugared dough balls on a parchment-lined baking sheet about 2 inches apart. Press a frozen Candy Cane Hershey Kiss gently into the center of each dough ball—don’t worry if some dough covers the bottom of the Kiss; it melts beautifully into the cookie. Bake for about 10-12 minutes or until the edges just start to firm up. You’ll know they’re ready when the cookie looks set but still soft in the middle.
Step 7: Cool and Enjoy
Let your cookies cool on the sheet for 5 minutes before transferring them to a wire rack. This helps them firm up without losing that tender center. These cookies are best enjoyed the same day, but if you can wait—even better fresh out of the oven with a cold glass of milk!
How to Serve Chocolate Peppermint Kiss Cookies Recipe
Garnishes
When I serve these Chocolate Peppermint Kiss Cookies Recipe, I sometimes sprinkle a bit of crushed peppermint candy or a light dusting of powdered sugar over the top. It adds a festive touch and a little extra crunch that guests seem to love. Keep it simple to let the cookie and peppermint Kiss shine.
Side Dishes
This cookie pairs perfectly with warm beverages—hot cocoa, peppermint tea, or even a glass of cold milk. I’d also recommend serving alongside a small cheese plate or fruit platter if you’re doing a holiday cookie spread; the fresh fruits balance the richness nicely.
Creative Ways to Present
For last year’s Christmas brunch, I arranged the cookies on a platter lined with evergreen sprigs and small ornaments. I also wrapped a few up individually in cellophane tied with red and white twine—perfect as little stocking stuffers. Presentation like this turns a simple cookie into a memorable gift or party favor.
Make Ahead and Storage
Storing Leftovers
I store leftover Chocolate Peppermint Kiss Cookies Recipe in an airtight container at room temperature for up to 3 days. To keep the Kisses from sweating or becoming sticky, I separate layers with parchment paper. This method keeps them fresh and soft without drying out.
Freezing
One of my favorite things is to freeze the dough balls before baking. I place them on a tray, freeze until solid, then store in a freezer-safe bag for up to 2 months. When you’re ready, just bake straight from frozen—add a minute or two to baking time. Freezing dough balls is perfect for last-minute holiday baking!
Reheating
If you have leftovers that’ve lost their fresh-baked warmth, pop a cookie in the microwave for about 10 seconds or warm gently in a 300°F oven for 5 minutes. This little reheating trick revives that soft texture and melty Kiss center beautifully.
FAQs
-
Can I use regular Hershey Kisses instead of Candy Cane flavor?
Absolutely! While the peppermint flavor is what gives this recipe its signature twist, using regular milk chocolate Hershey Kisses works perfectly if you want a more traditional chocolate cookie. The texture and baking process remain the same.
-
Why do I need to freeze the Candy Cane Kisses before baking?
Freezing the Kisses helps them hold their shape during baking so they don’t completely melt into the cookie dough. This ensures you get that lovely, recognizable peppermint center instead of just a blob of chocolate.
-
Can I make these cookies dairy-free?
You can try replacing the butter with a dairy-free margarine or coconut oil, though the texture might be slightly different. Be mindful that the Candy Cane Hershey Kisses contain milk, so for a fully dairy-free treat, you’d need to find a dairy-free peppermint chocolate alternative.
-
How should I store these cookies to keep them fresh?
Store them in an airtight container at room temperature, layering parchment paper between cookies to avoid sticking. They’ll stay fresh for about 3 days, but you can also refrigerate for longer keeping in mind they might harden slightly.
-
Can I freeze the baked cookies?
Yes, you can freeze baked cookies in an airtight container or freezer bag for up to 2 months. Thaw at room temperature before serving for best texture.
Final Thoughts
This Chocolate Peppermint Kiss Cookies Recipe holds a special place in my holiday baking lineup—it’s an easy recipe that always feels festive and indulgent. I love that it combines humble ingredients into something that looks and tastes like it belongs in a bakery window. I hope when you try these, they bring you as much joy and sweet moments with your loved ones as they have for me. Grab those Kisses, roll up your sleeves, and let’s make a batch you’ll want to keep coming back to year after year!
PrintChocolate Peppermint Kiss Cookies Recipe

These Chocolate Peppermint Kiss Cookies are rich, fudgy chocolate cookies rolled in sugar and topped with a festive peppermint Hershey’s Kiss. Perfect for the holiday season, they combine a soft cocoa-flavored cookie with the cool minty burst of a candy cane kiss, creating a delightful treat that’s both visually appealing and delicious.
- Prep Time: 15 minutes
- Cook Time: 8-10 minutes
- Total Time: 25 minutes
- Yield: 34 cookies 1x
- Category: Dessert
- Method: Baking
- Cuisine: American
- Diet: Vegetarian
Ingredients
Dry Ingredients
- 1 1/2 cups (188 g) all-purpose flour, spooned and leveled
- 1/2 cup (40 g) Dutch process cocoa powder
- 1/2 tsp baking powder
- 1/2 tsp baking soda
- 1/2 tsp salt
Wet Ingredients
- 3/4 cup (168 g) unsalted butter, softened
- 3/4 cup (165 g) light brown sugar, packed
- 1/4 cup (50 g) granulated sugar
- 2 egg yolks, at room temperature
- 1 tsp vanilla extract
Toppings
- 34 Candy Cane Hershey Kisses, frozen
- 1/4 cup (50 g) granulated sugar for rolling dough balls
Instructions
- Preheat Oven and Prepare Baking Sheets: Preheat your oven to 350°F (175°C) and line two baking sheets with parchment paper to prevent sticking. This ensures an even baking environment for the cookies.
- Mix Dry Ingredients: In a medium bowl, sift together the all-purpose flour, Dutch process cocoa powder, baking powder, baking soda, and salt. Set aside to combine well and ensure no lumps remain.
- Cream Butter and Sugars: In a large bowl, use an electric mixer to cream the softened unsalted butter with the light brown sugar and granulated sugar until the mixture is light and fluffy, about 2 to 3 minutes. This step introduces air into the dough for a tender texture.
- Add Egg Yolks and Vanilla: Beat in the two room temperature egg yolks one at a time, followed by the vanilla extract, mixing until fully incorporated. This enriches the dough and enhances flavor.
- Combine Wet and Dry Ingredients: Gradually add the dry ingredients to the wet ingredients, mixing on low speed until just combined. Be careful not to overmix to keep the cookies tender.
- Roll Dough in Sugar: Scoop the dough using a tablespoon or cookie scoop and roll each ball in the 1/4 cup granulated sugar until fully coated. This sugar coating adds a slight crunch and sparkle to the cookies’ exterior.
- Arrange on Baking Sheets: Place the sugar-coated dough balls on the prepared baking sheets, spacing them about 2 inches apart to allow for spreading.
- Bake Cookies: Bake in the preheated oven for 8-10 minutes, or until the cookies are set but still soft in the center. Avoid overbaking to maintain a chewy texture.
- Add Hershey Kisses: Immediately after removing the cookies from the oven, press one frozen Candy Cane Hershey Kiss into the center of each cookie. The chocolate will soften and gently melt onto the warm cookie, creating a festive centerpiece.
- Cool and Serve: Allow the cookies to cool on the baking sheets for at least 5 minutes to set before transferring them to wire racks to cool completely. Enjoy once fully cooled.
Notes
- Freezing the Hershey Kisses before placing them on cookies helps them retain their shape and prevents excessive melting.
- For best results, use Dutch process cocoa powder to get a richer, deeper chocolate flavor.
- You can store these cookies in an airtight container at room temperature for up to 5 days.
- If you want softer cookies, slightly underbake them and let them finish setting as they cool.
- Rolling dough balls in granulated sugar adds a nice texture contrast and a bit of sparkle to the finished cookies.
Keywords: chocolate peppermint cookies, Hershey kiss cookies, holiday cookies, peppermint chocolate desserts, festive cookies