Chocolate Mint Pinwheel Cookies Recipe
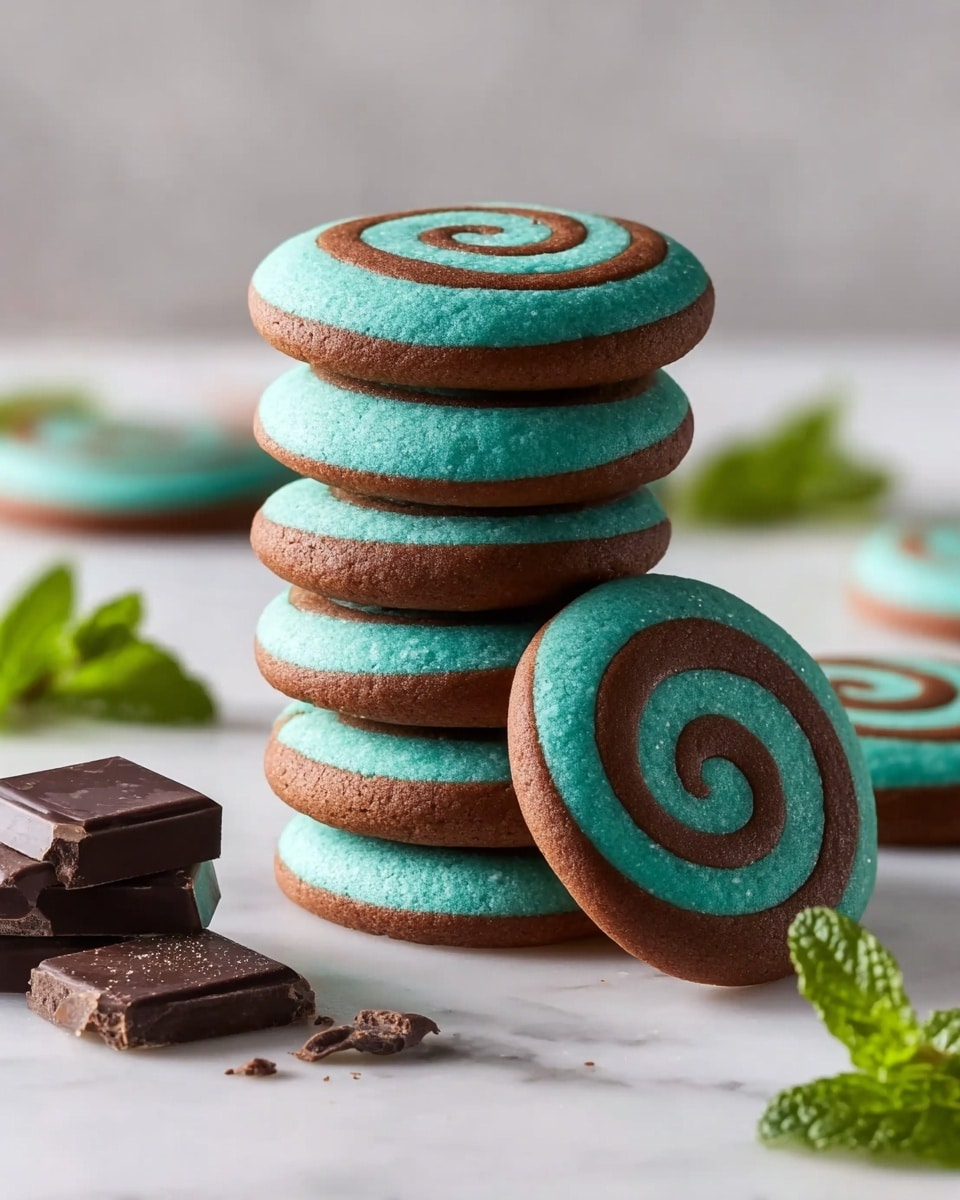
Okay, if you’ve never made Chocolate Mint Pinwheel Cookies before, you’re in for such a treat. These cookies have this mesmerizing swirl of rich chocolate and fresh minty green dough that’s as fun to look at as it is to eat. I love breaking these out during the holidays or anytime I’m craving that perfect combo of cool mint and deep chocolate. They’re surprisingly easy to make but feel super special—like a baker’s little secret weapon when you want to impress without stress.
What makes this Chocolate Mint Pinwheel Cookies Recipe stand out is the texture and flavor harmony. The dough is tender and buttery, with that hint of peppermint that perks up the chocolate without overpowering it. Plus, those vivid green spirals? They make your kitchen smell amazing and your guests go “Wow!” Trust me, once you try this recipe, it’ll become your go-to for cookie swaps, celebrations, or just a cozy night with a cup of tea.
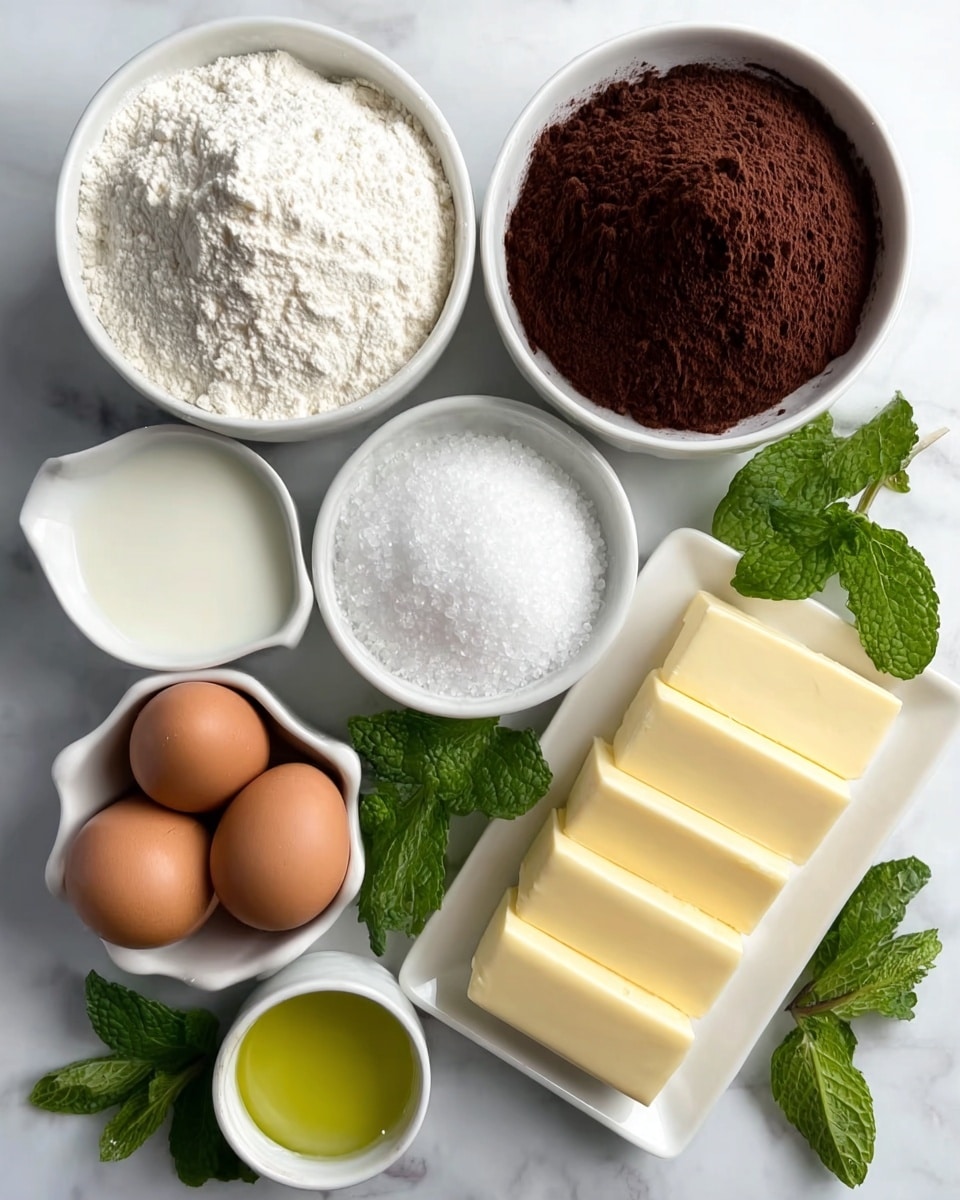
Ingredients You’ll Need
The magic of these cookies comes down to a handful of classic ingredients that blend perfectly. Each one plays a role to create the right texture and that fresh minty flavor. When shopping, try to pick good-quality cocoa powder and pure peppermint extract—you’ll notice the difference!
- All-purpose flour: This is the base; be sure to measure it properly by spooning into the cup and leveling off for the best texture.
- Baking powder: Helps the cookies rise just right, not too much but enough for a tender crumb.
- Fine sea salt: A pinch brings out the chocolate flavor beautifully.
- Unsweetened cocoa powder: Use a good-quality Dutch-processed or natural cocoa for intense chocolate taste.
- Unsalted butter: Soft but cool room temperature so it creams smoothly with the sugar.
- Granulated sugar: Sweetness that balances the cocoa and mint perfectly.
- Large egg: Adds richness and helps bind everything together.
- Peppermint extract: The star of the show—pure, strong peppermint extract gives you that refreshing “mint” without artificial flavors.
- Vanilla extract: Adds warmth and depth to the dough.
- Milk: Just a touch to soften the dough and help it come together.
- Green gel food coloring: I love Americolor Forest or Leaf Green for that perfect bright swirl without affecting consistency.
Variations
I often like to tweak this Chocolate Mint Pinwheel Cookies Recipe depending on the season or my mood. It’s a super flexible base, so don’t be shy to make it your own!
- Mint Chocolate Chip Twist: Try folding in mini chocolate chips to the chocolate side for extra texture. I did this once during a holiday bake-off and everyone couldn’t get enough.
- Dairy-Free Version: Swap the butter for a dairy-free margarine and almond milk in place of regular milk. The texture is slightly different but still delicious, perfect for friends with allergies.
- Stronger Mint Flavor: If you love mint like I do, add an extra ¼ teaspoon of peppermint extract. But go slow—peppermint can be potent!
- Festive Colors: Instead of green food coloring, try red or blue for different holidays or parties. The pinwheel effect is always a wow factor.
How to Make Chocolate Mint Pinwheel Cookies Recipe
Step 1: Mix Your Dry Ingredients
Start by whisking together the all-purpose flour, baking powder, salt, and unsweetened cocoa powder in a medium bowl. This ensures even distribution of the cocoa and leavening, giving each cookie consistent chocolate flavor. I always sift the cocoa with the flour to avoid clumps—trust me, it makes rolling out much easier later on.
Step 2: Cream Butter and Sugar Until Fluffy
Using a stand mixer or hand mixer, beat the unsalted butter and granulated sugar on medium speed until light and fluffy—about 3 to 4 minutes. This step is crucial because the creamed butter traps air that helps your cookies stay tender and slightly airy. Make sure your butter isn’t melted; cool room temp is perfect for smooth creaming.
Step 3: Add Egg and Extracts
Next, add your large egg, peppermint extract, vanilla extract, and milk to the creamed butter and sugar. Mix until combined but don’t overbeat—just enough so the dough stays tender. The peppermint is what gives these cookies their signature fresh zing, so make sure you don’t skip it!
Step 4: Divide and Color the Dough
Now comes the fun part—divide your dough in half. To one half, add your dry chocolate mixture and mix until fully incorporated. For the other half, add your green gel food coloring a little at a time until you get a vibrant mint green. This is the “mint” dough that will contrast beautifully with the rich chocolate.
Step 5: Roll, Stack, and Chill the Dough
Roll each dough half into equal-sized rectangles on parchment paper, about ⅛-inch thick. Carefully place the green dough sheet over the chocolate one, then gently press to stick like a cookie sandwich. Using the parchment paper, roll the stacked dough into a tight log, starting at one edge and rolling all the way through. Wrap in plastic wrap and chill for at least 2 hours or overnight—this chilling step is key for sharp pinwheels that slice cleanly.
Step 6: Slice and Bake
Preheat your oven to 350°F (175°C). Slice the chilled dough log into ¼-inch thick rounds and place them on a parchment-lined baking sheet, spacing them about 2 inches apart—they’ll spread slightly. Bake for 10 to 12 minutes until the edges look set but still soft. Let them cool on the pan for a few minutes before transferring to a wire rack. I always feel like a kid watching the swirls come to life as they bake!
How to Serve Chocolate Mint Pinwheel Cookies Recipe
Garnishes
While these cookies are gorgeous on their own, I like to dust them lightly with powdered sugar for a snowy effect during winter. Sometimes, I also drizzle a bit of melted white chocolate on top for an extra special touch. Simple, elegant, and it elevates the mint-chocolate vibe without too much fuss.
Side Dishes
Pair these cookies with a cold glass of milk or a warm cup of hot chocolate for the ultimate comfort combo. I also love serving them alongside peppermint tea when friends stop by; the flavors complement each other so well without overwhelming the palate.
Creative Ways to Present
For holiday parties, I arrange a pinwheel cookie platter with fresh mint leaves and some bright red cranberries for pops of color. Another favorite is stacking them in a clear jar tied with a festive ribbon—great as edible gifts! The pinwheel swirl just makes these cookies a natural centerpiece wherever you serve them.
Make Ahead and Storage
Storing Leftovers
I store leftover Chocolate Mint Pinwheel Cookies in an airtight container at room temperature, and they stay soft and fresh for about 4-5 days. Sometimes I pop parchment paper between layers to keep them from sticking or smudging the pinwheels. This way, I can enjoy a minty little indulgence whenever the craving hits.
Freezing
If I’m making a big batch, I often freeze the dough log before slicing. Wrapped tightly in plastic and foil, it freezes beautifully for up to 3 months. When you’re ready, just thaw it in the fridge overnight, slice, and bake fresh pinwheel cookies anytime you want.
Reheating
Leftover cookies taste great reheated in a warm oven (about 300°F for 5 minutes) or even a quick zap in the microwave for 10-15 seconds for a soft, just-baked feel. Just don’t overdo it or they’ll dry out. I prefer the oven method because it gives a little crisp edge while keeping the middle soft.
FAQs
-
Can I use peppermint oil instead of peppermint extract in this Chocolate Mint Pinwheel Cookies Recipe?
You can, but peppermint oil is much stronger than extract, so start with a tiny amount (a drop or two) and taste your dough before adding more. Too much oil can make the dough bitter or unpleasantly overpowering. Peppermint extract tends to be safer and easier to control.
-
Why is my pinwheel not keeping its swirl shape?
This usually happens if the dough gets too warm when rolling or slicing. Make sure to chill your dough log well before slicing, and keep your hands cool while working. If the dough gets sticky, pop it back into the fridge for 10-15 minutes. Using parchment paper to help roll also prevents sticking and helps keep the layers intact.
-
Can I make these cookies gluten-free?
Yes! I recommend swapping the all-purpose flour for a gluten-free baking blend designed for cookies. Keep in mind that texture might be a little different—sometimes a bit more crumbly—but the mint-chocolate flavor still shines. Adding a teaspoon of xanthan gum can also help with structure if your blend doesn’t have it.
-
How long will these cookies keep fresh?
Stored properly in an airtight container at room temperature, these cookies stay fresh for about 4 to 5 days. After that, they begin to lose their softness but can still be enjoyed if reheated gently. For longer storage, freezing the dough or baked cookies works really well.
-
Can I add chocolate chips to the chocolate dough in this recipe?
Absolutely! I love adding mini chocolate chips for some melty bursts of chocolate in each bite. Just fold them into the chocolate dough before rolling it out. It’s a fun little twist especially appreciated by chocolate lovers.
Final Thoughts
I really think this Chocolate Mint Pinwheel Cookies Recipe has become one of my favorite go-to treats because of how it merges taste, presentation, and ease effortlessly. Whether it’s a last-minute gift, a cozy snack, or a party showstopper, it never disappoints. Give it a try, and I’m sure you’ll find yourself loving the mint-chocolate swirl as much as I do—plus, it’s a wonderful way to add a little homemade charm to your cookie jar.
PrintChocolate Mint Pinwheel Cookies Recipe

These Chocolate Mint Pinwheel Cookies combine rich cocoa-flavored dough with a vibrant mint-infused green dough, rolled into a delightful swirled pattern. Perfectly soft yet slightly crisp on the edges, these visually striking and delicious cookies bring a refreshing hint of peppermint to your classic chocolate cookie.
- Prep Time: 25 minutes
- Cook Time: 12 minutes
- Total Time: 2 hours 37 minutes
- Yield: About 24 cookies 1x
- Category: Dessert
- Method: Baking
- Cuisine: American
Ingredients
Dry Ingredients
- 2 1/4 cups (286 grams) all-purpose flour
- 1/2 teaspoon baking powder
- 1/4 teaspoon fine sea salt
- 3 tablespoons (16 grams) unsweetened cocoa powder
Wet Ingredients
- 2 sticks (226 grams) unsalted butter, at cool room temperature
- 3/4 cup (150 grams) granulated sugar
- 1 large egg, at cool room temperature
- 1 teaspoon peppermint extract
- 1/2 teaspoon vanilla extract
- 1 tablespoon milk
Other
- ¼–½ teaspoon green gel food coloring (preferably Americolor Forest Green or Leaf Green)
Instructions
- Prepare Dry Ingredients: In a medium bowl, whisk together the all-purpose flour, baking powder, sea salt, and unsweetened cocoa powder until well combined. Set aside for use in forming the doughs.
- Cream Butter and Sugar: In a large mixing bowl, beat the cool room temperature unsalted butter with granulated sugar until light and fluffy, about 3 to 5 minutes using an electric mixer on medium speed.
- Add Wet Ingredients: Beat in the egg, peppermint extract, vanilla extract, and milk until smooth and fully incorporated into the butter-sugar mixture.
- Make Chocolate Dough: Gradually add half of the dry ingredient mixture that contains cocoa powder into the wet ingredients, mixing just until combined to form the chocolate dough. Avoid over-mixing.
- Make Green Mint Dough: In a separate bowl, mix the remaining half of the dry ingredients (excluding cocoa powder), then add the green gel food coloring. Combine with a portion of the wet ingredients to create a green mint dough. Add additional peppermint extract if desired for stronger mint flavor.
- Shape Doughs: Roll the chocolate dough and the green mint dough each into rectangles of similar size on parchment paper. Carefully layer the green mint dough on top of the chocolate dough, then gently roll them together into a tight log, forming the pinwheel shape.
- Chill the Log: Wrap the rolled dough log tightly in plastic wrap and refrigerate for at least 2 hours or until firm enough to slice cleanly.
- Preheat Oven: Preheat your oven to 350°F (175°C) and line a baking sheet with parchment paper.
- Slice Cookies: Remove the chilled dough log from the refrigerator and slice into 1/4 to 1/2 inch thick rounds using a sharp knife.
- Bake Cookies: Place the sliced pinwheel cookies on the prepared baking sheet about 2 inches apart. Bake for 10 to 12 minutes or until edges are set but centers remain soft.
- Cool: Let cookies cool on the baking sheet for 5 minutes before transferring to a wire rack to cool completely.
Notes
- Use cool room temperature butter and egg to ensure a smooth dough.
- Chilling the dough log is essential to achieve clean pinwheel slices and prevent spreading during baking.
- Adjust the amount of green gel food coloring to your preferred shade of mint green.
- For an extra peppermint kick, add an additional 1/4 teaspoon of peppermint extract to the green dough.
- Store cookies in an airtight container at room temperature for up to one week.
Keywords: Chocolate mint pinwheel cookies, peppermint cookies, holiday cookies, swirled cookies, chocolate cookies, green cookies