Chocolate and Sea Salt Nut Bars Recipe
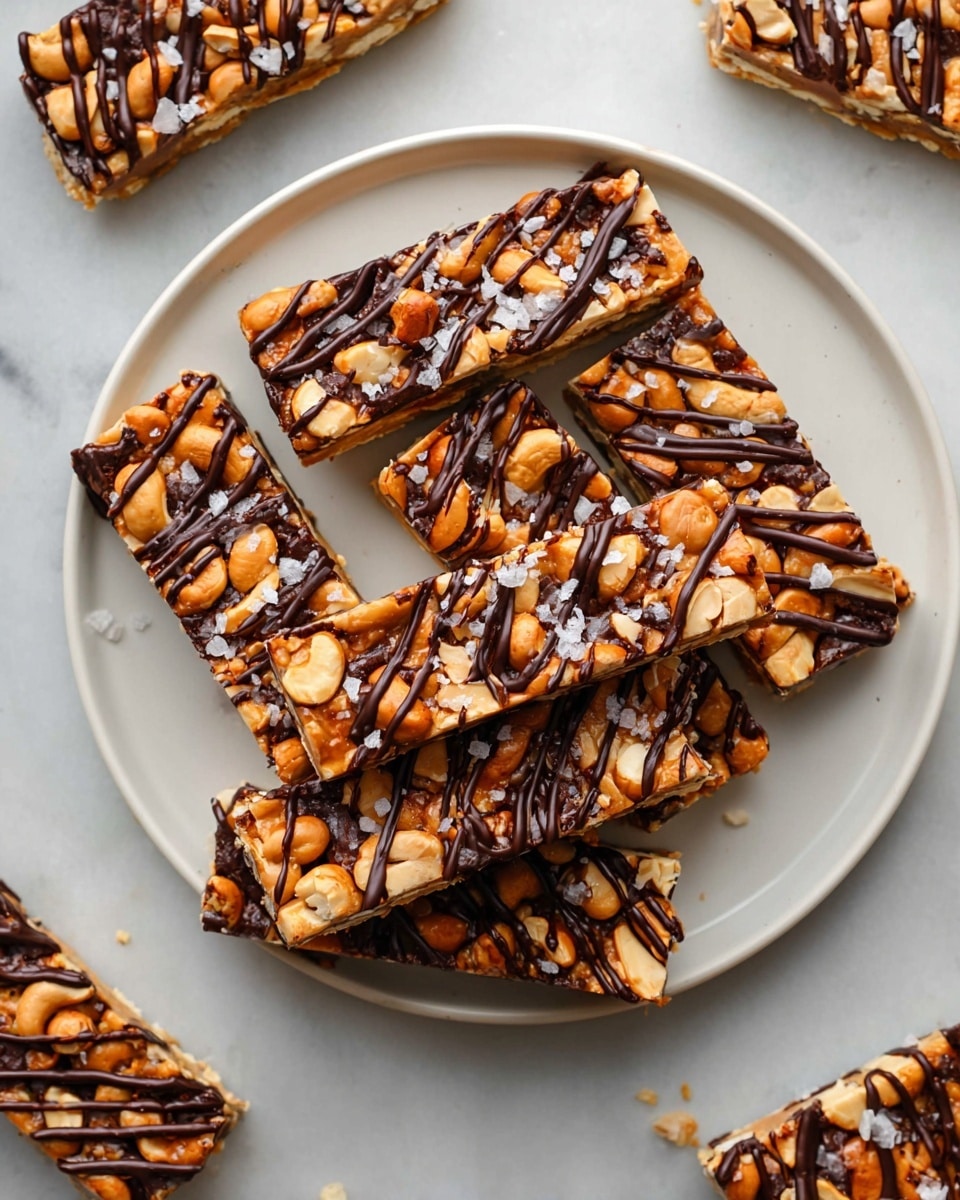
If you’re anything like me, you’re always on the lookout for a snack that feels indulgent yet still somewhat wholesome. This Chocolate and Sea Salt Nut Bars Recipe fits that bill perfectly! I love how these bars deliver the perfect crunch from a mix of nuts and puffed rice, paired with the bittersweet richness of dark chocolate and that just-right hint of sea salt. It’s one of those snacks that feels like a treat but also powers me through a busy afternoon.
These bars are so versatile – they’re perfect for a quick breakfast on the go, a satisfying midday pick-me-up, or even a little dessert after dinner. Whenever I make a batch, they disappear fast. What makes this Chocolate and Sea Salt Nut Bars Recipe stand out to me is the balance of texture and flavor you get, plus the simplicity of the ingredients. You’ll find yourself coming back to this recipe again and again once you try it!
Ingredients You’ll Need
All the ingredients in this Chocolate and Sea Salt Nut Bars Recipe come together to create a harmonious taste experience – the nuts add natural crunch and richness, while the brown rice syrup binds everything with just the right amount of chewiness. A quick tip: use fresh nuts and good quality dark chocolate to really elevate your bars.
- Unsalted nuts of choice: I like the combo of cashews, peanuts, and almonds for variety in flavor and texture, but swap in your favorites!
- Puffed rice: This adds a light, crispy contrast that keeps the bars from feeling too dense.
- Brown rice syrup: It’s a sticky, mild sweetener that holds everything together without overpowering the flavors.
- Vanilla extract: Just a touch boosts the overall flavor profile beautifully.
- Sea salt: This enhances all the flavors and complements the chocolate perfectly.
- Dark chocolate chips: Opt for at least 60% cocoa for that bittersweet kick.
- Coconut oil: It helps the chocolate melt smoothly and adds a subtle tropical note.
- Optional flaky salt for topping: A finishing sprinkle adds a crunchy pop and a sophisticated touch.
Variations
One of my favorite things about the Chocolate and Sea Salt Nut Bars Recipe is how easy it is to tweak according to your tastes or dietary needs. Feel free to get creative with your nut choices or swap ingredients to suit what you have on hand.
- Nut-free version: I once made these with seeds like pumpkin and sunflower instead of nuts for a nut allergy-friendly snack, and honestly, it was delicious!
- Sweetener swap: You can use honey or maple syrup instead of brown rice syrup; just keep an eye on the consistency.
- Add dried fruit: A handful of dried cranberries or cherries gives a nice tart burst that pairs well with the chocolate.
- Spiced up: Sprinkle in some cinnamon or a pinch of cayenne if you like a little warmth and complexity.
How to Make Chocolate and Sea Salt Nut Bars Recipe
Step 1: Toast the Nuts and Puffed Rice
Start by lightly toasting your nuts and puffed rice in a dry skillet over medium heat for about 5-7 minutes. Keep stirring to avoid burning and watch for a fresh, toasty aroma. Toasting intensifies the flavors and adds extra crunch, which is super important for these bars. After toasting, transfer them to a bowl to cool while you prepare the binding ingredients.
Step 2: Make the Syrup Mixture
In a small saucepan, gently warm the brown rice syrup, vanilla extract, and sea salt over low heat, stirring until well combined. This warms the syrup just enough to make it easier to mix later but don’t let it boil. Once it’s smooth and melded, remove from heat and let it cool for a minute or two.
Step 3: Combine and Press
Toss the toasted nuts and puffed rice into the syrup mixture and stir until everything is coated evenly. Transfer this sticky mixture into a lined or greased pan, pressing firmly with the back of a spatula or your hands (I use parchment paper to press down because it keeps things neat and easy). The firmer you press, the better the bars hold together, so don’t be shy here!
Step 4: Melt the Chocolate Topping
In a microwave-safe bowl, combine the dark chocolate chips and coconut oil. Microwave in 20-second bursts, stirring in between, until the chocolate is completely melted and silky. Pour the melted chocolate evenly over the pressed nut mixture, using a spatula to smooth it out. If you love that extra salty crunch like I do, sprinkle flaky salt on top now.
Step 5: Chill and Slice
Pop the pan in the fridge for at least 2 hours to let everything set firmly. Once chilled, lift the whole block out and slice into bars or squares. I usually find a sharp knife warmed under hot water makes cleaner cuts. And just like that, your Chocolate and Sea Salt Nut Bars are ready to enjoy!
How to Serve Chocolate and Sea Salt Nut Bars Recipe
Garnishes
I love a light sprinkle of flaky sea salt on top right before serving—it enhances the chocolate and adds a little sparkle. Sometimes I add a few cacao nibs or shredded coconut for extra texture and flavor, especially when sharing with friends who appreciate those little touches.
Side Dishes
These bars do a great job standing alone, but I like pairing them with a cup of strong coffee or a chai latte for a cozy snack experience. If you want to make it more of a meal, a bowl of Greek yogurt topped with fresh berries complements the nut bars beautifully.
Creative Ways to Present
For special occasions, I’ve presented these bars on a wooden serving board with a scattering of mini chocolate chips and whole nuts decoratively placed around. Wrapping individual bars in parchment and tying them with twine makes a lovely homemade gift, too. It turns this simple recipe into a charming treat anyone will appreciate.
Make Ahead and Storage
Storing Leftovers
I store leftovers in an airtight container in the fridge to keep them fresh and to maintain that perfect chewy-crunchy texture. They usually last about a week this way. Just make sure to bring them to room temperature for a few minutes before eating for the best flavor.
Freezing
I’ve frozen these bars successfully wrapped individually in plastic wrap and placed in a freezer bag. When you want a quick snack, thaw them at room temperature for about 30 minutes—they hold up great without losing their texture.
Reheating
These bars don’t need reheating, but if you prefer them a little softer, a few seconds in the microwave (about 10-15 seconds) work wonders. Just watch closely so the chocolate doesn’t get too melty or greasy.
FAQs
-
Can I make this Chocolate and Sea Salt Nut Bars Recipe vegan?
Yes! This recipe is naturally vegan as long as you use vegan-friendly dark chocolate and ensure your brown rice syrup is not processed with animal products. Just double-check your chocolate label to be certain.
-
What if I don’t have brown rice syrup?
No worries—maple syrup or agave nectar make good substitutes. The texture might vary slightly, so if it’s too runny, add a bit more puffed rice or nuts to balance it out.
-
How long do these bars keep fresh?
Stored in an airtight container in the fridge, they stay fresh for up to a week. You can extend their life by freezing them for up to 3 months.
-
Can I use other types of nuts or add dried fruit?
Absolutely! This recipe is very forgiving. I recommend experimenting with your favorite nuts or tossing in dried fruit for extra flavor and texture.
-
Why is sea salt important in this recipe?
Sea salt enhances the rich chocolate flavor and balances the sweetness, leaving you with that perfect sweet-salty snack everyone craves.
Final Thoughts
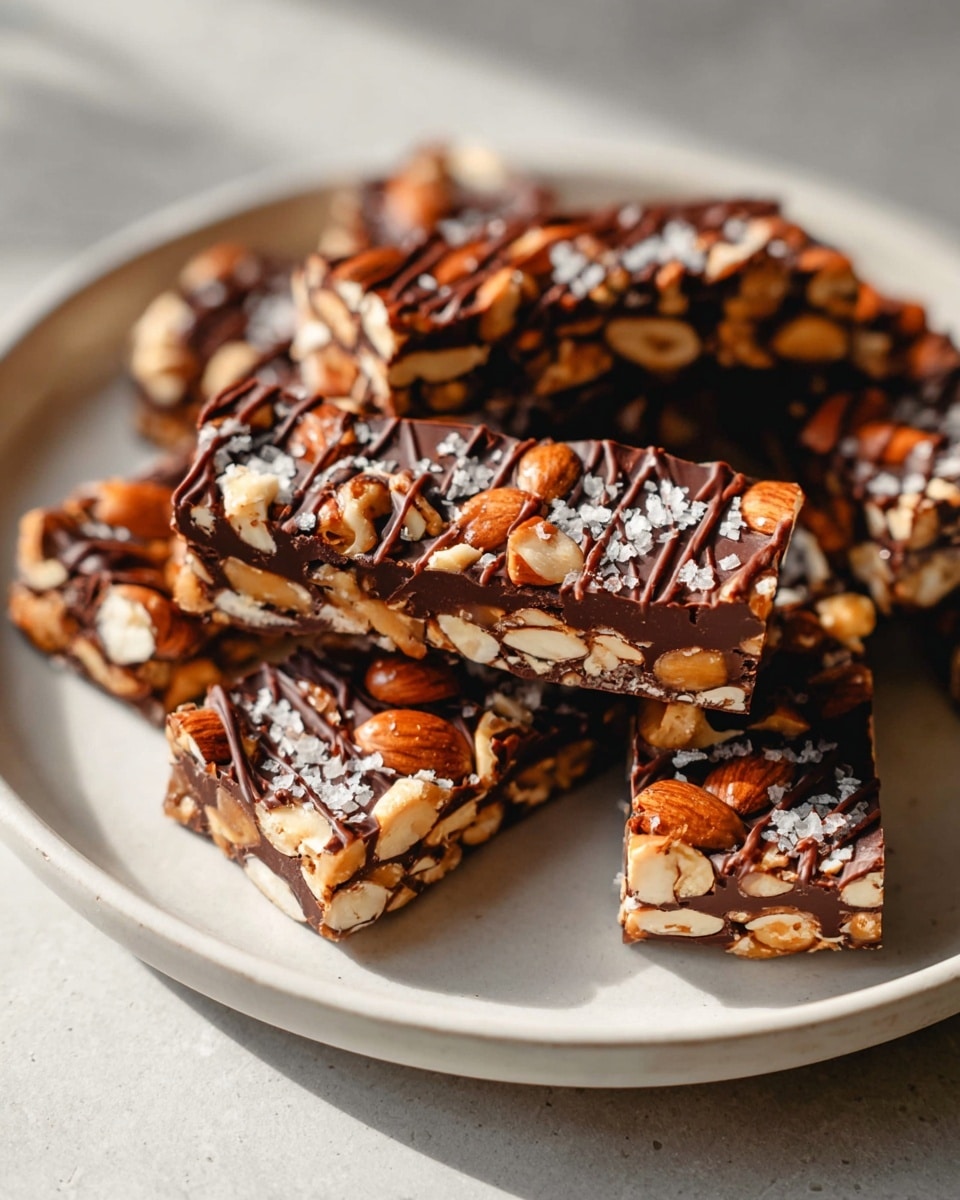
This Chocolate and Sea Salt Nut Bars Recipe is one of those gems I keep coming back to whenever I want a snack that feels special without a ton of fuss. It’s so satisfying to bite into the crunchy nuts and puffed rice, with that luscious chocolate and pinch of salt finishing it off perfectly. I hope you enjoy making (and eating) these as much as I do—they’re a real crowd-pleaser and perfect for sharing or just savoring solo with your favorite drink.
PrintChocolate and Sea Salt Nut Bars Recipe
These Chocolate and Sea Salt Nut Bars are a deliciously crunchy and sweet snack made with a blend of unsalted nuts, puffed rice, and a touch of brown rice syrup. Coated with rich dark chocolate and a hint of sea salt, they provide the perfect balance of salty and sweet flavors. Easy to prepare and great for on-the-go snacking or a wholesome treat.
- Prep Time: 15 minutes
- Cook Time: 10 minutes
- Total Time: 2 hours 25 minutes
- Yield: 12 bars 1x
- Category: Snack
- Method: No-Cook
- Cuisine: American
- Diet: Gluten Free
Ingredients
Nuts and Base
- ¾ cup cashews
- ¾ cup peanuts
- 1 cup almonds
- ½ cup puffed rice
Sweeteners and Flavorings
- ¼ cup brown rice syrup
- 1 ½ teaspoon vanilla extract
- ½ teaspoon sea salt
Chocolate Coating
- 1 cup dark chocolate chips
- 2 teaspoons coconut oil
Optional Topping
- Flaky salt
Instructions
- Prepare the nut mixture: In a large mixing bowl, combine the cashews, peanuts, almonds, and puffed rice. Stir well to evenly distribute all ingredients.
- Add syrup and flavorings: Warm the brown rice syrup slightly if needed and pour it over the nut and rice mixture. Add the vanilla extract and sea salt. Use a spatula or wooden spoon to mix everything together until the nuts and puffed rice are evenly coated and sticky.
- Press into a pan: Line a square or rectangular baking pan with parchment paper. Transfer the mixture into the pan and use a spatula or the back of a spoon to press it down firmly and evenly. This will help the bars hold their shape once set.
- Melt the chocolate coating: In a small microwave-safe bowl or a double boiler, gently melt the dark chocolate chips with the coconut oil. Stir often until the chocolate is smooth and completely melted.
- Coat the bars: Pour the melted chocolate over the pressed nut mixture and spread it evenly with a spatula to cover the entire surface.
- Add optional flaky salt: Sprinkle flaky salt on top of the chocolate layer while still wet for an added salty crunch and enhanced flavor contrast.
- Chill to set: Place the pan in the refrigerator for at least 1 to 2 hours or until the chocolate has fully hardened and the bars are firm enough to cut.
- Cut into bars: Remove from the fridge and lift the nut and chocolate slab out using the parchment paper edges. Use a sharp knife to cut into bars or squares of desired size.
- Serve and store: Enjoy the bars immediately or store them in an airtight container in the refrigerator for up to 2 weeks for freshness.
Notes
- You can substitute any nuts of your choice or that you have on hand.
- Brown rice syrup is used here as a natural binding sweetener, but you can substitute with honey or maple syrup if preferred.
- Make sure to firmly press the nut mixture into the pan to help the bars hold together when sliced.
- These bars are best stored refrigerated to prevent the chocolate from melting and to keep them firm.
- Optional flaky salt on top enhances the flavor by balancing the sweetness and adding crunch.
Keywords: Chocolate nut bars, sea salt bars, no-bake nut bars, dark chocolate snack, gluten free nut bars, healthy snack bars