Carmelitas Recipe
Let me tell you, this Carmelitas Recipe has become my go-to treat whenever I need that perfect balance of chewy oats, rich chocolate, and gooey caramel. It’s one of those recipes that’s deceptively simple but delivers serious wow-factor, whether you’re making it for a potluck, a weekend family bake, or just that sweet craving that hits in the mid-afternoon. The way the caramel melts into the layers creates this irresistible texture that feels both indulgent and comforting at the same time.
What I love most about this Carmelitas Recipe is how versatile it is and how effortlessly it brings people together. It’s the kind of dessert that sparks conversation because everyone just wants to know your secret. Plus, you’ll find the ingredients are pretty straightforward, so you won’t have to make a special trip to some fancy store. Trust me, once you try this, you’ll be making it on repeat like I do!
Ingredients You’ll Need
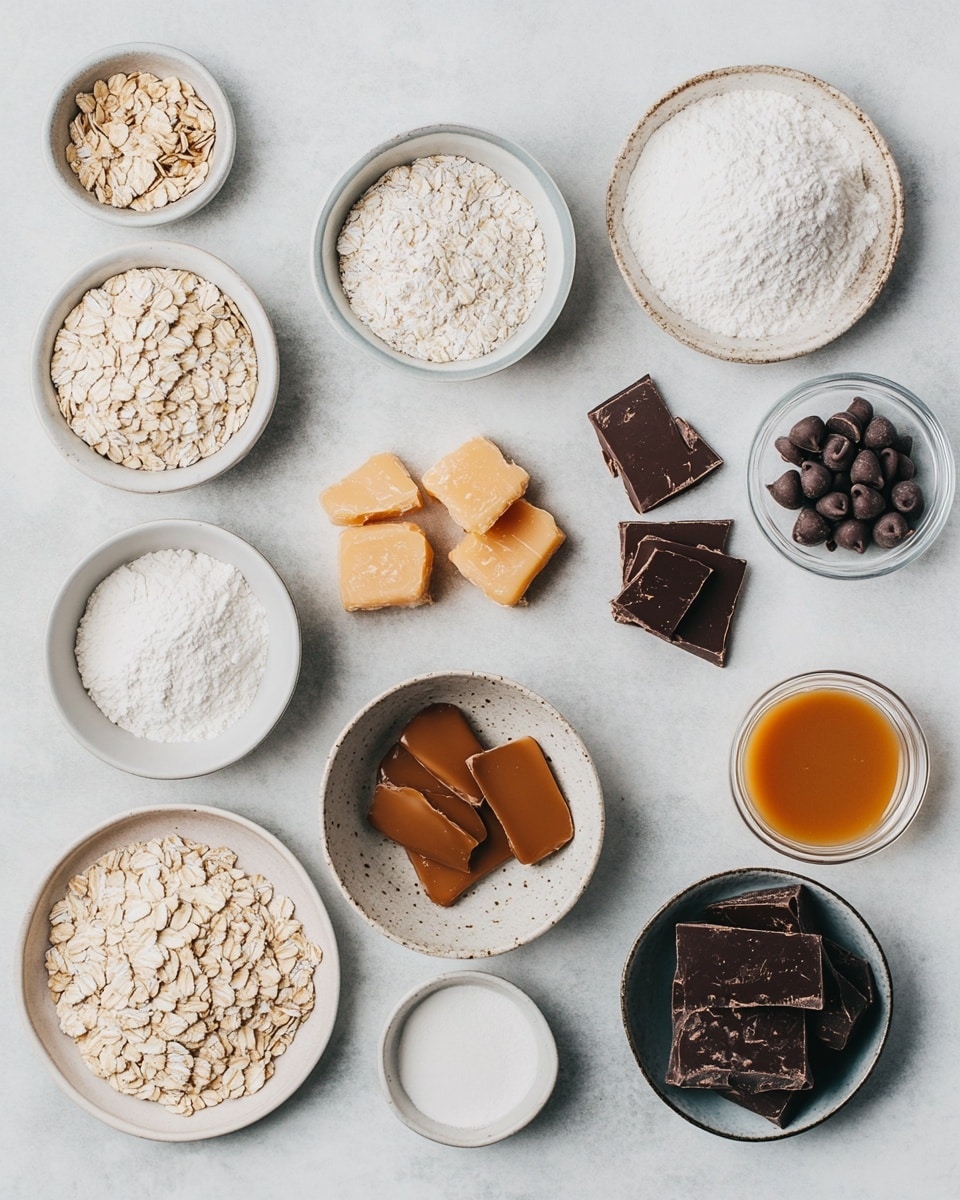
The ingredients in this Carmelitas Recipe come together beautifully to give you that perfect chewy cookie base topped with silky chocolate and gooey caramel. Each component plays a crucial role — the oats for texture, the brown sugar for that depth of sweet molasses flavor, and the butter giving everything a rich, tender finish.
- All purpose flour: This forms the sturdy but tender base, so make sure to measure accurately for the right texture.
- Old fashioned oats: I use rolled oats for a chewy bite, which is a big part of what makes Carmelitas so uniquely delightful.
- Salted butter: Melted butter adds richness and helps bind the oat mixture together, giving it that almost brownie-like feel.
- Light brown sugar: The moisture and hint of molasses here really make the cookie base shine.
- Pure vanilla extract: Don’t skip this — vanilla ties all the flavors together and enhances the caramel and chocolate tones.
- Baking soda: Gives a slight lift, keeping the cookie base from being too dense.
- Kosher salt: Just a pinch to balance the sweetness and amplify flavors.
- Milk chocolate chips: These melt beautifully into a glossy chocolate layer that complements that buttery oat base.
- Individually wrapped caramels: The star of the show — they melt into a luscious caramel layer that pulls everything together.
- Heavy cream: A little magic here helps melt the caramels smoothly and keeps the caramel layer silky and luscious.
Variations
One of the reasons I’m so fond of this Carmelitas Recipe is how easy it is to make it your own. Whether you want to swap the chocolate, add nuts, or transform it into a gluten-free treat, there’s room to experiment and tailor it to your taste buds or dietary needs.
- Nutty Carmelitas: I like to toss in chopped pecans or walnuts sometimes for an extra crunch—perfect if you love a bit of texture.
- Dark chocolate version: Swapping milk chocolate chips for dark chocolate adds depth and a slight bitterness, which balances the sweetness wonderfully.
- Gluten-free option: Try using a gluten-free all-purpose flour blend and certified gluten-free oats. It works surprisingly well without losing that chewy texture.
- Salted caramel twist: Sprinkling flaky sea salt on top after baking enhances the caramel’s flavor and gives you that fancy bakery feel at home.
- Vegan adaptation: You can substitute vegan butter and use dairy-free chocolate chips along with coconut cream instead of heavy cream to make these plant-based.
How to Make Carmelitas Recipe
Step 1: Prepare the Cookie Base
Start by preheating your oven to 350°F (175°C) and lining a 9×13-inch baking pan with parchment paper, leaving a bit hanging off the sides to help you lift the Carmelitas out later. In a large bowl, mix the melted butter with the brown sugar and vanilla until smooth and combined. Then, add the flour, oats, baking soda, and salt, stirring until the mixture looks like coarse crumbs but sticks together when pressed. Press half of this mixture evenly into the pan—don’t forget to give it a good, firm press so it holds its shape during baking.
Step 2: Bake the Bottom Layer
Bake the pressed cookie base for around 12 minutes. You want the edges to get golden but the center should still be slightly soft — this helps the layers bond perfectly and prevents any crumbling later. Let it cool just a bit while you prepare the caramel and chocolate layers.
Step 3: Melt the Caramel Layer
Unwrap the caramels and place them in a small saucepan with the heavy cream over low heat. Stir gently and patiently until the caramel melts into a smooth, creamy sauce. Avoid high heat so it doesn’t burn or become grainy. Once smooth, pour this luscious caramel evenly over the baked base and spread it almost to the edges.
Step 4: Add the Chocolate Topping
Immediately sprinkle the milk chocolate chips evenly over the warm caramel layer. Give it a minute, then gently spread the melting chocolate with a spatula to cover the caramel. This creates a beautiful, glossy chocolate top. You can pop it back in the oven for just 2-3 minutes if you want the chocolate to melt a bit more, but be careful not to overdo it.
Step 5: Cool and Slice
Let the Carmelitas cool completely at room temperature, then transfer to the fridge for at least an hour to firm up beautifully. This step is key — it helps the layers set so when you slice, you get those neat, clean bars instead of a sticky mess. Use the parchment to lift the entire slab from the pan and cut into squares or rectangles. Enjoy the magic you’ve just created!
How to Serve Carmelitas Recipe
Garnishes
I personally love adding a sprinkle of flaky sea salt on top just before serving — it perfectly offsets the sweetness and adds a touch of sophistication. Sometimes, I’ll dust them lightly with powdered sugar for a pretty presentation if it’s a special occasion. Fresh berries alongside also bring a lovely tartness that contrasts nicely with the rich layers.
Side Dishes
Carmelitas are a treat on their own, but I like pairing them with a cup of strong coffee or a creamy latte when enjoying as an afternoon snack. For a dessert spread, they go wonderfully with vanilla ice cream or simple whipped cream to add a light, airy balance. Fresh fruit or even a small bowl of mixed nuts can complement the texture and flavor perfectly.
Creative Ways to Present
For gatherings, I like to cut the Carmelitas into bite-size squares and arrange them on a rustic wooden board with drizzles of caramel sauce and extra chocolate chips for dipping. Sometimes, I double-layer the bars in a pretty jar with parchment between layers for gifting—that personal touch always gets rave reviews. For a party, topping each square with a tiny dollop of whipped cream and a sprinkle of sea salt makes them feel extra special.
Make Ahead and Storage
Storing Leftovers
I store my leftover Carmelitas in an airtight container layered between parchment paper to prevent sticking. They keep well at room temperature for up to 3 days but I prefer refrigerating them because it helps maintain that perfect chewy texture and prevents the caramel from getting too sticky in warm conditions.
Freezing
Freezing Carmelitas works like a charm if you want to prepare batches in advance. I wrap individual bars tightly in plastic wrap, then store them in a freezer-safe container. When you’re ready to indulge, just thaw them in the fridge overnight. I’ve found this method preserves the layers and texture really well, so they taste fresh even weeks later.
Reheating
When I reheat leftovers, I like to warm them gently in the microwave for about 15-20 seconds to bring back that soft, melty feel without making the chocolate too runny. You can also pop them in a low-heat oven (around 300°F) wrapped in foil for 5-7 minutes if you prefer a slightly toasted edge that adds a nice contrast.
FAQs
-
Can I use dark chocolate instead of milk chocolate chips in the Carmelitas Recipe?
Absolutely! Dark chocolate adds a rich, slightly bitter contrast to the sweet caramel and oat base. Just swap the same amount of milk chocolate chips for your favorite dark chocolate ones, and you’ll get a deeper chocolate flavor that many people love.
-
How do I prevent the caramel layer from getting too hard or sticky?
Using heavy cream with the caramel helps keep it smooth and creamy. Also, make sure to let the bars cool completely before slicing or storing. Refrigerating after cooling helps the caramel set just right without becoming rock hard or too sticky.
-
Can I make the Carmelitas Recipe vegan?
You can! Substitute vegan butter for regular butter, use dairy-free chocolate chips, and replace heavy cream with coconut cream or another plant-based alternative. Just be sure the caramels you use are vegan-friendly or make your own vegan caramel topping.
-
Is it necessary to bake the oat base before adding the caramel?
Yes, pre-baking the oat base helps it firm up and creates a sturdy foundation so the caramel and chocolate layers don’t sink or make the bars too gooey. It also enhances the nutty flavor of the oats and gives a nice texture contrast.
-
How long will Carmelitas keep fresh?
Stored in an airtight container in the fridge, Carmelitas typically last up to 5 days while still maintaining their chewy texture and fresh flavor. You can extend their shelf life by freezing as mentioned earlier.
Final Thoughts
This Carmelitas Recipe holds a special place in my baking repertoire because it’s one of those desserts that brings so much joy with such simple ingredients. It’s warm, comforting, and indulgent—perfect for sharing or treating yourself after a long day. I really hope you give it a go and enjoy making these chewy, caramel-chocolate bars as much as I do. Once you nail the balance of layers, you’ll have a crowd-pleaser on hand whenever you want. Happy baking, friend!
PrintCarmelitas Recipe

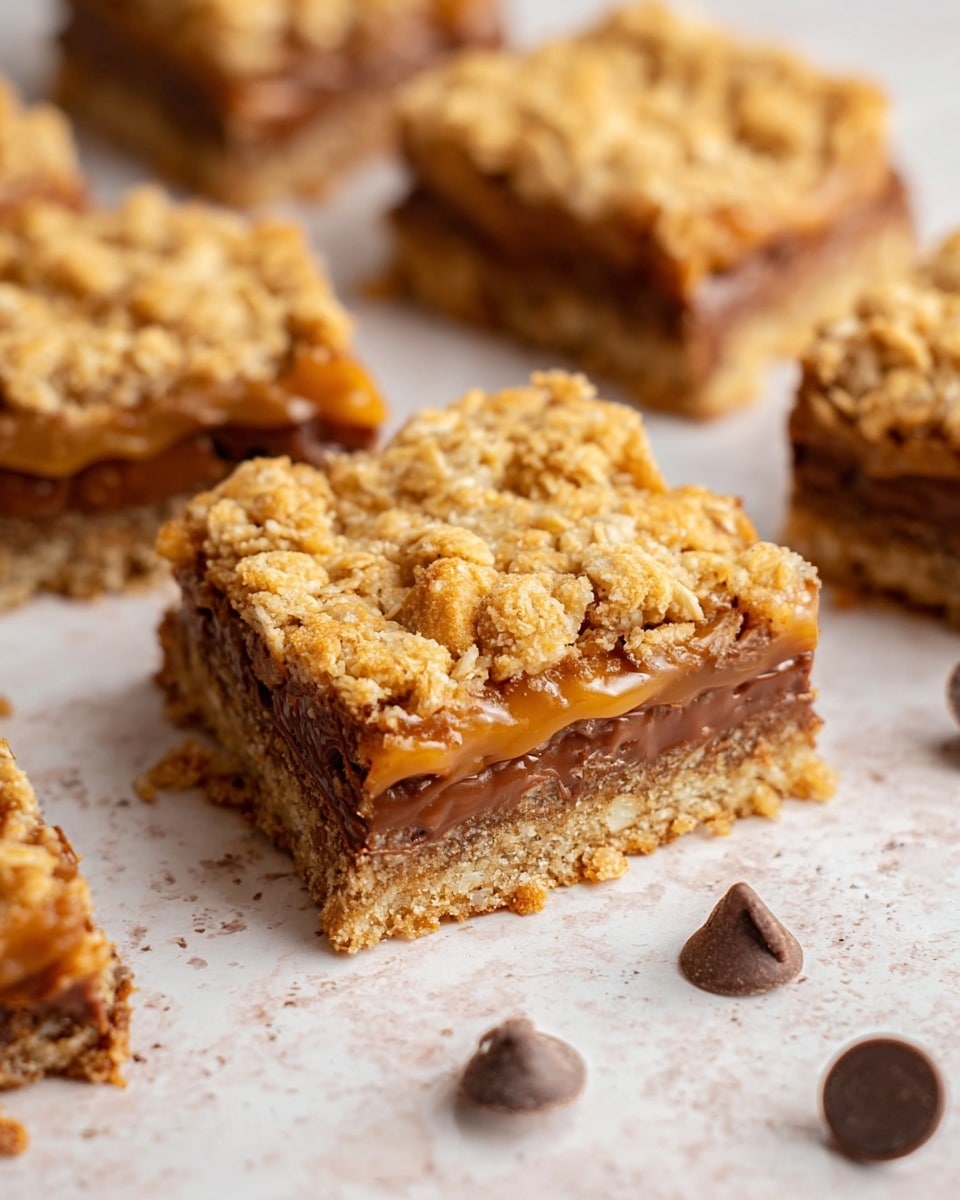
This Carmelitas recipe features a buttery oat and flour cookie base topped with a decadent layer of milk chocolate and gooey caramel, creating a perfect blend of textures and flavors in every bite. Ideal for dessert lovers craving a delightful homemade treat with rich caramel and chocolate layers.
- Prep Time: 15 minutes
- Cook Time: 30 minutes
- Total Time: 45 minutes
- Yield: 24 squares 1x
- Category: Dessert
- Method: Baking
- Cuisine: American
Ingredients
Cookie Base
- 1½ cups all purpose flour
- 1½ cups old fashioned oats
- 1 cup salted butter, melted
- ¾ cup light brown sugar, tightly packed
- 2 teaspoons pure vanilla extract
- 1 teaspoon baking soda
- ½ teaspoon kosher salt
Chocolate and Caramel Layer
- 1½ cups milk chocolate chips
- 11 ounces individually wrapped caramels, unwrapped
- ½ cup heavy cream
Instructions
- Prepare the Oven and Pan: Preheat your oven to 350°F (175°C). Line a 9×13-inch baking pan with parchment paper, leaving some overhang on the sides for easy removal later.
- Make the Cookie Base: In a large mixing bowl, combine the all purpose flour, old fashioned oats, light brown sugar, baking soda, and kosher salt. Stir in the melted salted butter and pure vanilla extract until the mixture is evenly combined and crumbly.
- Form the Base Layer: Press about two-thirds of the oat-flour mixture firmly and evenly into the bottom of the prepared baking pan to create the cookie base layer.
- Add Chocolate Chips: Sprinkle the milk chocolate chips evenly over the pressed base layer in the baking pan.
- Prepare Caramel Layer: In a small saucepan over low heat, combine the unwrapped caramels with the heavy cream. Stir continuously until the caramels melt fully and the mixture is smooth and creamy.
- Pour Caramel over Chocolate: Pour the warm caramel mixture evenly over the layer of chocolate chips, spreading gently if needed to cover completely.
- Add Remaining Crumb Mixture: Sprinkle the remaining oat-flour mixture evenly over the caramel layer, pressing down lightly to adhere but keeping some crumbly texture.
- Bake: Place the pan in the preheated oven and bake for 25-30 minutes, or until the top is golden brown and the caramel is bubbling slightly around the edges.
- Cool and Set: Remove the Carmelitas from the oven and allow to cool completely in the pan. Once cooled, use the parchment paper overhang to lift the bars out of the pan, place on a cutting board, and cut into squares.
Notes
- Ensure caramel is melted slowly over low heat to avoid burning or graininess.
- Press the base layer tightly for better structural integrity.
- Use parchment paper to easily remove the Carmelitas from the pan without breaking.
- Store in an airtight container at room temperature for up to 3 days, or refrigerate for longer freshness.
Keywords: Carmelitas, caramel bars, oat cookie bars, chocolate caramel dessert, homemade dessert bars