Brazilian Chicken Croquettes (Coxinha) Recipe

Let me tell you, diving into this Brazilian Chicken Croquettes (Coxinha) Recipe is like taking a little trip straight to the heart of Brazil’s street food scene, right from your own kitchen. These croquettes are crispy on the outside with a creamy, savory chicken filling inside that just melts in your mouth. Anytime I make them, I’m reminded how they’re perfect for parties, snack times, or even an indulgent family dinner — there’s something about them that just brings people together.
What I love most is how achievable this recipe is for any home cook. You don’t need a fancy pantry, and the ingredients work in harmony to create that signature coxinha texture — a soft dough wrapped around tasty, cheesy chicken. Once you see how simple the method is, you’ll understand why this Brazilian Chicken Croquettes (Coxinha) Recipe is worth bookmarking for weekend cooking or whenever you want to impress with minimal fuss.
Ingredients You’ll Need
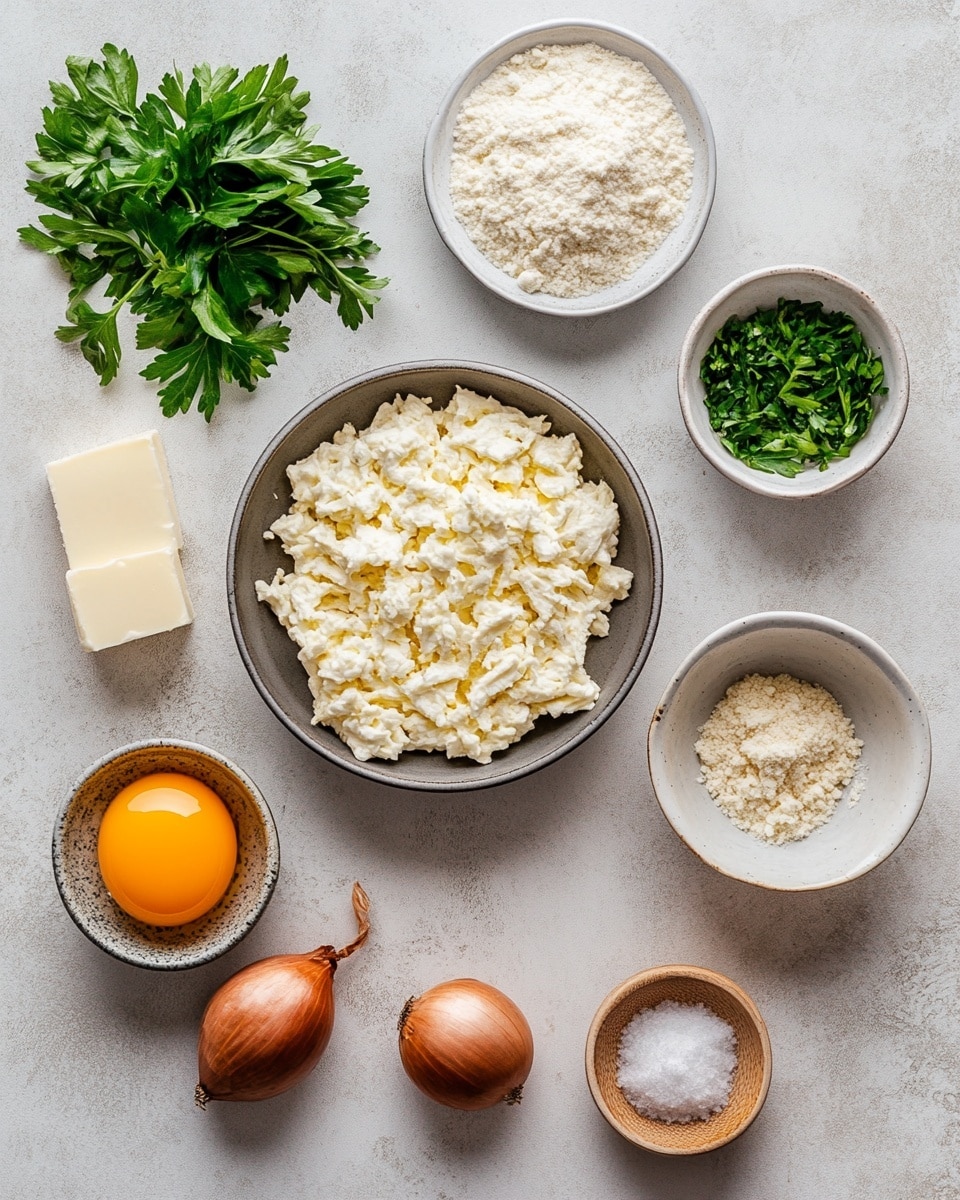
Each ingredient in this Brazilian Chicken Croquettes (Coxinha) Recipe plays a pivotal role — from the tender shredded chicken to the creamy cheese and the soft dough that crisps up beautifully fried. When you shop, aim for fresh herbs and good quality chicken to get the best flavors.
- Olive oil: Ideal for sautéing garlic and onion, bringing out their natural sweetness without overpowering the chicken.
- Garlic: Fresh cloves add that essential aromatic kick; avoid powdered for true authenticity.
- White onion: Diced finely to melt smoothly into the filling for subtle sweetness.
- Cooked, shredded chicken: Use leftovers or rotisserie chicken to save time and boost flavor.
- Paprika or cayenne pepper: Adds just the right amount of warmth — adjust to your heat preference.
- Salt: Key for balancing flavors, so season carefully.
- Cream cheese: Makes the filling luxuriously creamy; full-fat works best here.
- Fresh parsley: Adds brightness and a pop of color that livens up the rich filling.
- Unsalted butter: Helps create a silky dough base and keeps flavors mellow.
- Whole milk: Essential for the dough’s soft texture; skim won’t give the same result.
- Chicken broth: Contributes a rich, savory depth to the dough.
- All-purpose flour: Forms the sturdy dough that wraps the filling snugly.
- Egg: For dredging, giving the croquettes a golden, crunchy exterior.
- Panko breadcrumbs: The secret to that irresistibly crispy crust — regular breadcrumbs just won’t do.
- Oil for frying: Choose a neutral oil with a high smoke point to get that perfect deep-fry crispness without burning.
Variations
I love tweaking this Brazilian Chicken Croquettes (Coxinha) Recipe depending on the mood or dietary needs, and you should definitely feel free to make it your own. Whether you’re avoiding dairy or want to kick up the spice, there’s always a way to modify things while keeping that classic comfort food vibe.
- Spicy Kick: I sometimes add diced jalapeños or a splash of hot sauce to the filling for an extra fiery bite — it’s a hit when friends come over.
- Dairy-Free Version: Swapping cream cheese with vegan cream cheese or mashed avocado totally works, giving a creamy texture without dairy.
- Herb Mix: Fresh cilantro instead of parsley changes the flavor profile wonderfully, especially if you like a bit more zest in each bite.
- Air-Fried Croquettes: If you’re avoiding deep frying, air frying these at 375°F for about 15 minutes (flipping halfway) creates a lighter but still crispy option.
How to Make Brazilian Chicken Croquettes (Coxinha) Recipe
Step 1: Cook Up the Flavorful Filling
Start by warming olive oil in a medium pot over medium heat. Once hot, toss in your minced garlic and diced onion. Sauté them gently until they’re soft and just starting to turn golden — this should take about 5-7 minutes. The aroma at this stage tells you the foundation is right. Then, add in your shredded chicken, salt, and that paprika or cayenne pepper. Stir everything well so those spices gently warm the chicken without overpowering it. Once combined, transfer the filling to a bowl and stir in cream cheese and chopped parsley until everything’s rich and creamy. This combo of flavors and textures is what makes the filling so irresistible.
Step 2: Prepare the Silky Dough
Using the same pot, melt the butter over medium heat. When melted, add the chicken broth and milk and bring to a gentle boil. Slowly stir in the all-purpose flour all at once, reducing the heat to low right away. Keep stirring vigorously with a wooden spoon — this is the step where the dough magically comes together as a thick ball that pulls away from the sides of the pot. Don’t rush it; you want a smooth and cohesive dough, not lumpy. Once the dough forms, transfer it to a flat surface and let it cool slightly — you want it warm, not hot, for the next step.
Step 3: Shape and Fill Your Coxinha
Pinch off a piece of dough roughly the size of a large egg. Roll it into a smooth ball between your hands, then flatten it out into a small pancake shape. Spoon about a tablespoon of the chicken filling right into the center. Now here’s the fun but delicate part — gently wrap the dough around the filling, molding it into a traditional pear shape. Make sure there are no holes or gaps where the filling might escape during frying. Keep your hands lightly dusted with flour if the dough gets sticky; it really helps keep the shapes neat and tidy.
Step 4: Coat and Fry to Golden Perfection
Heat oil in a deep pot or fryer to 350˚F (180˚C). While waiting, prepare your dredging station: beat an egg in a bowl and place panko breadcrumbs in another. Dip each formed croquette first into the egg, then roll it generously in the panko, pressing lightly to make sure the coating adheres well. This double step gives you that iconic crispy exterior. Fry in batches without crowding the pot — they take about 4-5 minutes each to turn gorgeously golden brown and crispy. Transfer them to a paper towel-lined rack or plate to drain any excess oil.
Step 5: Serve Immediately and Enjoy!
These Brazilian Chicken Croquettes (Coxinha) Recipe creations are best enjoyed right away while the crust is still crunching under your teeth and the filling is warm and melty. Don’t wait too long, or they’ll lose that perfect texture that makes them so addictive!
How to Serve Brazilian Chicken Croquettes (Coxinha) Recipe
Garnishes
I usually keep it simple with a sprinkle of fresh parsley for color and a wedge of lime on the side. The citrus brightens every bite and pairs beautifully with the savory filling. Some friends swear by a drizzle of hot sauce or Brazilian vinaigrette salsa, which adds a nice tangy contrast.
Side Dishes
When serving these croquettes, a crisp green salad or simple rice with black beans makes a perfect pairing. I’m also a fan of serving them alongside some Brazilian cheese bread (pão de queijo) for a truly immersive experience.
Creative Ways to Present
For a special gathering, I like arranging the coxinhas on a sharing platter with small bowls of dipping sauces like garlic mayo, spicy ketchup, or chimichurri. You can also skewer smaller “mini” coxinhas on cocktail sticks as fun party finger foods — always a crowd-pleaser!
Make Ahead and Storage
Storing Leftovers
If you have leftovers (which might be rare!), I store them in an airtight container in the fridge for up to 2 days. I find placing a paper towel underneath the croquettes helps absorb any moisture and keeps them from getting soggy.
Freezing
For freezing, I arrange the uncooked shaped coxinhas on a parchment-lined tray and freeze them solid. Once frozen, they go into a zip-top bag. When you want them, fry them straight from frozen — just add a minute or two to the cooking time. It’s a real timesaver on busy days!
Reheating
To reheat cooked croquettes, I prefer the oven or an air fryer at 350°F for about 10 minutes, which revives the crispiness without drying the filling. Avoid microwaving, unless you don’t mind a soggy crust.
FAQs
-
Can I use other meats besides chicken for this Brazilian Chicken Croquettes (Coxinha) Recipe?
Absolutely! While traditional coxinha uses chicken, you can experiment with shredded beef, turkey, or even a vegetarian filling with mushrooms or jackfruit. Just be sure to adjust seasoning and moisture content to keep the filling flavorful and cohesive.
-
What’s the secret to a crispy exterior on coxinha?
The key is using panko breadcrumbs for coating and double dredging with egg and panko before frying. Also, frying at the right temperature (around 350°F) ensures they cook through and crisp up without absorbing too much oil.
-
Can I bake Brazilian Chicken Croquettes instead of frying them?
Yes, baking is an option for a healthier twist. Preheat your oven to around 400°F, place the breaded coxinhas on a greased baking sheet, and bake for 20-25 minutes, flipping halfway through. The result won’t be as crispy as frying, but still delicious.
-
How do I keep the dough from sticking to my hands?
Lightly dust your hands and the working surface with flour while shaping the dough. Working when the dough is warm (not hot) also helps elasticity and prevents sticking while shaping.
Final Thoughts
This Brazilian Chicken Croquettes (Coxinha) Recipe truly holds a special place in my heart because it combines simplicity, flavor, and tradition in one bite. I hope you’ll find making them as enjoyable and rewarding as I do, whether for a cozy night in or impressing guests with authentic Brazilian flair. Give it a go — I promise your kitchen will be filled with amazing smells and a whole lot of happy smiles!
PrintBrazilian Chicken Croquettes (Coxinha) Recipe

Brazilian Chicken Croquettes, also known as Coxinha, are a beloved street food snack featuring a creamy shredded chicken filling wrapped in a soft dough and deep-fried to golden perfection. This recipe combines tender chicken with cream cheese and aromatic spices, encased in a homemade dough, then coated with panko breadcrumbs for a crispy exterior. Perfect for appetizers or snacks, these crispy, flavorful bites bring authentic Brazilian flavors to your kitchen.
- Prep Time: 30 minutes
- Cook Time: 20 minutes
- Total Time: 50 minutes
- Yield: 9 servings 1x
- Category: Appetizer
- Method: Frying
- Cuisine: Brazilian
Ingredients
Filling
- 1 tablespoon olive oil
- 4 cloves garlic, minced
- 1 white onion, diced
- 2 cups chicken, cooked and shredded
- ½ teaspoon paprika or cayenne pepper
- Salt, to taste
- 4 oz cream cheese
- 3 tablespoons fresh parsley, chopped
Dough
- 1 tablespoon unsalted butter
- 2 cups whole milk
- ¼ cup chicken broth
- 2 cups all-purpose flour
Coating and Frying
- 1 egg, beaten
- 2 cups panko breadcrumbs
- Oil, for deep frying
Instructions
- Sauté the aromatics and chicken: In a medium pot, heat olive oil over medium heat. Add the minced garlic and diced onion, sautéing until soft and lightly browned. Stir in the shredded chicken along with salt and paprika (or cayenne pepper) to taste. Cook for a few minutes until flavors are melded.
- Prepare the filling mixture: Transfer the chicken mixture to a bowl. Add the cream cheese and chopped fresh parsley, mixing thoroughly until creamy and well combined. Set aside.
- Make the dough: In the same pot used for the chicken, add the butter, chicken broth, and whole milk. Bring the mixture to a boil over medium heat. Once boiling, gradually stir in the all-purpose flour until a thick dough forms and pulls away from the sides of the pot.
- Knead the dough: Transfer the dough to a flat surface and knead it while it is warm but not hot to touch. Knead until smooth and pliable.
- Shape the croquettes: Pinch off a portion of dough about the size of a large egg and roll it into a ball. Flatten the ball into a disk with your hands. Place a spoonful of the chicken filling in the center, then carefully wrap the dough around it to form a pear-shaped croquette, making sure there are no holes or gaps.
- Coat the croquettes: Heat oil to 350˚F (180˚C) in a deep pot. Dredge each shaped croquette first in the beaten egg, then coat thoroughly with panko breadcrumbs for a crispy texture.
- Deep fry: Fry the croquettes in batches in the hot oil until golden brown and heated through, about 4-5 minutes per batch. Remove with a slotted spoon and drain on paper towels or a wire rack.
- Serve: Serve the Brazilian chicken croquettes hot for the best flavor and texture. Enjoy immediately!
Notes
- Ensure the oil temperature is maintained at 350˚F (180˚C) to achieve a crispy exterior without absorbing excess oil.
- You can substitute cream cheese with requeijão (Brazilian cream cheese) for a more authentic taste if available.
- The dough needs to be warm but not hot before shaping to avoid cracking.
- Leftover croquettes can be frozen before frying; fry directly from frozen at a slightly lower temperature.
- For a spicier version, increase cayenne pepper or add some hot sauce to the chicken filling.
Keywords: Brazilian chicken croquettes, Coxinha recipe, deep-fried snacks, Brazilian street food, chicken croquettes, appetizer, crispy chicken bites